Creating a Basic Integration Flow
This document provides a step-by-step instruction on creating a basic Integration Flow. It is intended for platform users who have little to no experience in Flow creation. The instruction includes the following sections: configuring trigger and configuring action steps.
Configuring Trigger
The first step of an Integration Flow is called an initial trigger. Its job is to trigger the running Flow execution. Some components can be used for a trigger, for example: Node.js, Webhook Component, Simple Trigger, etc.
For the first step, the list of available Components is limited to those that can be a trigger, so you can’t go wrong. In this instruction we will use Simple Trigger as an example of the first step.
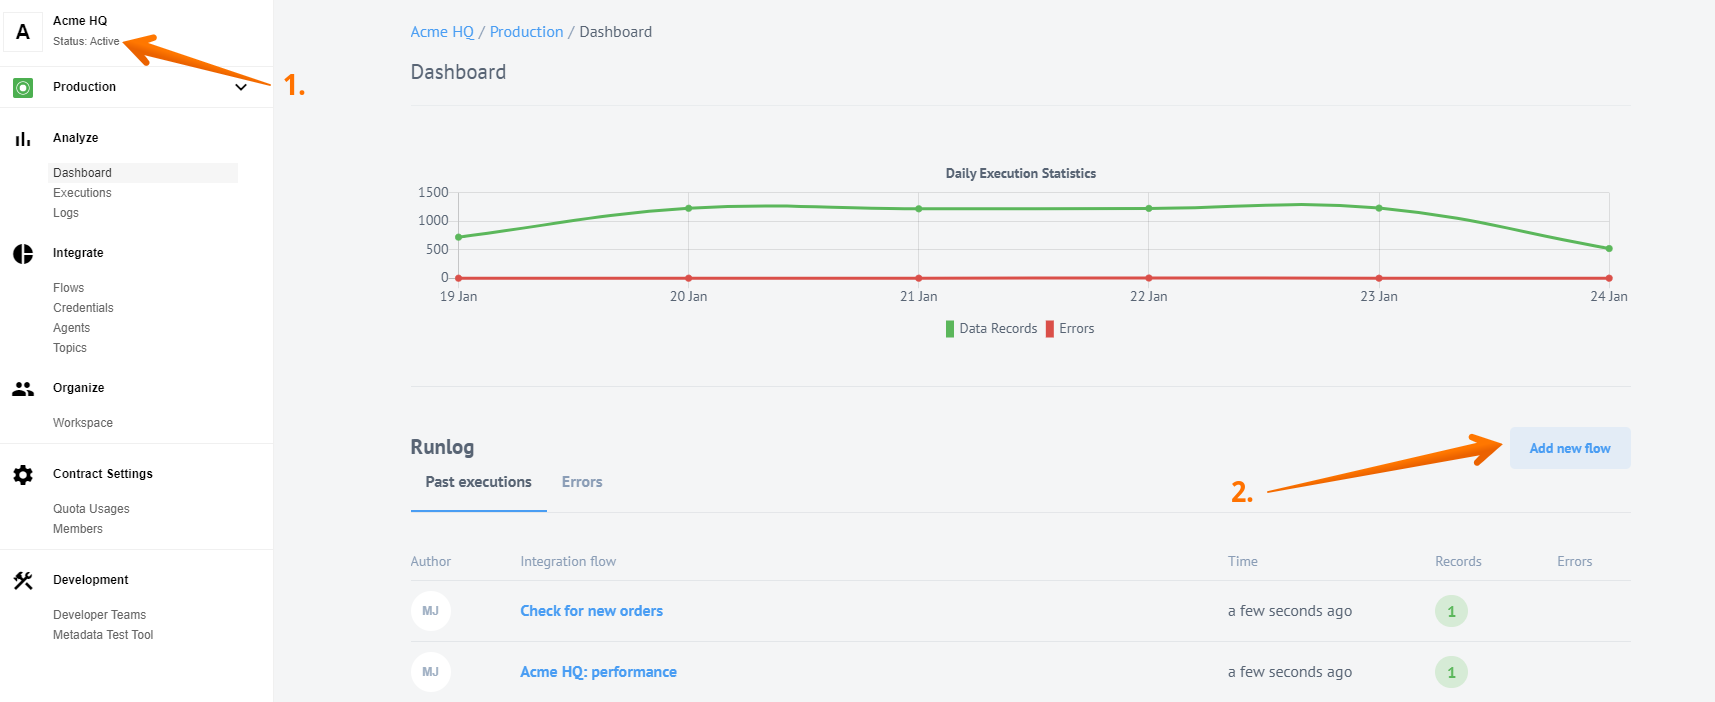
To start the creation of our Flow, go to the navigational menu, select your Workspace and either click “Add new flow” on the dashboard:
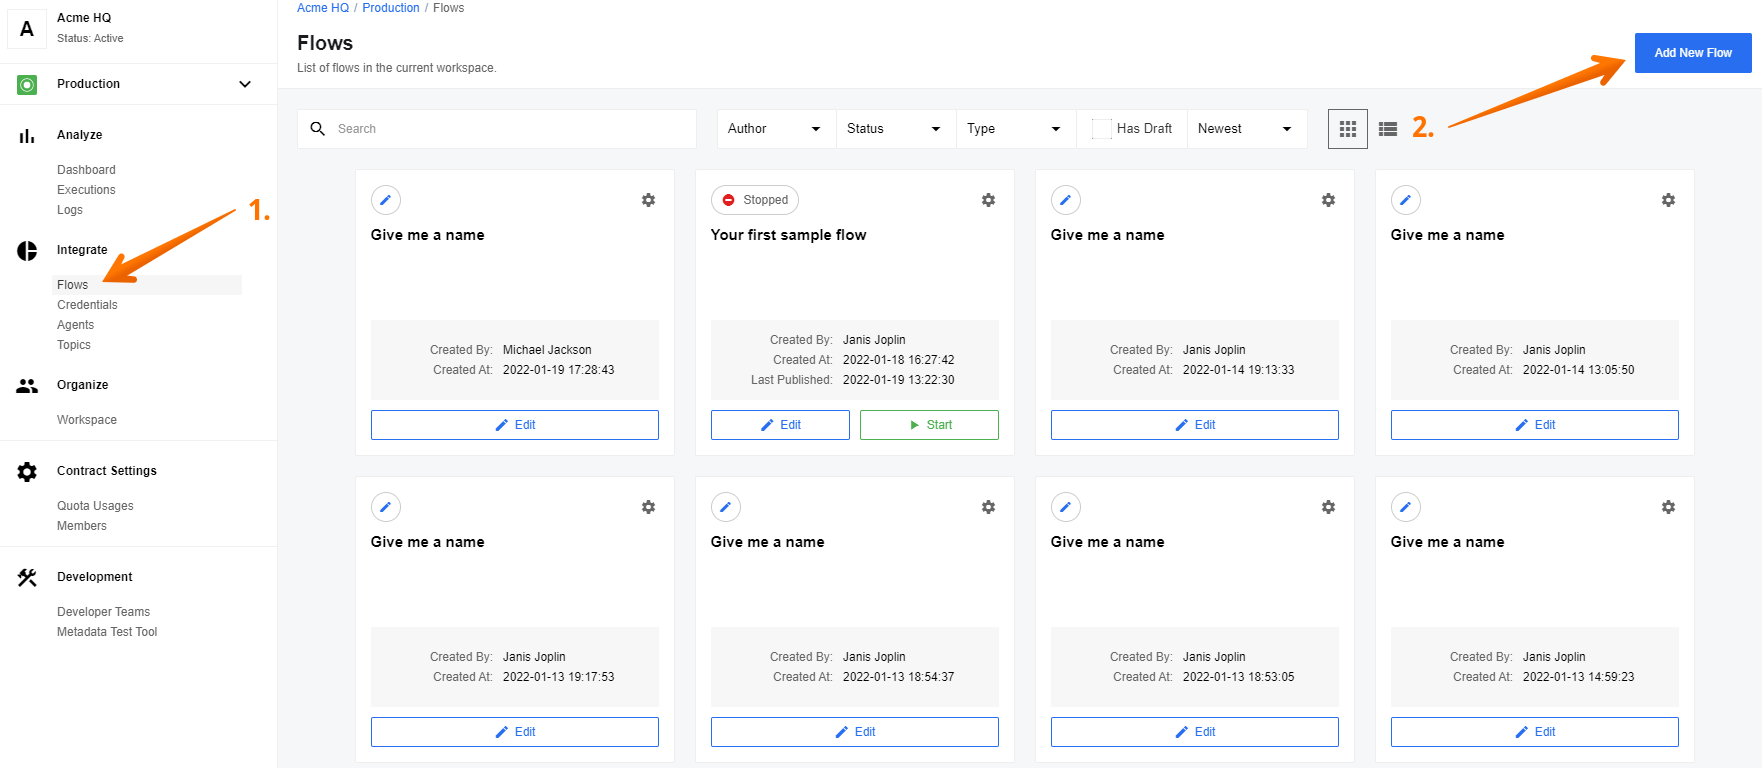
OR go to Flows and click “Add New Flow”:
This brings you to Designer page. Let’s start with naming your Flow (1), which is optional, and adding the initial trigger (2):
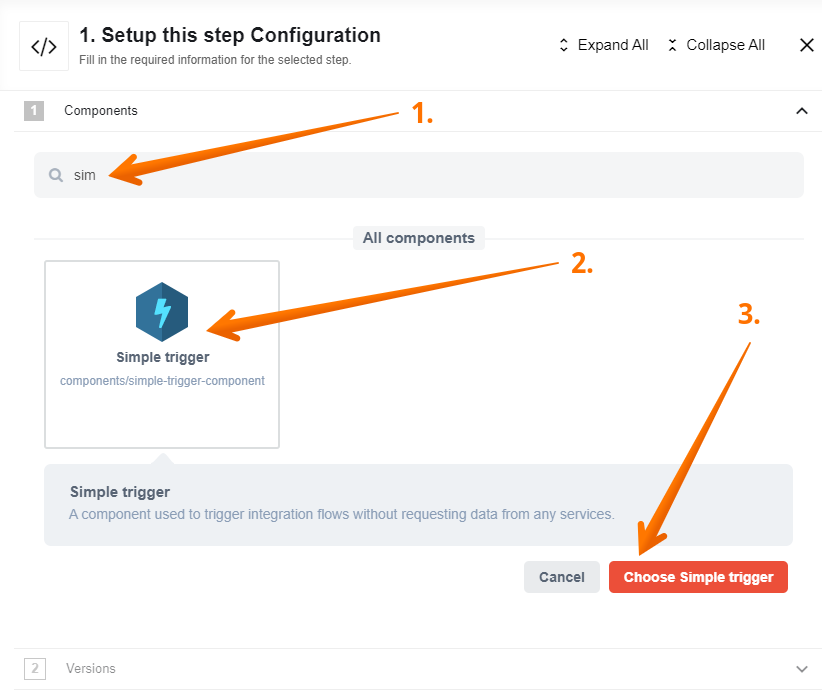
The platform prompts you to setup the first step. First you can select the Component you want to use by using search bar or Component list. We want to use Simple Trigger, so we will start typing “simple” to the search bar (1), and find it faster. Then select it (2) and click “Choose Simple trigger” (3):
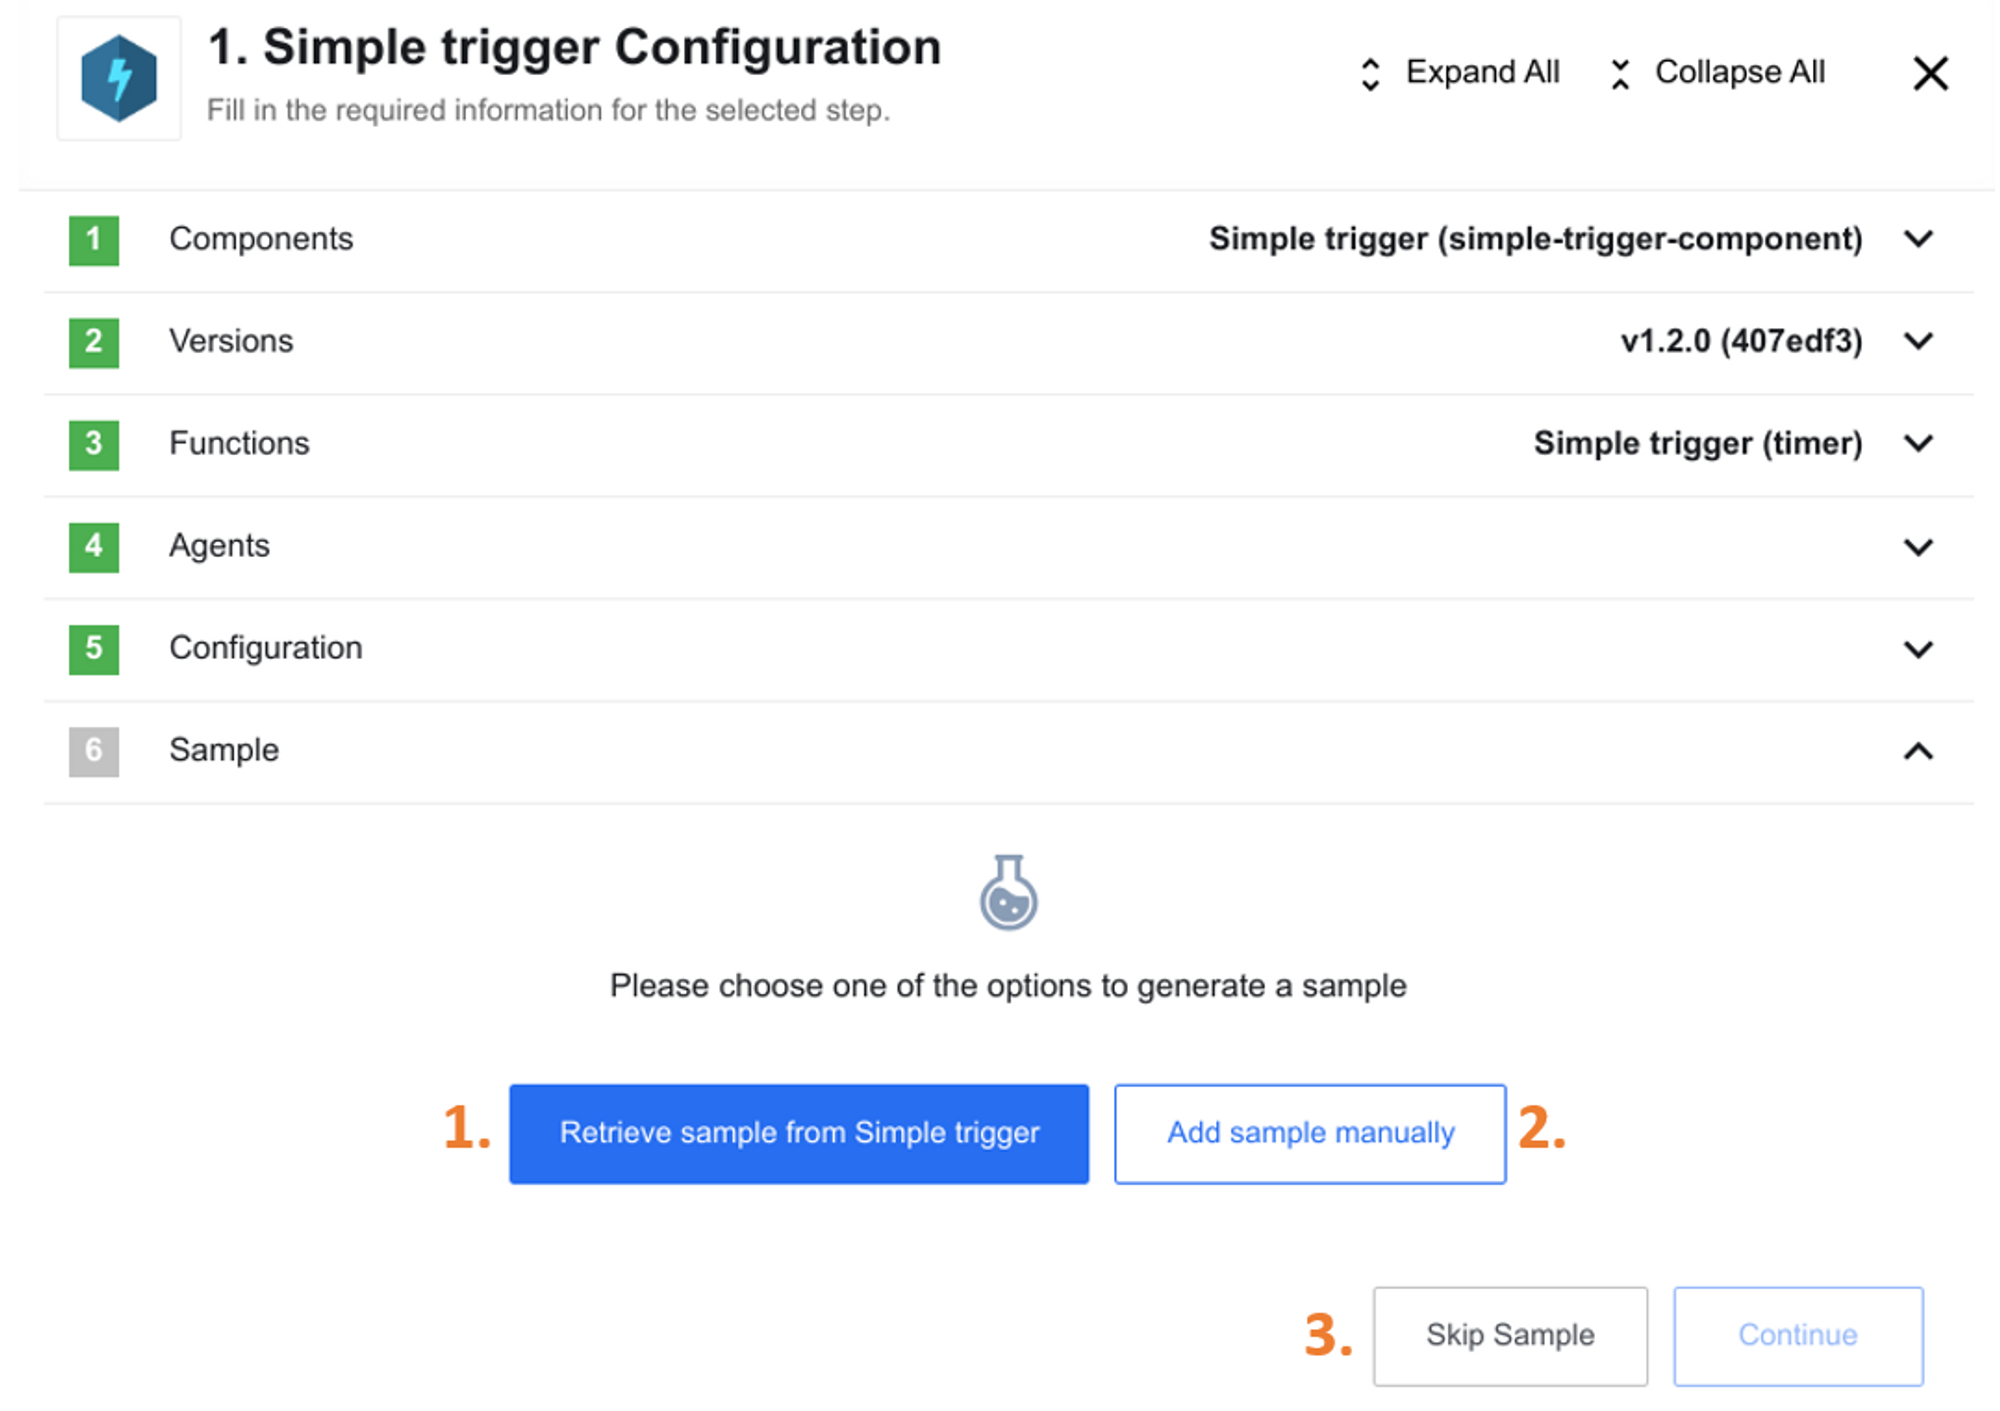
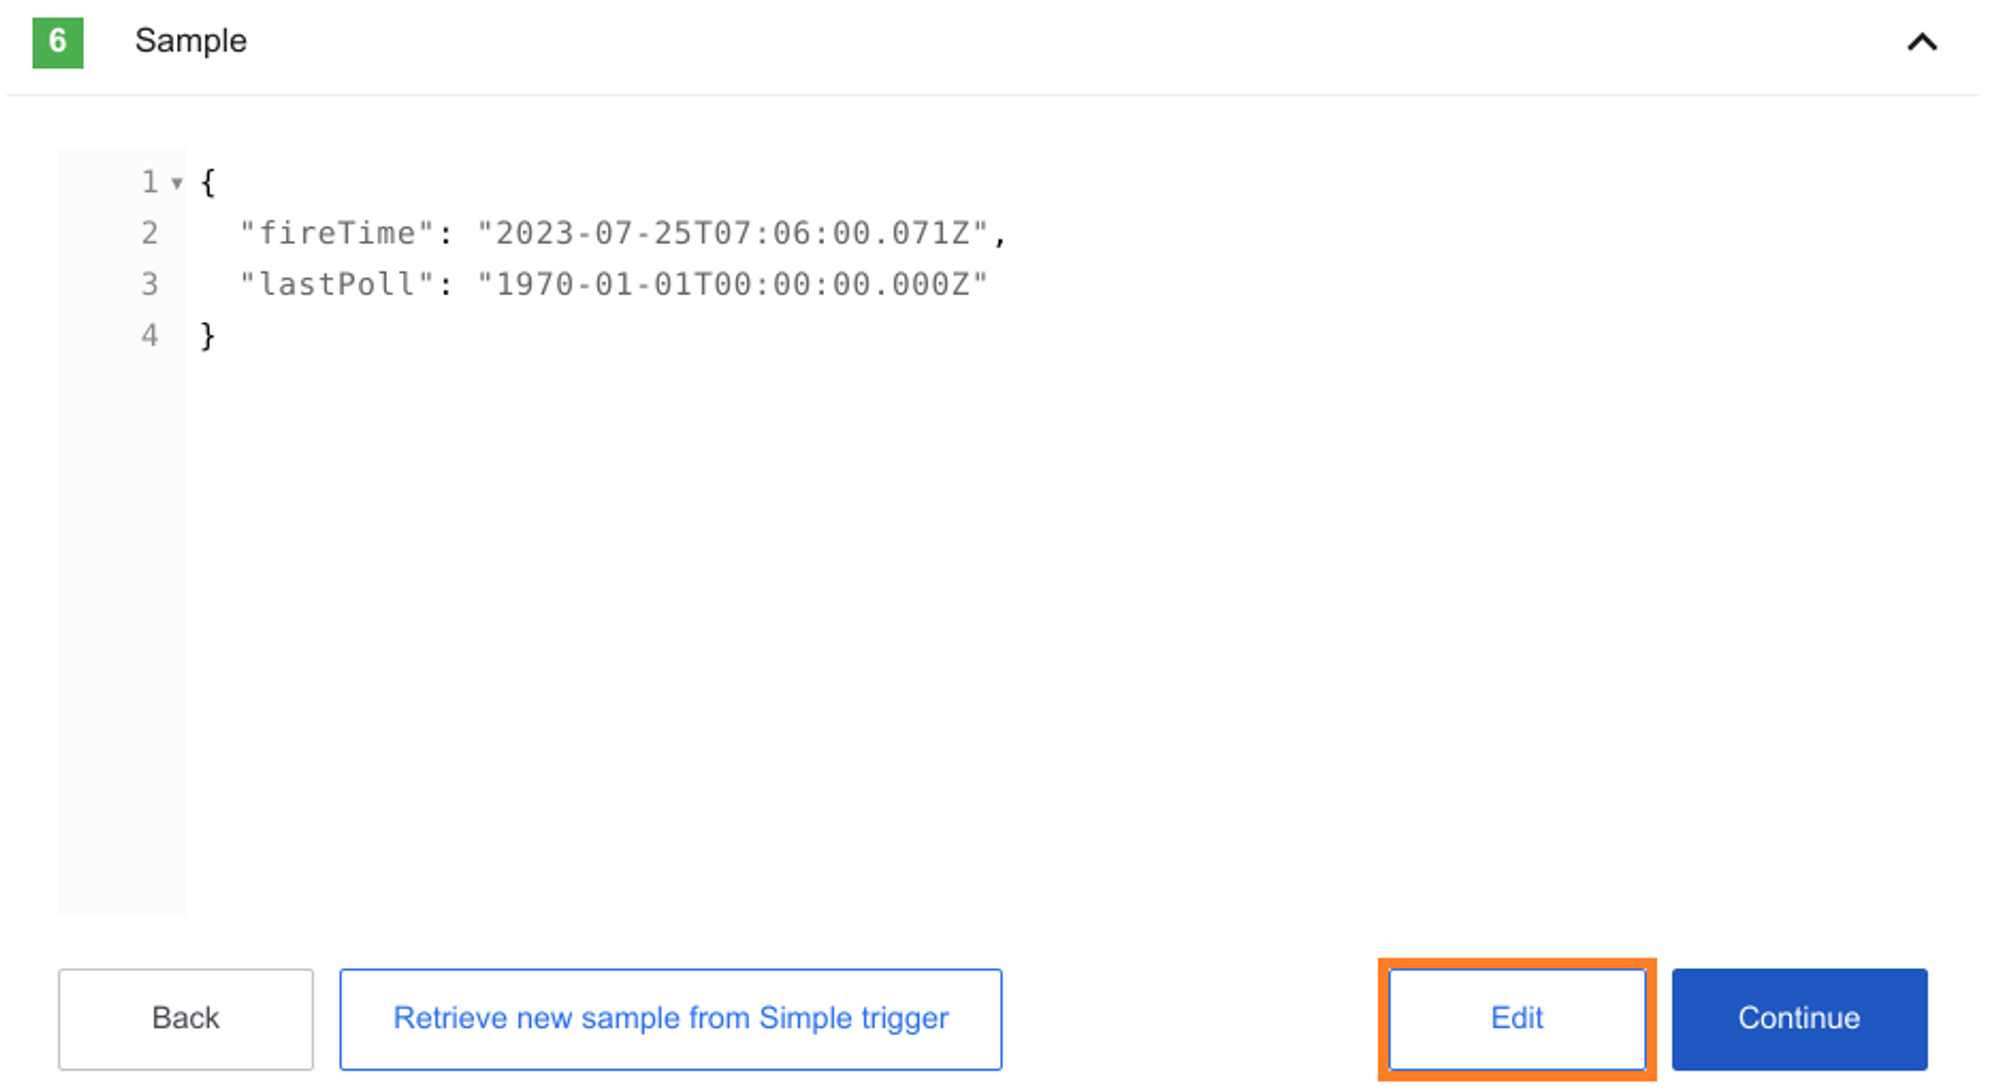
The next step is data sample retrieval. You can read about data samples here. Click “Retrieve sample from Simple trigger” (1), “Add sample manually” (2) or just Skip the Sample (3). After that you will be automatically redirected to the last step.
You can also change the sample if you wish:
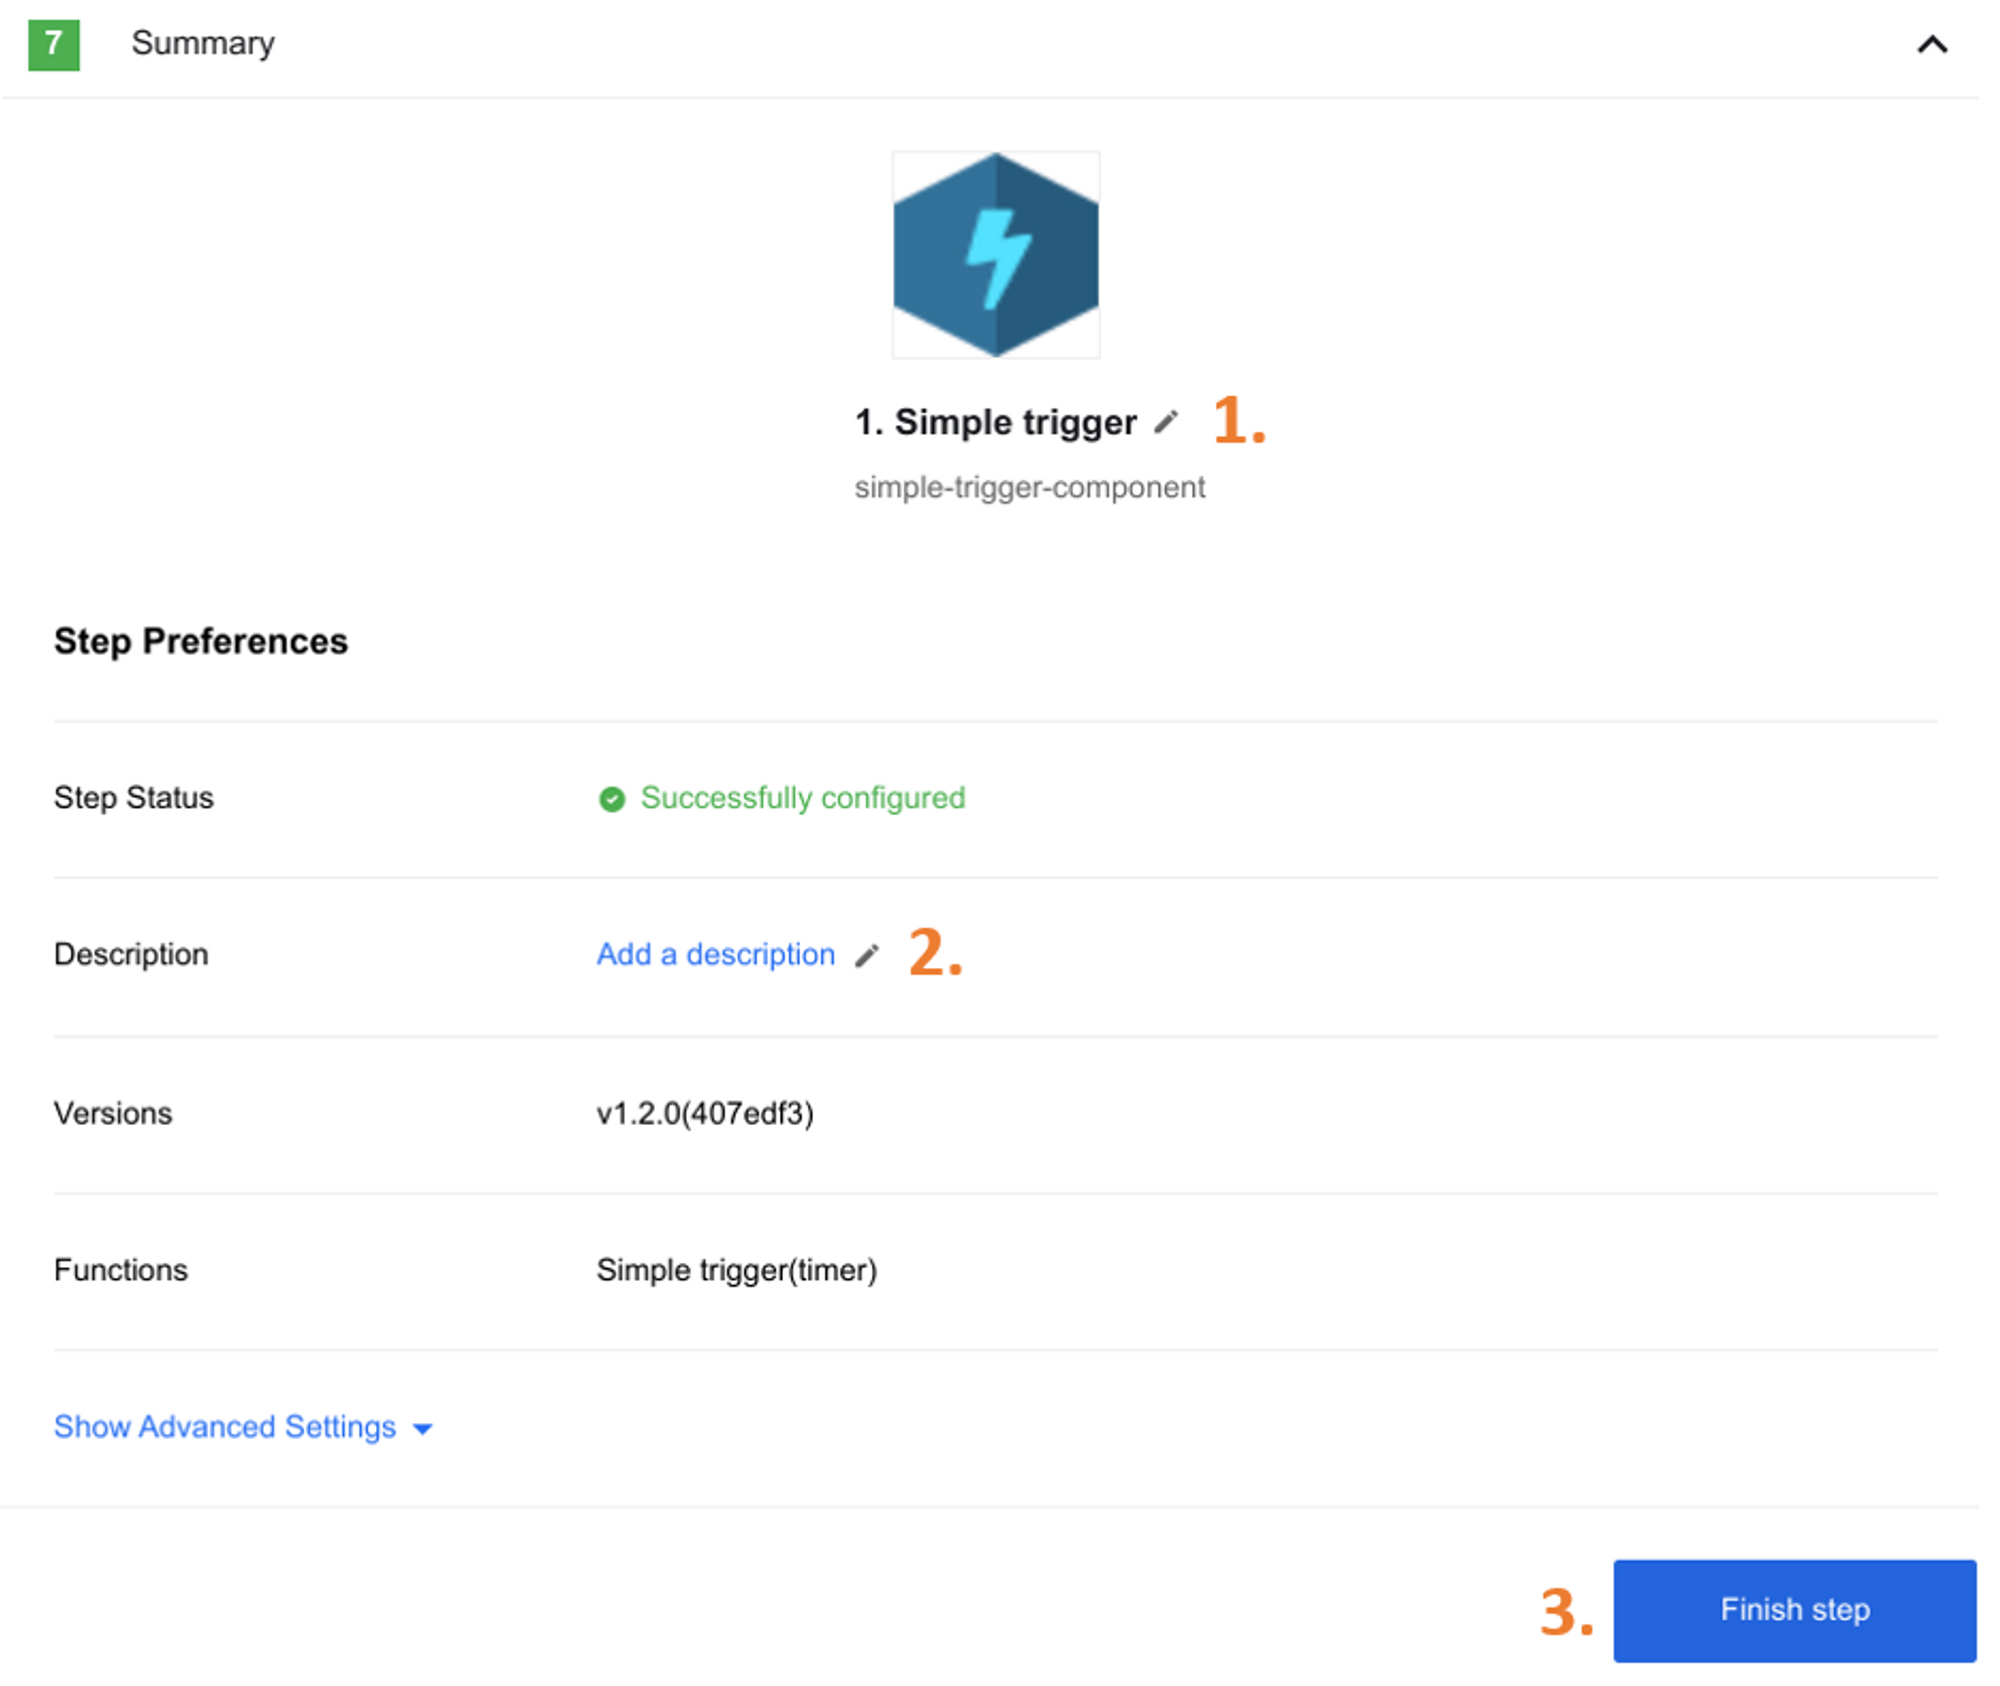
In the next tab you may change a name (1), add a description if you want (2), and click “Finish step” (3) to finalize the initial trigger:
Configuring Action Steps
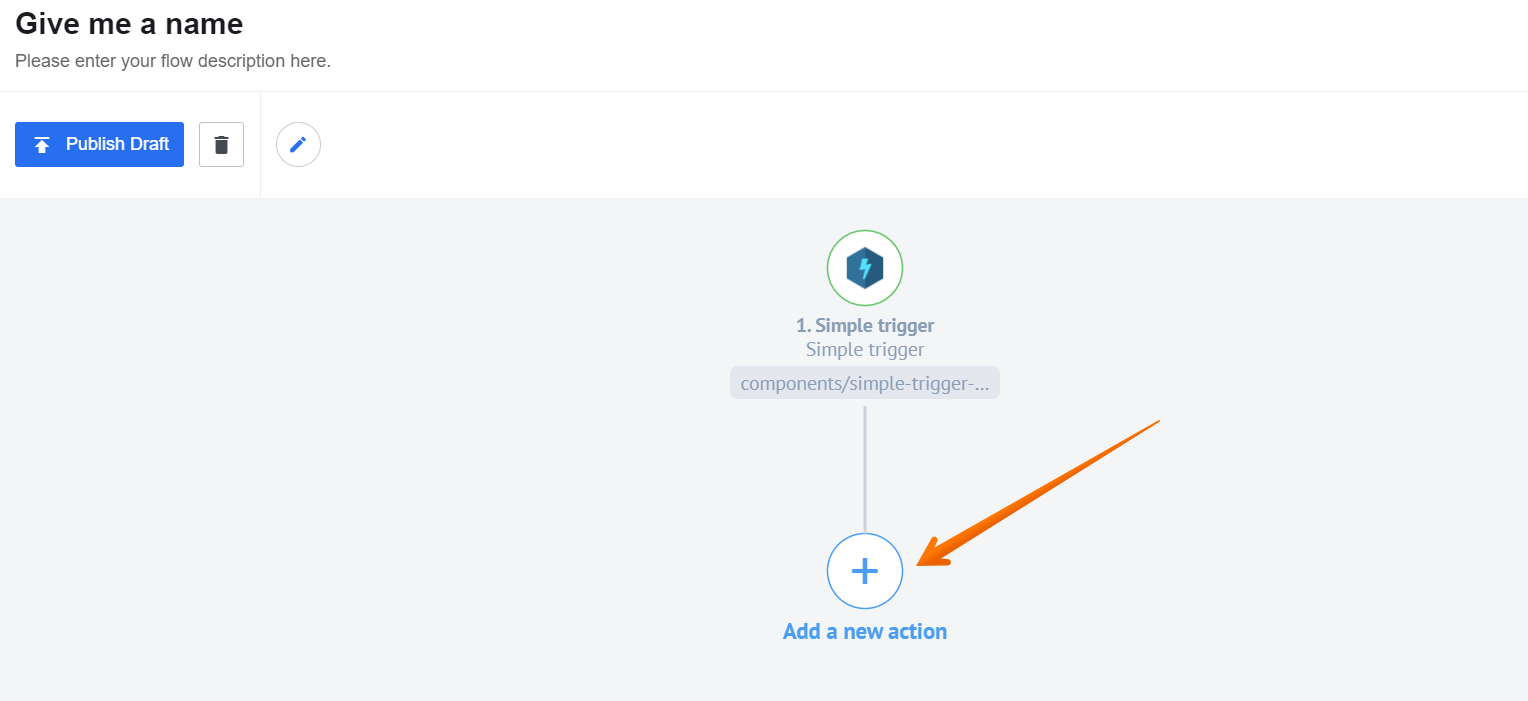
As our initial trigger is ready, let’s proceed with the second step, which is an action triggered by the first step. To start configuring the action, click “Add a new action”:
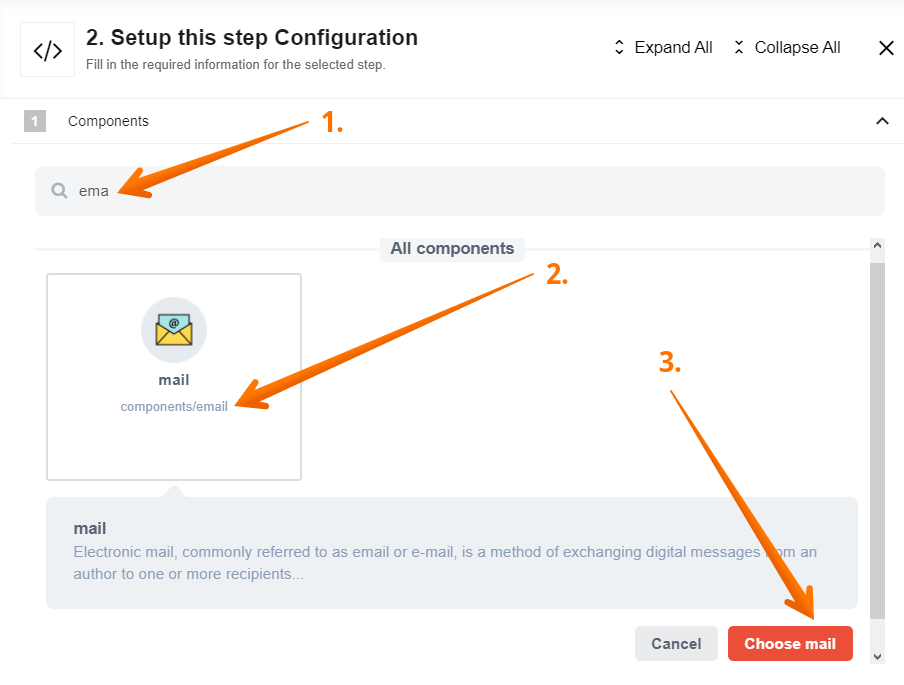
Again, we’re prompted to setup the step, similar to the first one. We’re going to use Email Component for our third step, so let’s start typing into the search bar (1). Select the component (2) and click “Choose Email” (3):
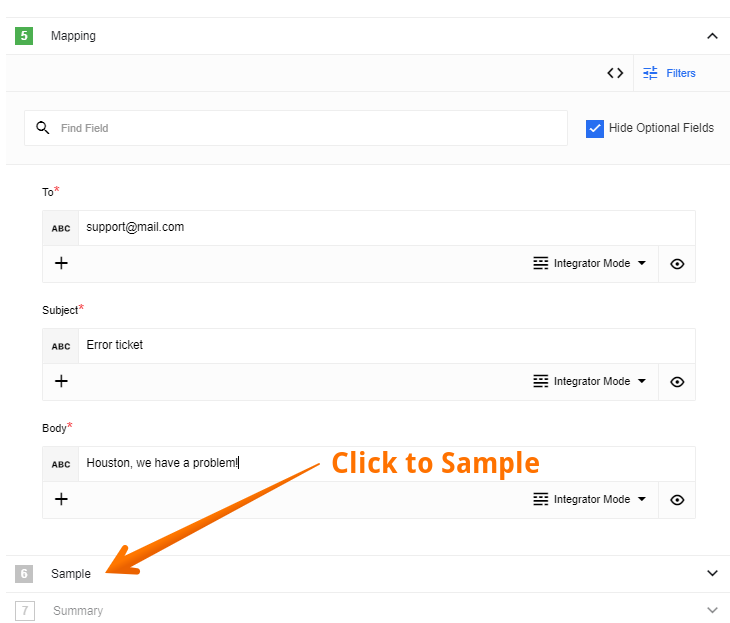
Email Component sends an email when triggered, so you should just fill in the details as you would for an email. After you’ve entered all the data, click to “Sample”:
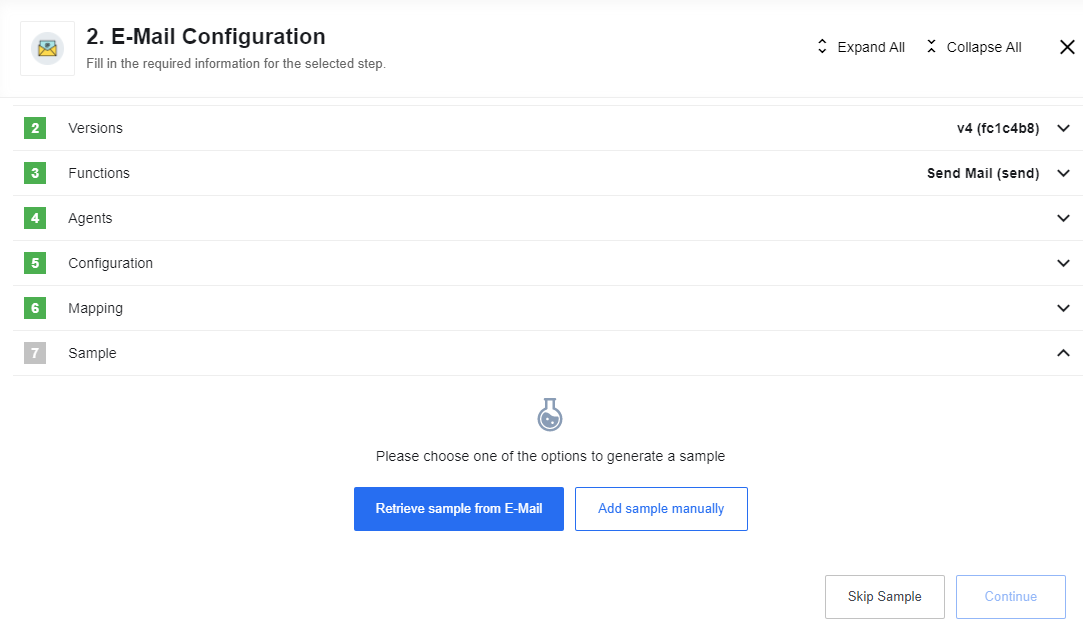
Next click to “Retrieve sample from E-Mail” or “Add sample manually”. You can also Skip the Sample. After that you will be automatically redirected to the last step.
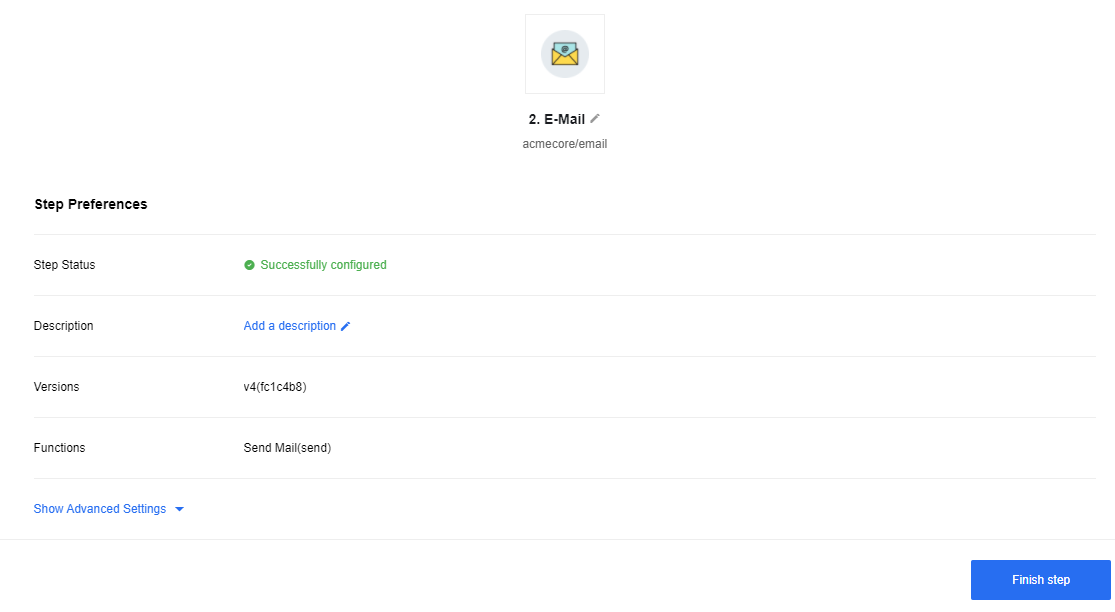
Finally, Same as in the trigger step, you can change a name , may add a description and click to “Finish step”:
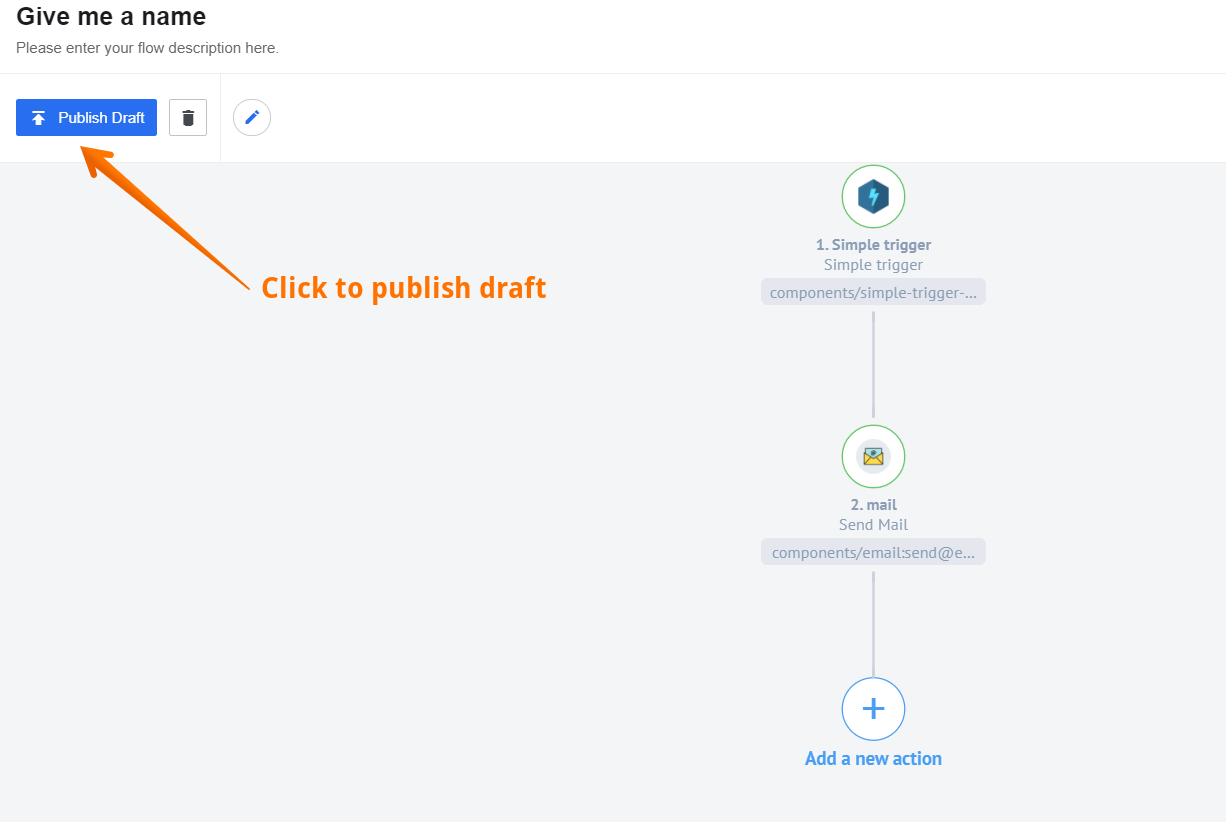
To publish the Flow draft and be able to run the Flow, click the corresponding button:
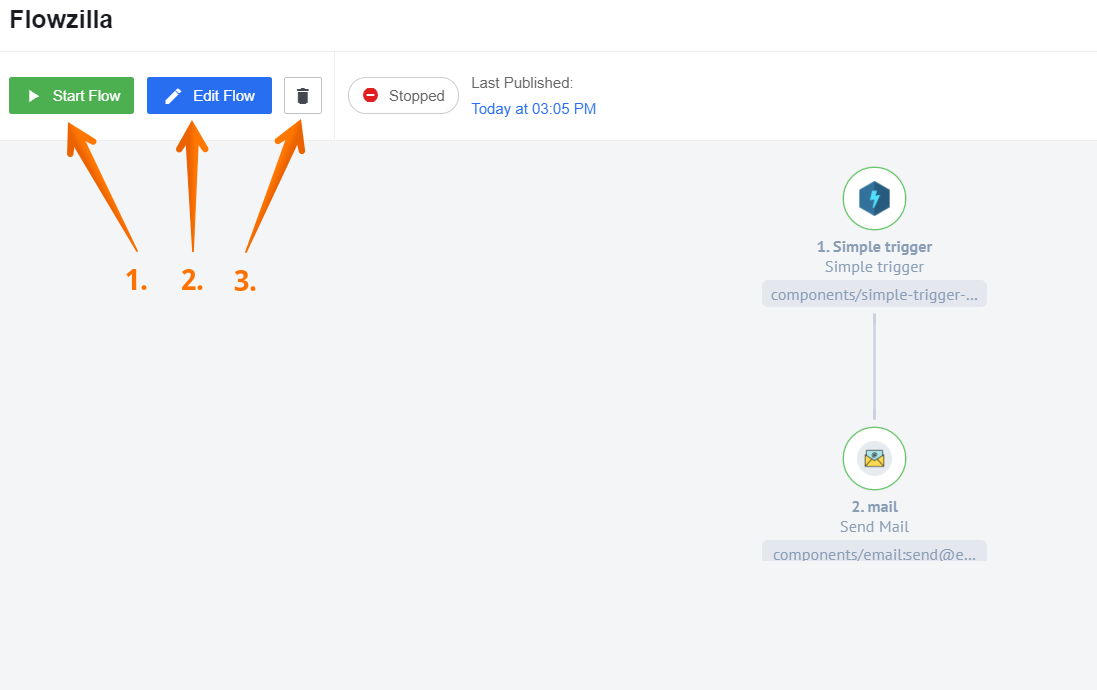
Congratulations! You Flow has been published, and it’s ready to run. You can run it (1), edit it (2) or delete it (3) using the corresponding buttons:
