Utility Usage Example
The Utility component is a versatile tool that serves multiple purposes. It can perform various operations to enhance the functionality of your application.
All operations can be divided into groups four groups
- File conversion
- String conversion
- Diagnostics
- Delay
File Conversion
String to Attachment
The Utility component provides a convenient method for converting a string into an attachment. In this mode, you simply provide the text as input, and the component generates an Attachment URL. This URL can be easily shared or saved for further use.
Example
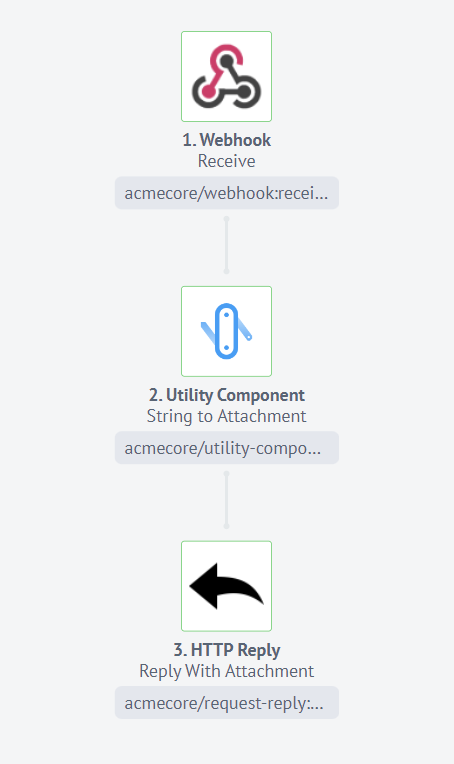
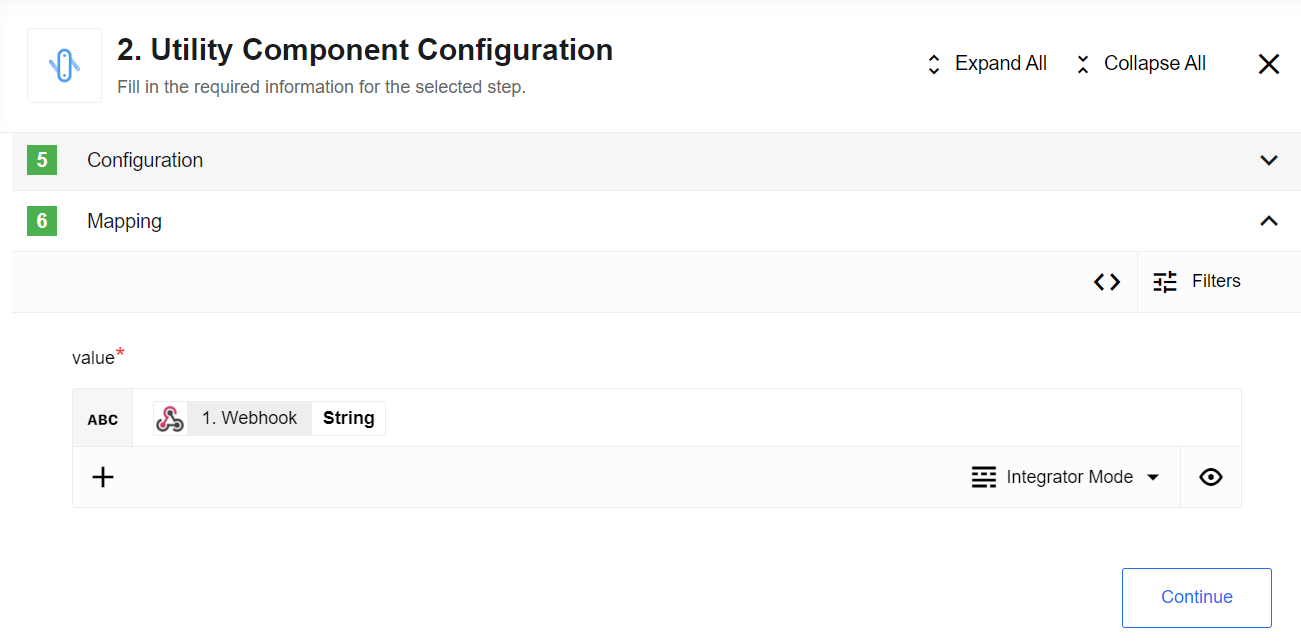
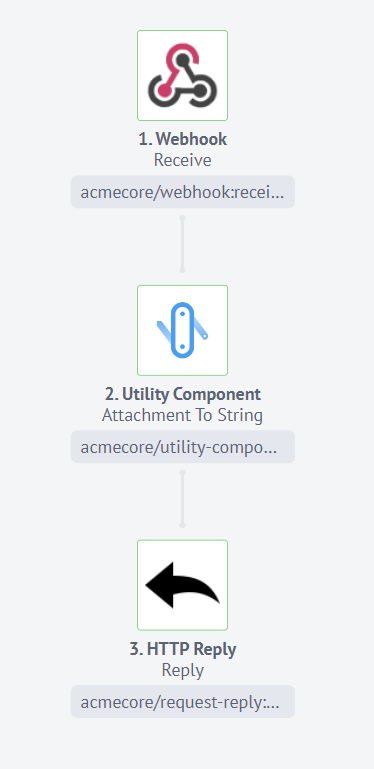
Let’s take an example scenario where you receive a string of text through the Webhook component. By utilizing the Utility component’s String to Attachment mode, you can convert the received string into an attachment. This attachment can then be sent back as an HTTP Reply, providing a seamless way to transmit data.
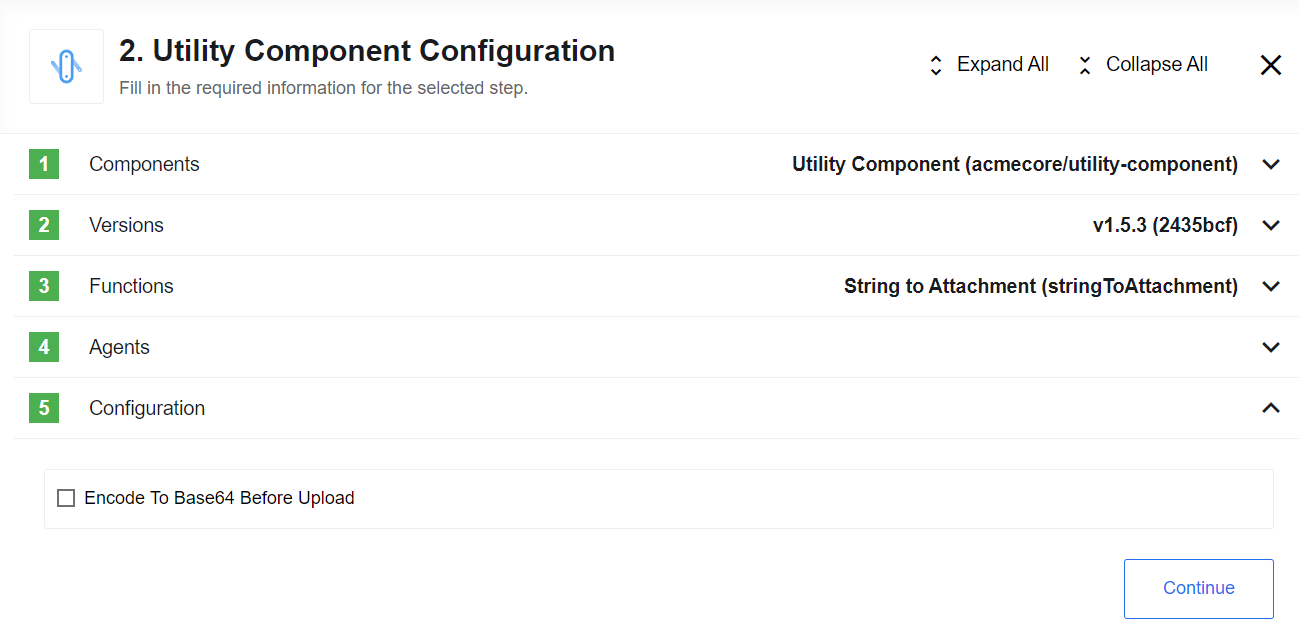
Please note that the String to Attachment mode also offers the option to encode the string using Base64. This encoding method ensures data integrity and compatibility when transmitting sensitive information.
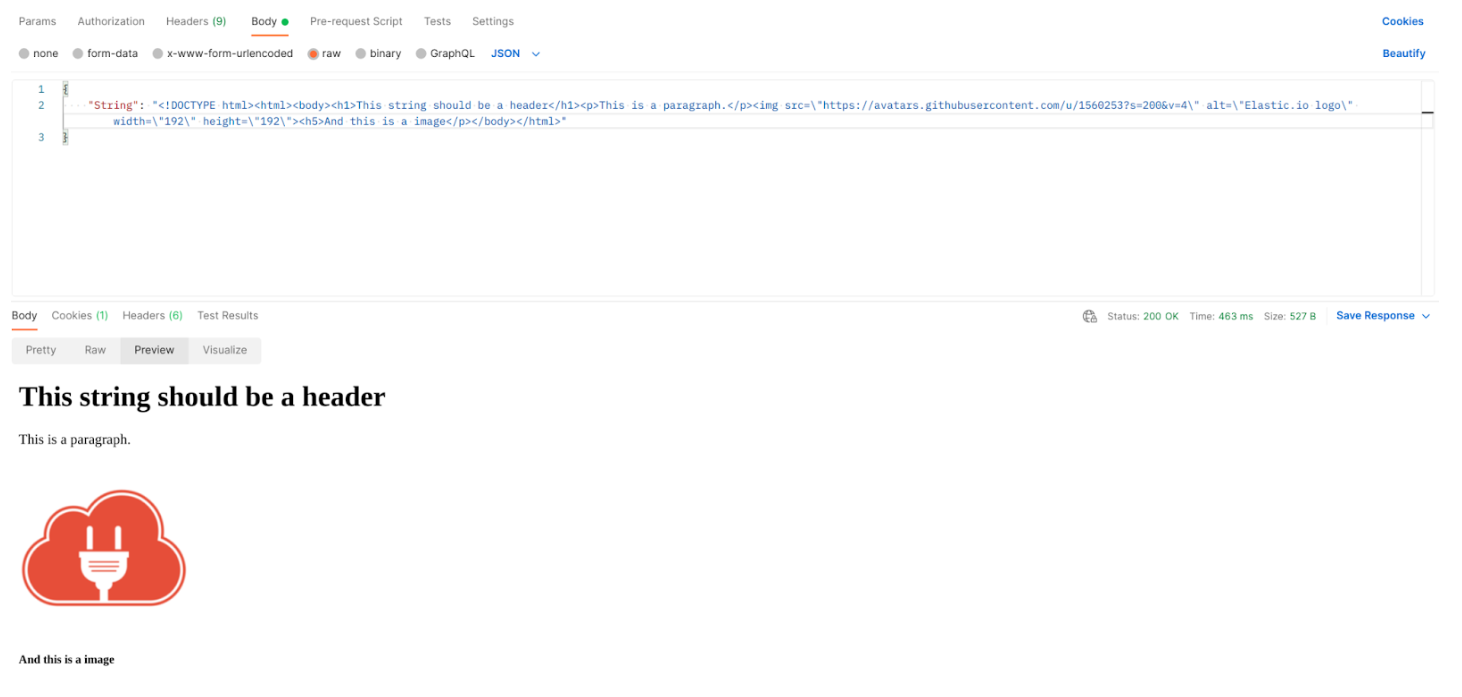
By configuring the Utility component accordingly, you can leverage its capabilities to process a string containing HTML code. The component will convert the HTML string into an attachment, allowing you to send it as an HTML page through the HTTP Reply attachment. Ensure that you enable the “text/html” output type in the HTTP Reply component to guarantee the proper rendering of the HTML content.
Attachment to String
The Utility component offers a convenient feature known as Attachment to String conversion mode. In this mode, the component accepts an attachment as input and generates text as output.
Example
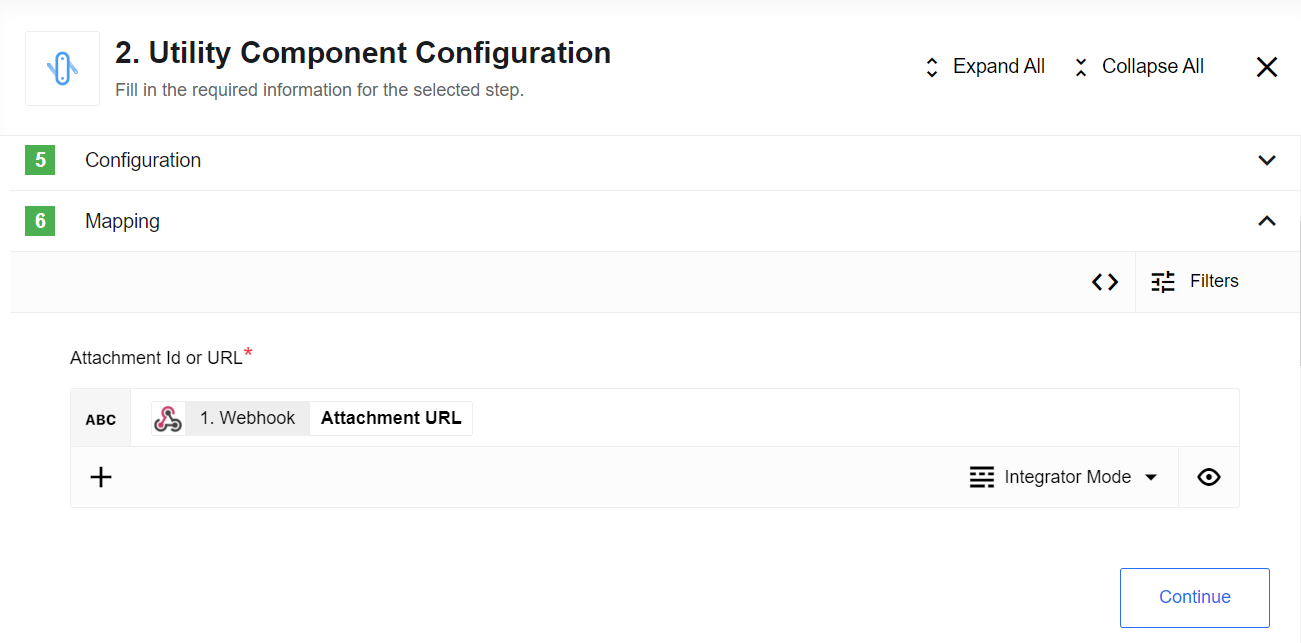
Let’s explore an example that demonstrates the usage of Attachment to String conversion. Suppose you receive a link to a file through the Webhook component. By utilizing the Utility component’s Attachment to String mode, you can convert the attachment into a readable text format. This transformed text can then be sent back to the HTTP Reply component or used for further processing within your application.
It’s important to note that Attachment to String mode includes Base64 encoding by default. Therefore, to ensure readability of the text, it is necessary to decode it from Base64. This decoding step is automatically enabled within the component.
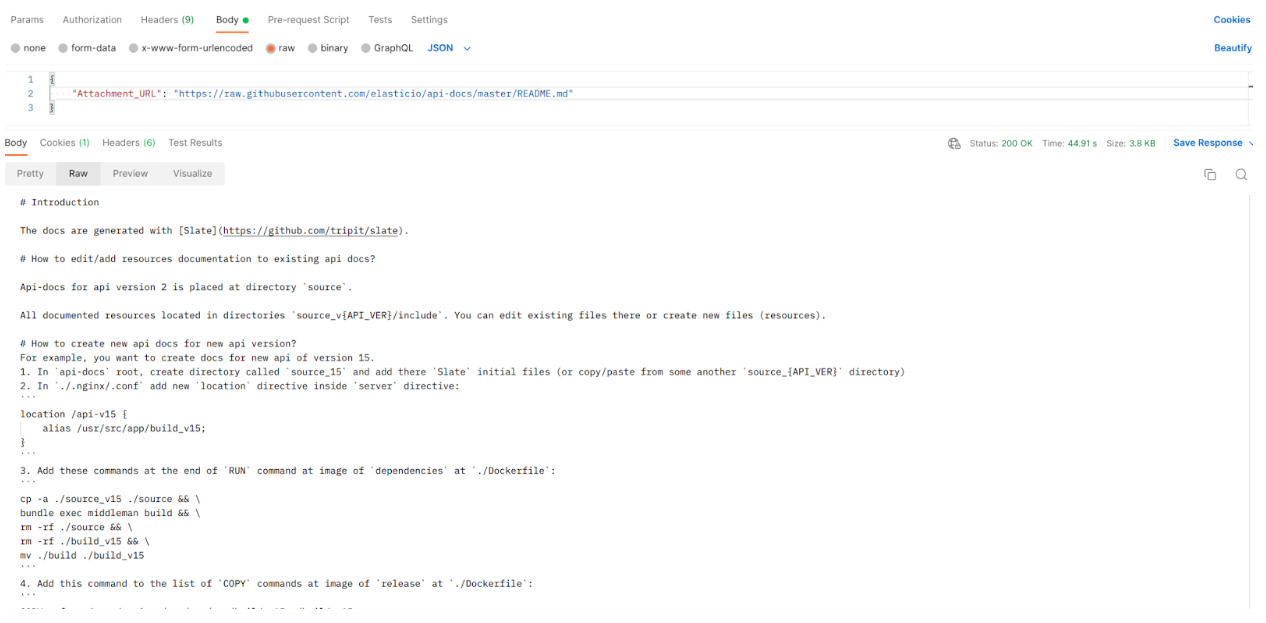
To illustrate the functionality, consider a scenario where you pass a link to a file hosted on GitHub. For instance, let’s use the link to the README.md file from the API Docs.
By configuring the Utility component accordingly, you can decrypt and read the content of the file. This capability becomes especially useful when working with components that require attachments for data transfer.
Create JSON Patch
The Utility component offers a powerful feature known as Create JSON Patch mode. In this mode, the component requires two parameters: the origin object and the target object. By analyzing the differences between these two objects, the Patch Utility component generates a Patch that can be used to transform the origin object into the target object.
Example
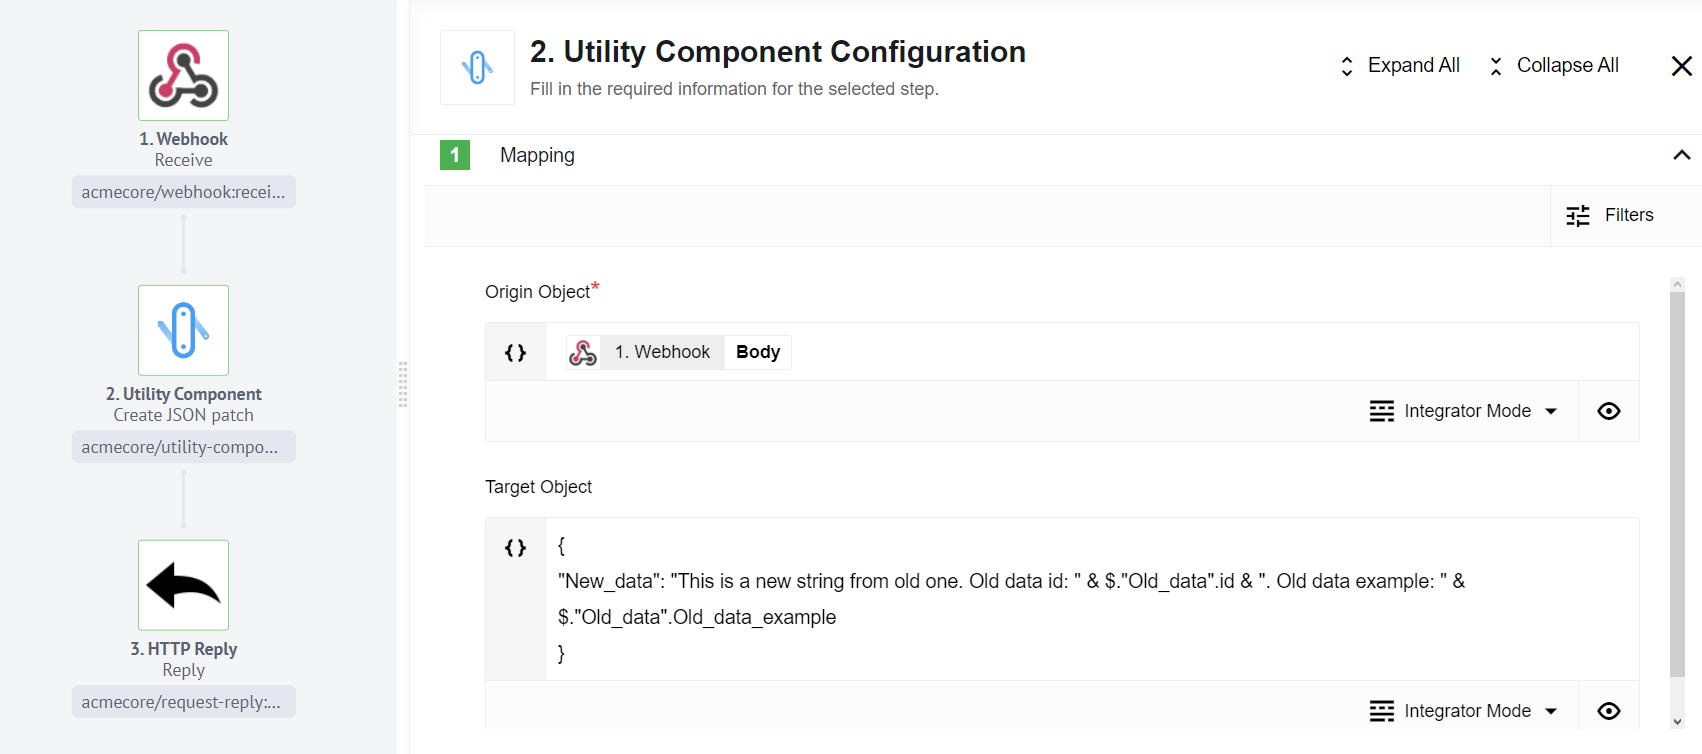
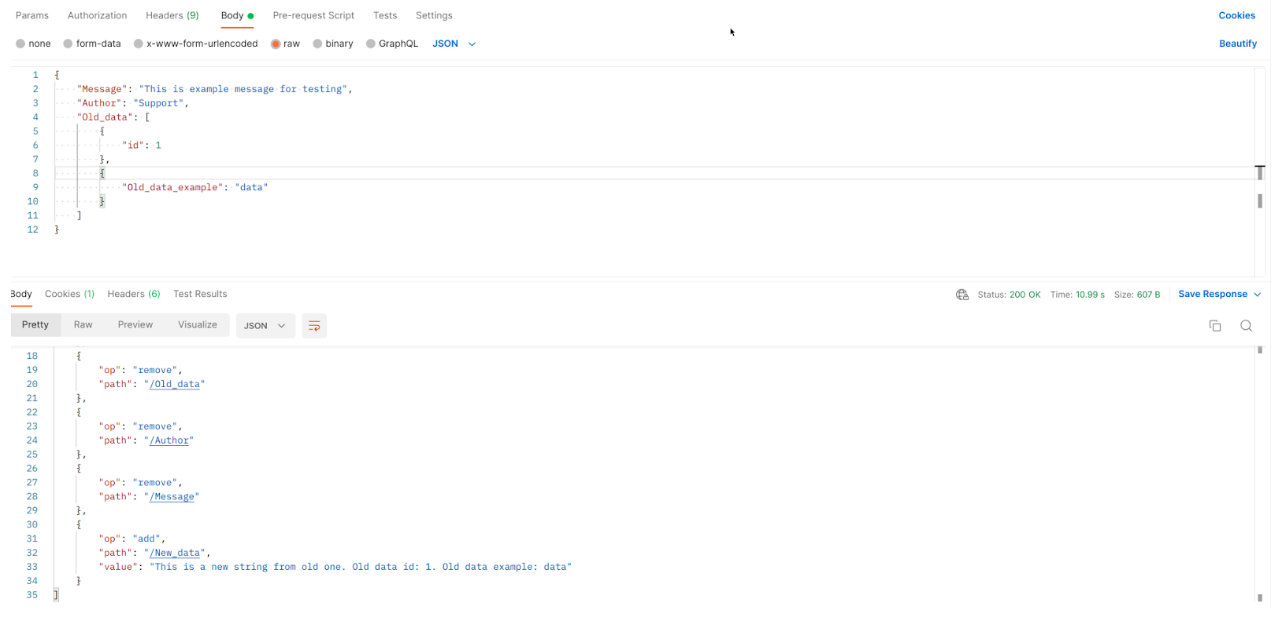
Let’s consider an example scenario where a webhook captures the body of a document. We can pass this body as the origin object to the Utility component, along with the target object based on the old version of the document. To access the entire document body from the first step, you can utilize the $getPassthrough().step_1.body parameter.
The Utility component then performs a comparison between the origin and target objects, identifying the changes required to transition from one document to another. The result is a Patch that encapsulates the necessary modifications.
Upon completion of the component configuration, the HTTP Reply component can return the generated Patch. This Patch represents a set of operations that, when applied, will transform the origin document into the target document. Applying the Patch ensures consistency between different versions of the document.
Apply JSON Patch
The Apply JSON Patch mode of the Utility component is designed to apply a previously generated Patch to a new object. This mode enables you to seamlessly transfer modifications from one object to another using the Patch obtained from the Create JSON Patch component.
Example
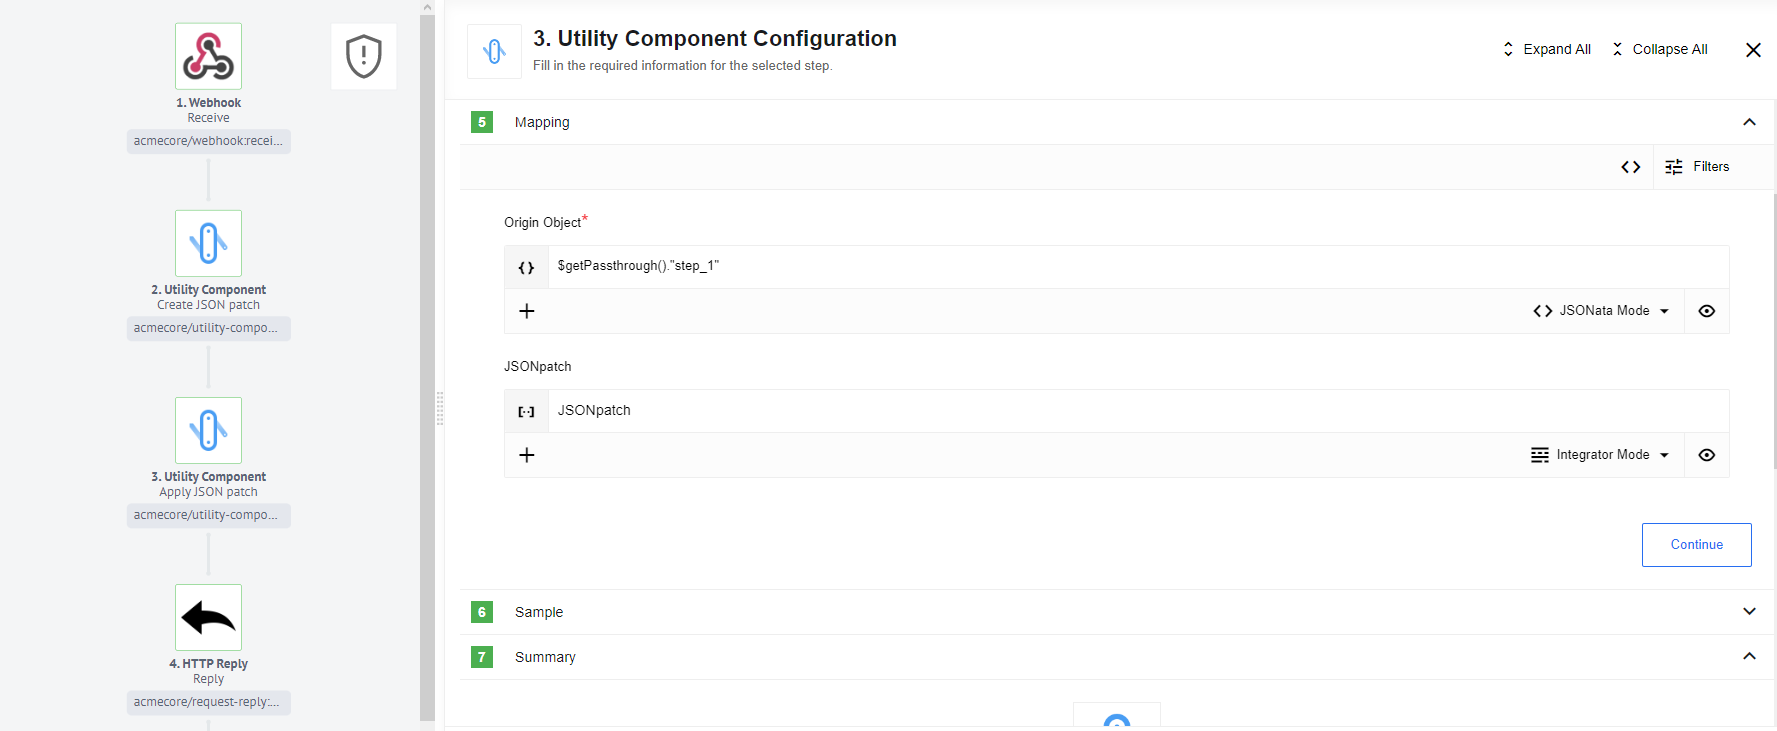
To illustrate its usage, let’s consider the example flow from the Create JSON Patch section and introduce an additional Utility component in Apply JSON Patch mode. In this configuration, the origin object will be the body obtained from step 1, as done previously. Within the Apply JSON Patch function, the JSONPatch field should contain the value retrieved from the previous Utility component, which generated the Patch.
By incorporating this Apply JSON Patch component within the flow, you can apply the Patch to the new object effectively. The component’s functionality ensures that the modifications specified in the Patch are accurately applied to the origin object, resulting in a transformed object.
Finally, in the HTTP Reply component, you can include the result obtained from the Apply JSON Patch step. This will provide the desired outcome, reflecting the changes made by applying the Patch.
String conversion
Encoding and Decoding Base64
The Utility component provides support for Base64 encoding and decoding operations. The configuration process for both modes of the component is straightforward and follows a similar pattern.
Example
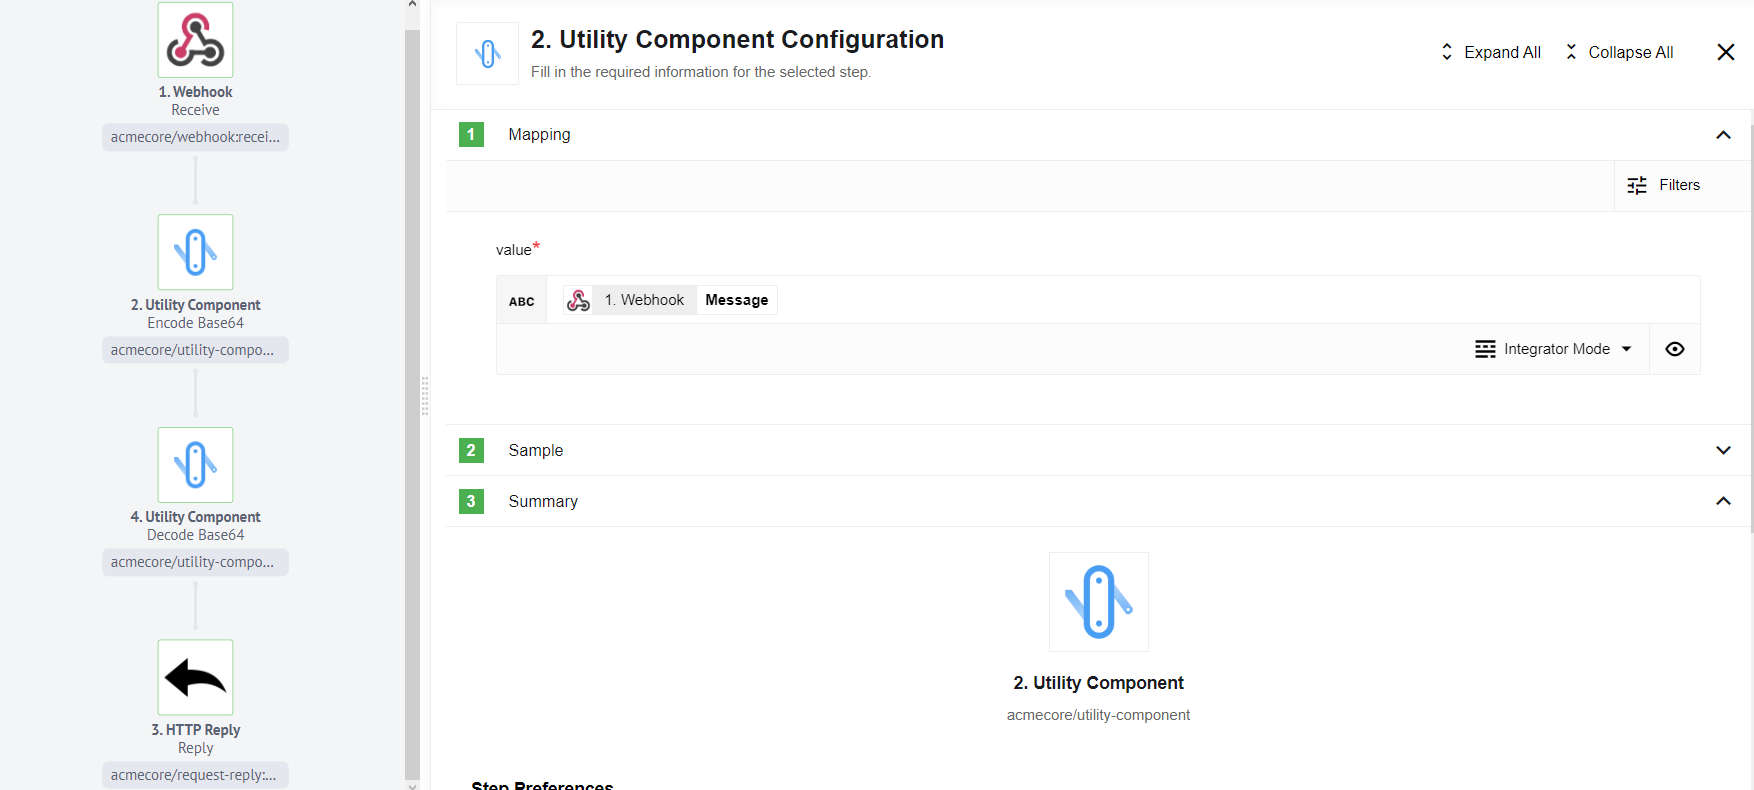
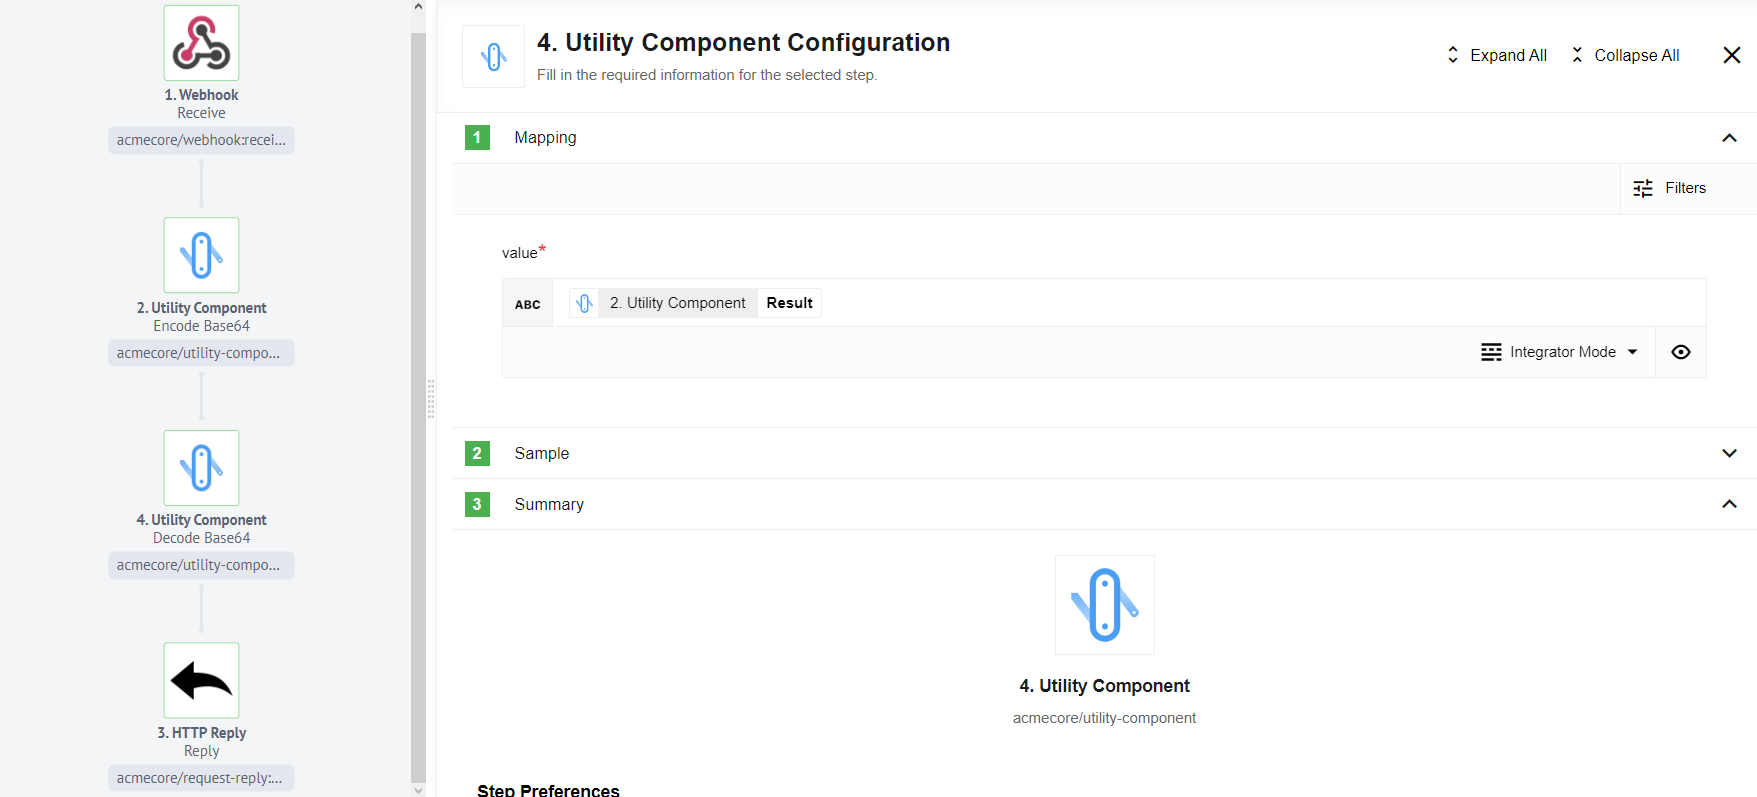
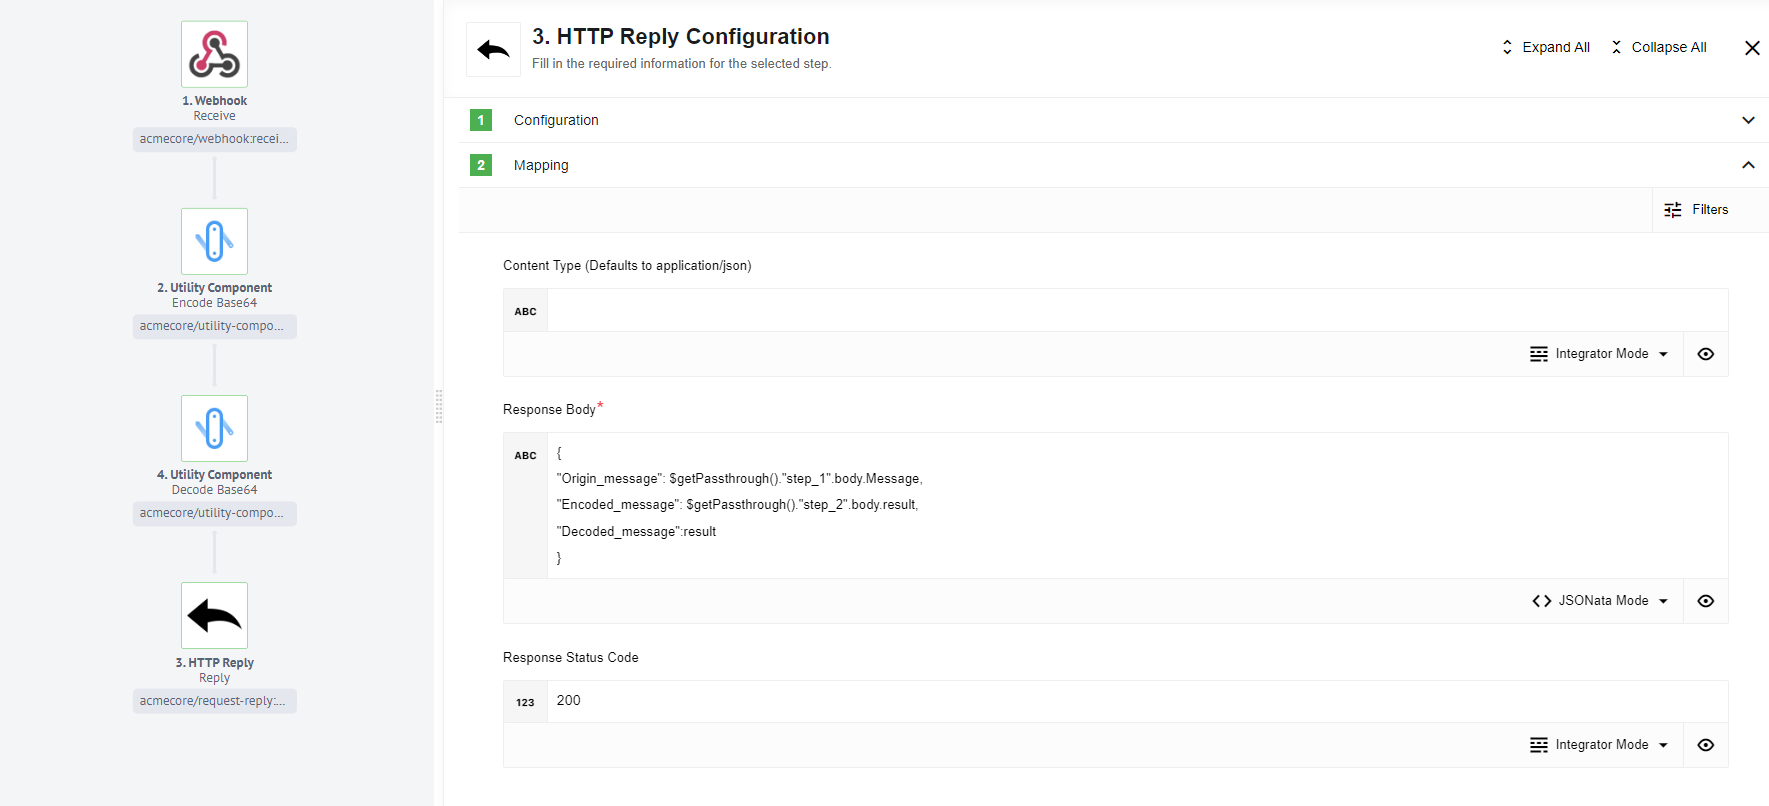
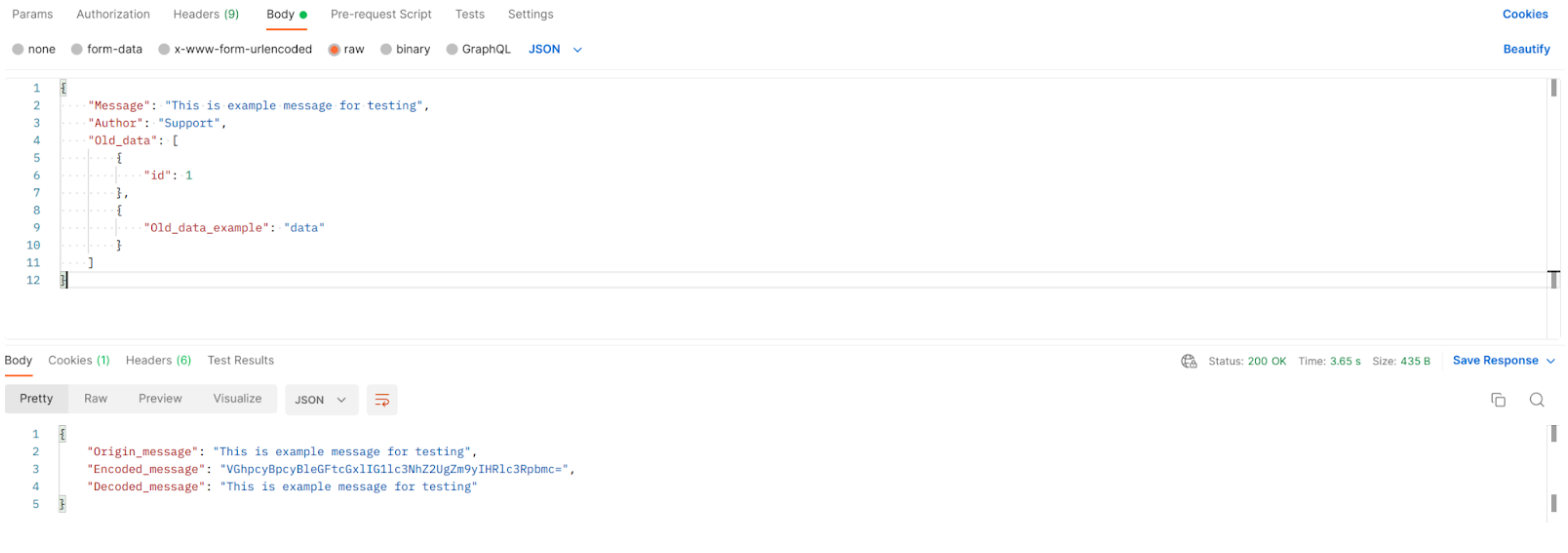
In this example, we will demonstrate the functionality of both modes. The first Utility component is responsible for encoding a given string. It takes the input string and applies Base64 encoding to convert it into a corresponding encoded representation.
Next, the second Utility component focuses on decoding the previously encoded string. It takes the encoded string as input and performs the necessary Base64 decoding process to retrieve the original string.
As a result of this sequence, we obtain three strings: the initial string before encoding, the encoded string, and the decoded string. These outputs provide a clear illustration of the transformation that occurs during the encoding and decoding processes.
Convert Between Timezones
The Utility component offers a useful feature for converting dates between different timezones, taking into consideration daylight saving time adjustments.
Example
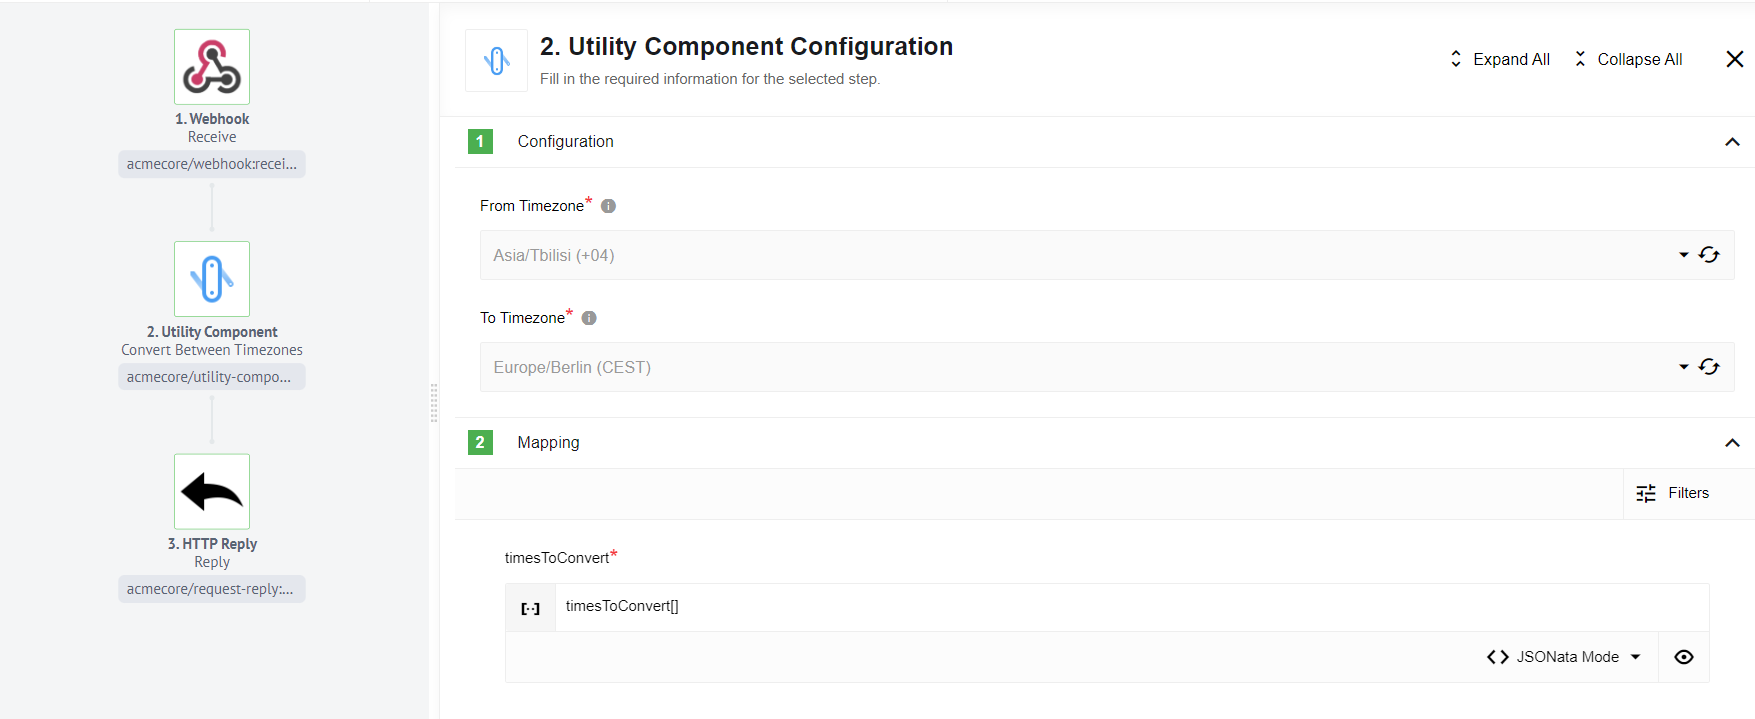
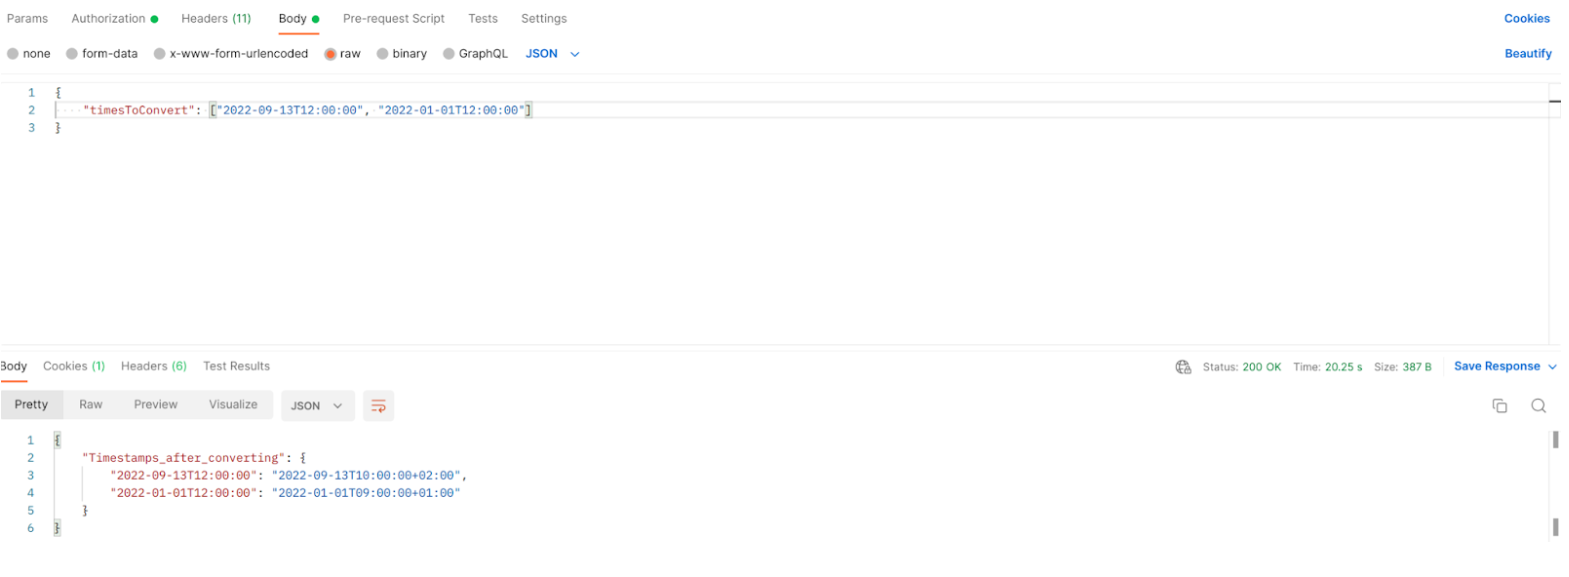
To perform a timezone conversion, you need to specify the source timezone and the target timezone to which you want to convert the timestamp. Additionally, you should create an array and add the timestamps that you wish to convert.
By utilizing this approach, the Utility component will effectively convert the specified timestamps from the source timezone to the target timezone. The component’s underlying functionality accounts for daylight saving time changes, ensuring accurate and reliable conversions.
Converting dates between timezones is particularly valuable when working with international applications or handling data from various regions. The Utility component simplifies the process, allowing you to seamlessly handle timezone conversions within your application.
Diagnostics
Network Diagnostics
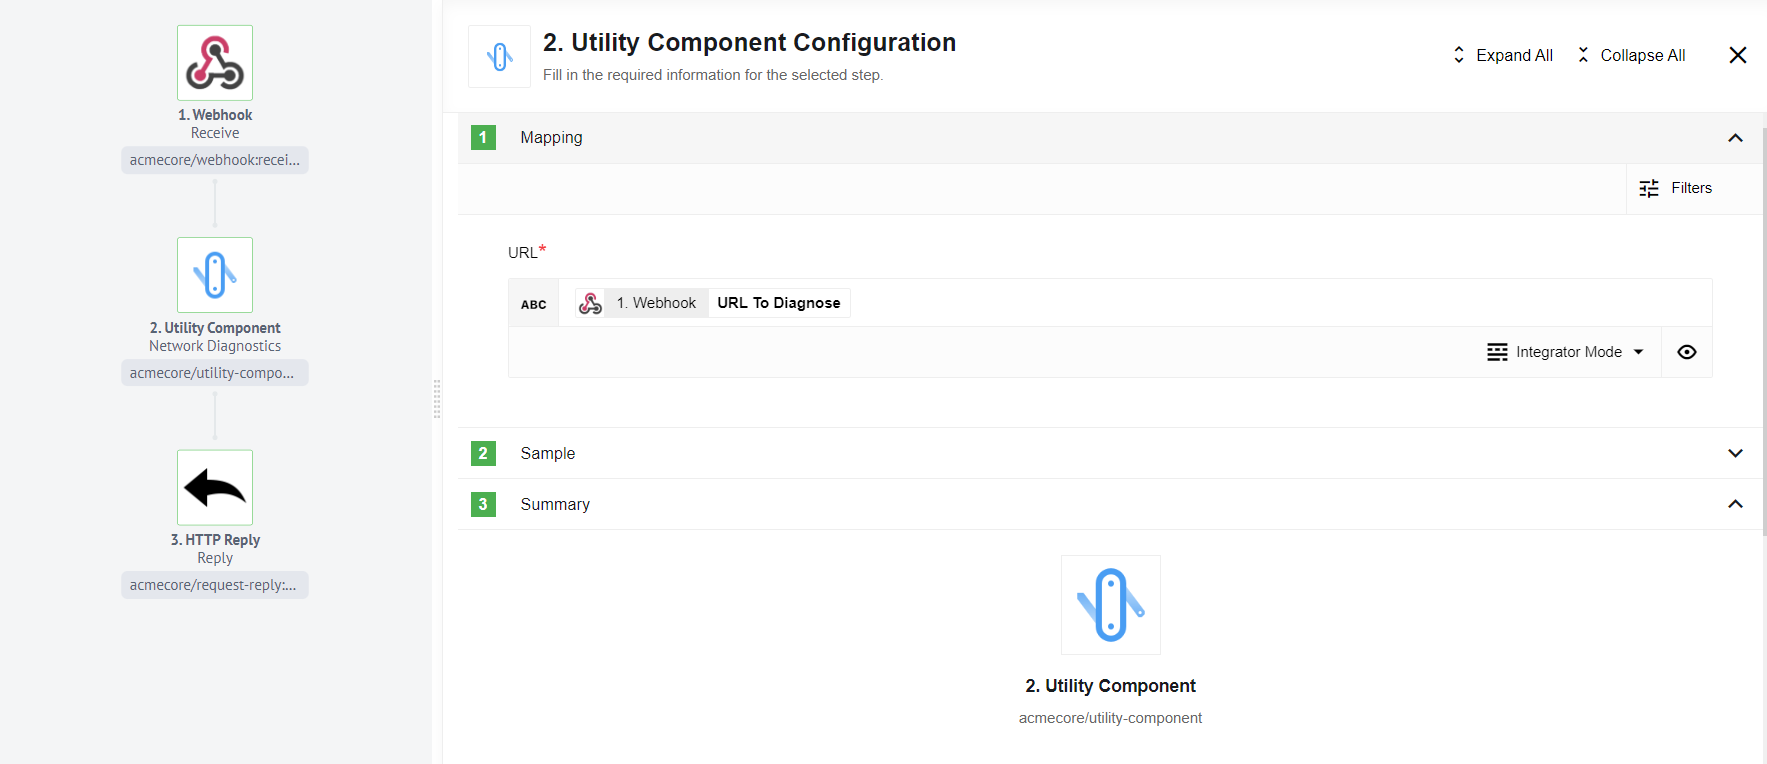
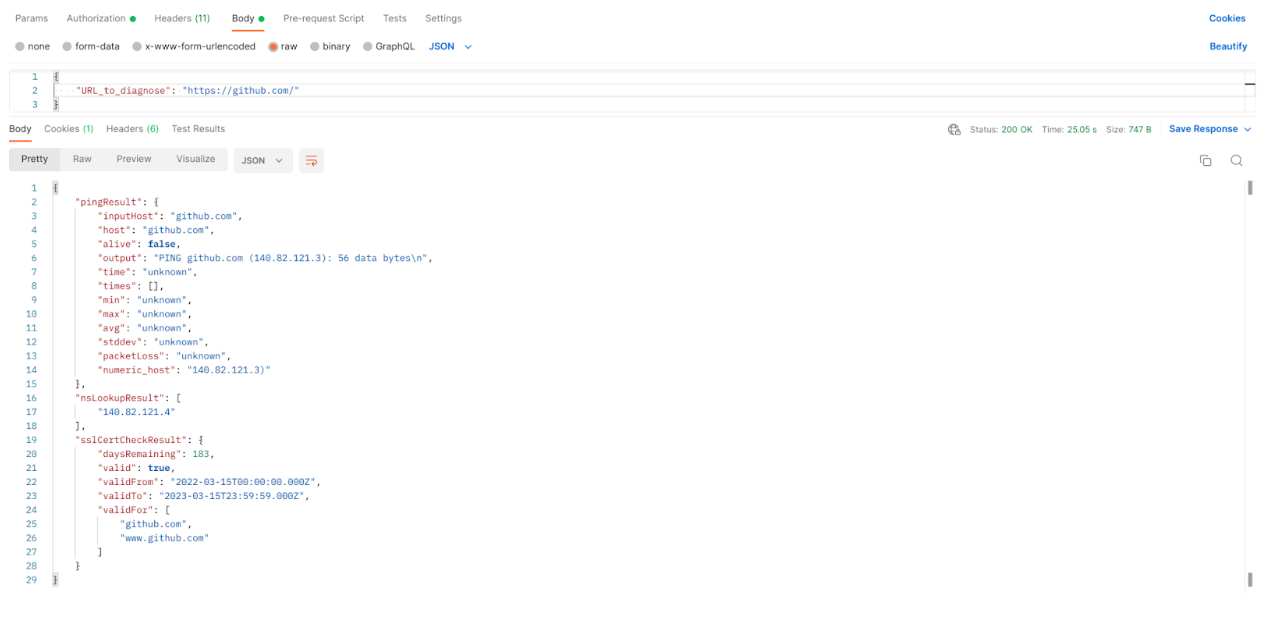
The Utility component offers a Network Diagnostics mode that allows you to diagnose the connection between the platform pod and various endpoints. This mode provides valuable insights into the connection quality, host information, and SSL certification data.
Example
Setting up the Utility component in Network Diagnostics mode is straightforward and does not require any special conditions. Simply provide the URL of the endpoint you wish to diagnose, and the component will initiate the connection and collect the response.
Log Message
The Utility component offers a Log Message mode that enables you to output data passing through the component to logs. This mode is particularly useful for debugging applications and manually reviewing data within a flow.
Example
For example, you can log the data received from a webhook to gain insights into the transmitted information.
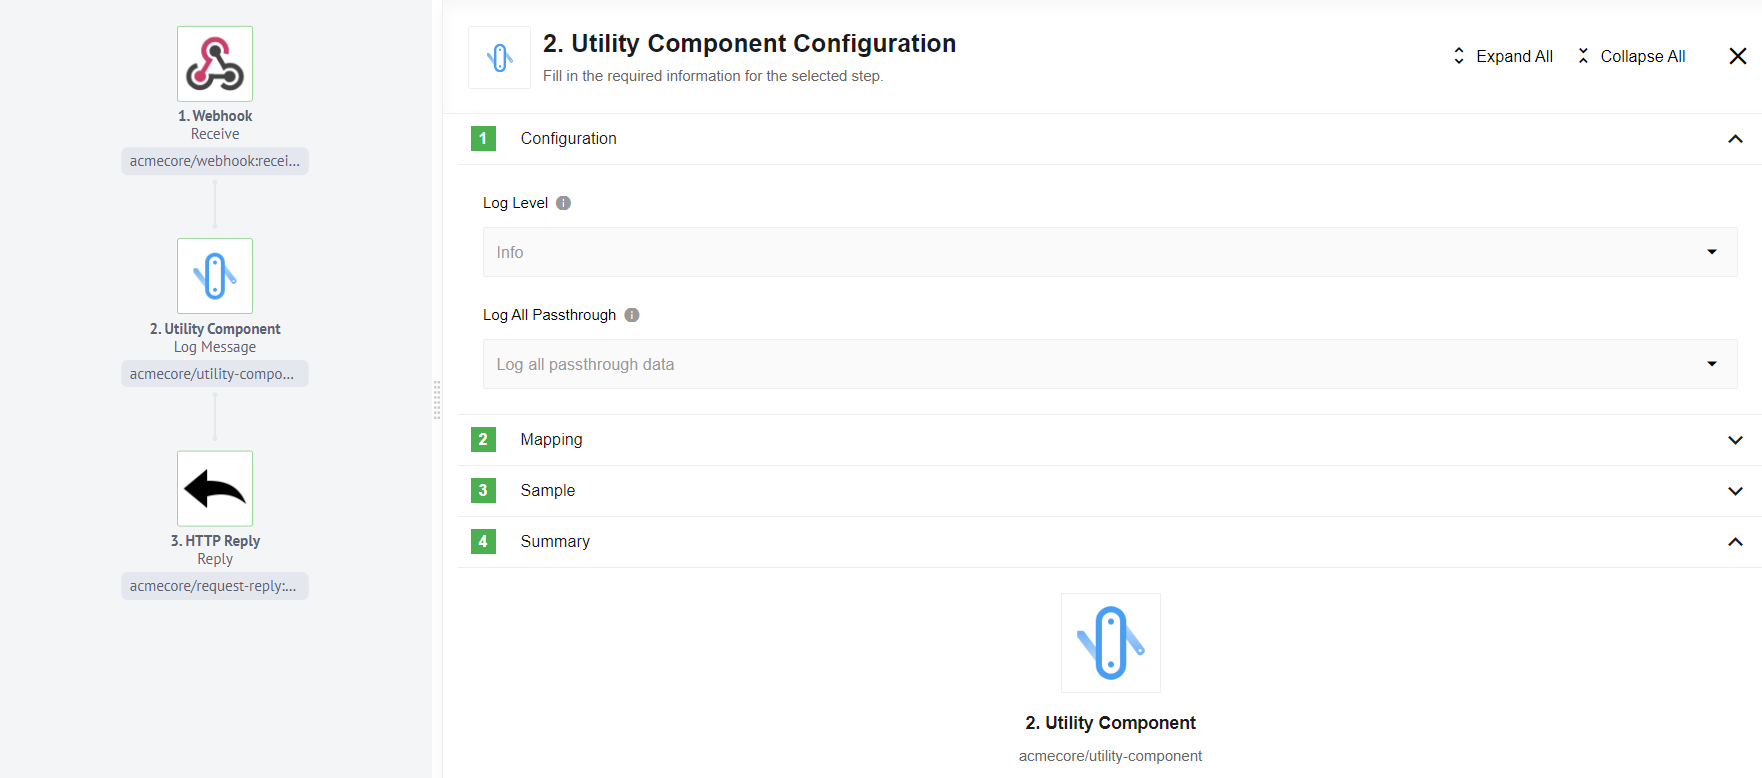
To accomplish this, simply place the Utility component in Log Message mode at the desired location in your flow, typically between the Webhook component and the HTTP Reply component.
Within the configuration, you can specify the logging level and choose whether to log only the message or log all passthrough data.
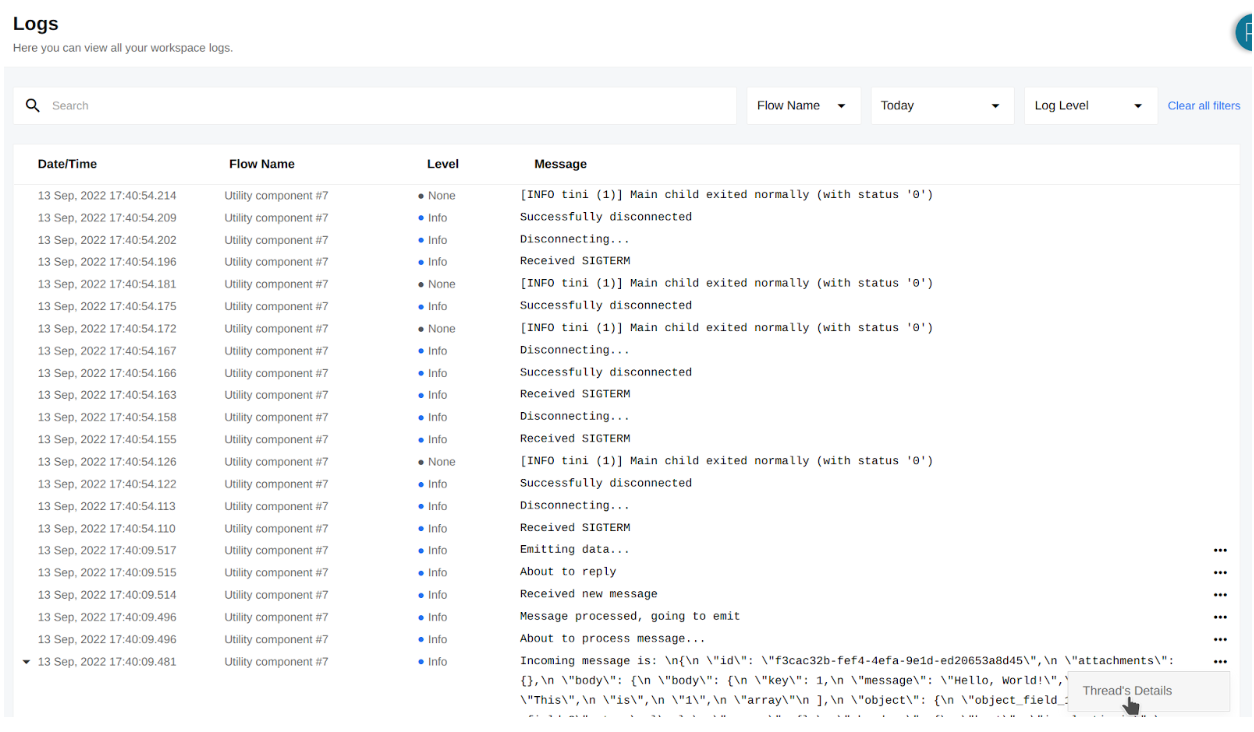
Once you run the flow, you can navigate to the Logs tab on the left side of the screen. Locate the log entry for the Utility component, which is easily identifiable as the log message may not fit into a single line. You will see an icon indicating that the full log entry is available for viewing.
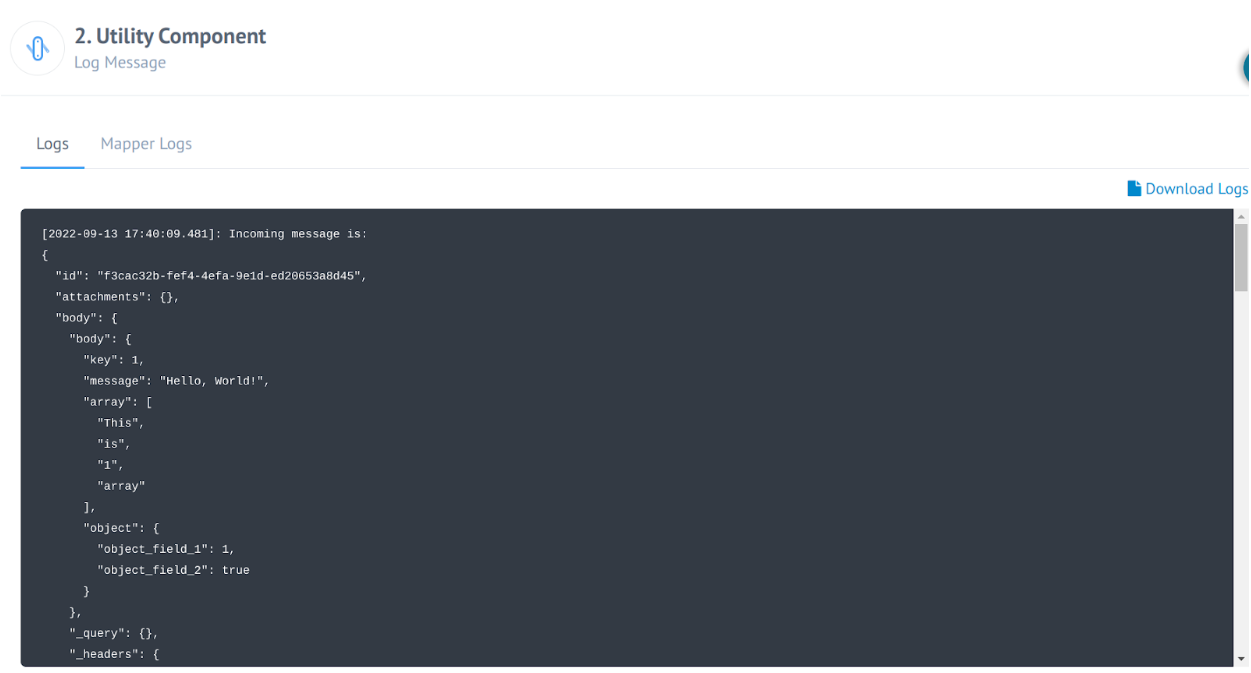
To conveniently review the logged data, you can access the Thread Details tab by clicking on the triplet symbol associated with the log entry. Within the Thread Details, navigate to the Utility component to access a comprehensive view of the data passing through the component, along with other relevant details.
Delay
The Delay mode serves as a mechanism to introduce a delay in the execution of components placed between it. This delay allows for controlled timing and sequencing of messages within an integration flow.
Example
The Delay function operates in two modes:
1. **Delay each:** This mode enables you to independently delay each message, ensuring that each message is timed separately. For example, if 100 messages are loaded with a delay of one second, all messages will be delivered to the next step within one second, irrespective of each other.

2. **Delay All:** In this mode, a sequential delay is arranged for each message. If 100 messages are loaded with a one-second delay, each message will be delivered after 100 seconds, creating a sequential pattern.
Delay takes two inputs: the delay time and the data to be transferred.
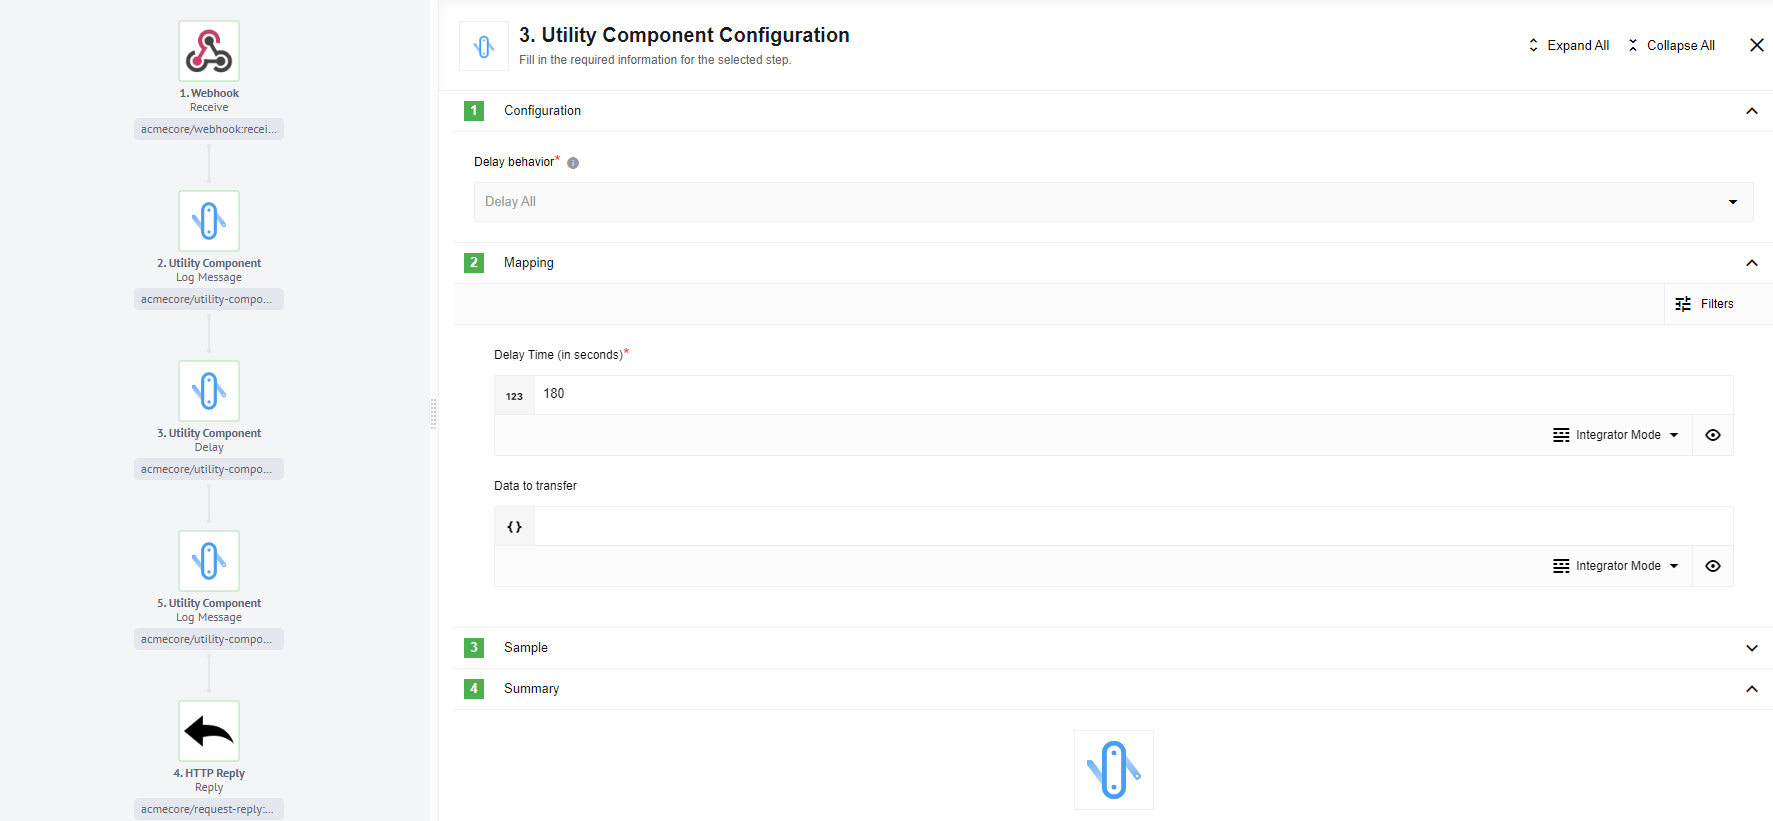
To illustrate the functionality of the Delay component, consider a simple flow example.
In this example, the component is configured in “Delay All” mode, with a delay of 3 minutes. The delay time is specified in seconds, so a value of 180 seconds represents a 3-minute delay.
To observe the operation of the Delay component, the Utility component in Log Message mode is chosen as the subsequent component. This allows you to examine the triggering time of the Delay component and confirm that the delay is functioning as expected.
In the provided example, the delay is set to 3 minutes and 70 milliseconds. It’s important to note that due to the container building process and potential high loads, the actual duration of the delay may vary slightly. However, it remains within an acceptable range.
Click here to learn more about the elastic.io iPaaS
