Configuring ODATA APP
Deprecated component
Plese note: the Microsoft Dynamics CRM component has been deprecated and is no longer supported. We highly recommend migrating to the newer Microsoft Dynamics CRM v2 component, which offers improved functionality and ongoing maintenance.
Please update your codebase to utilize the Microsoft Dynamics CRM v2 as soon as possible to ensure compatibility with future updates and benefit from the latest features.
Here is how to register and configure an app in Active Directory or Azure Active Directory.
The following steps and screenshots describe app registration on Azure Active Directory. These instructions may differ for other types of Active Directory.
1. Login
- Login to the Azure Portal with your Microsoft Credentials.
- Select the Azure Active Directory resource from the selector on the left.
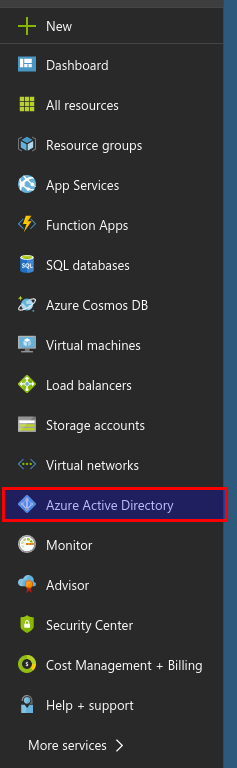
2. App registrations
- Select App registrations.
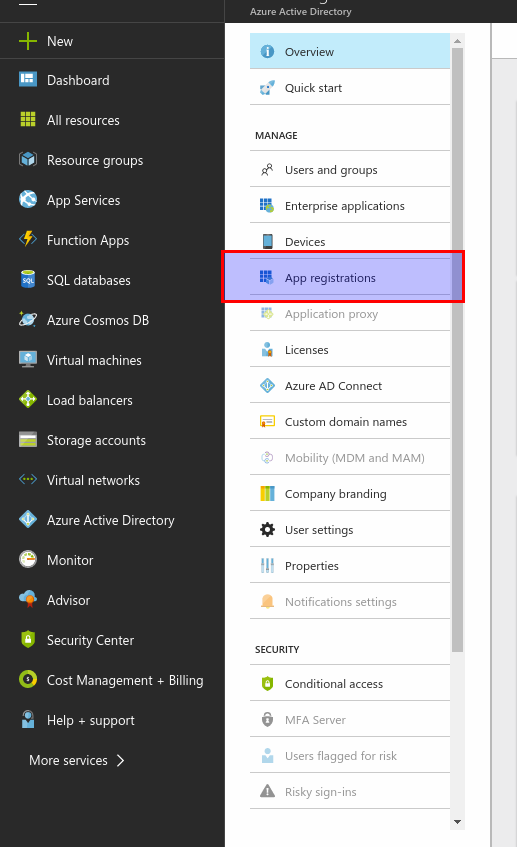
- Select New application registration.

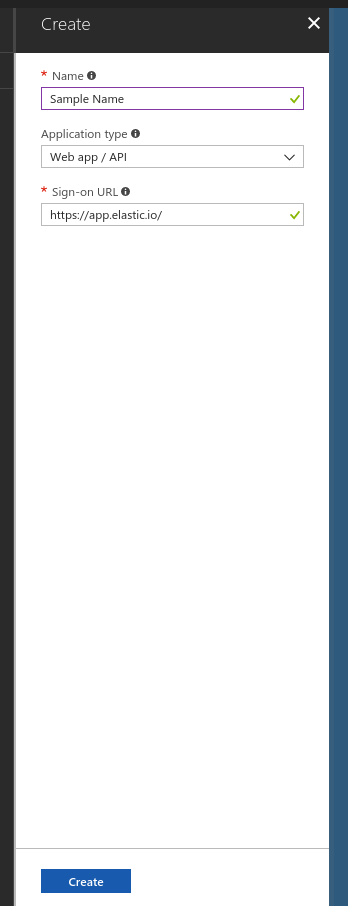
- Enter:
- A Name of your choosing.
- Select Web app/API for Application Type.
- Enter
https://app.elastic.iofor the Sign-on URL.
- Click Create.
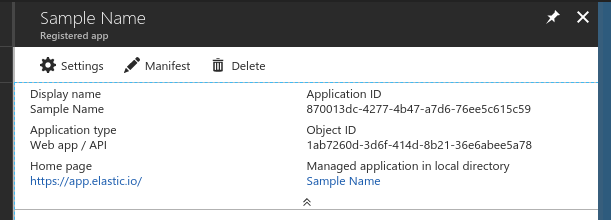
3. Settings
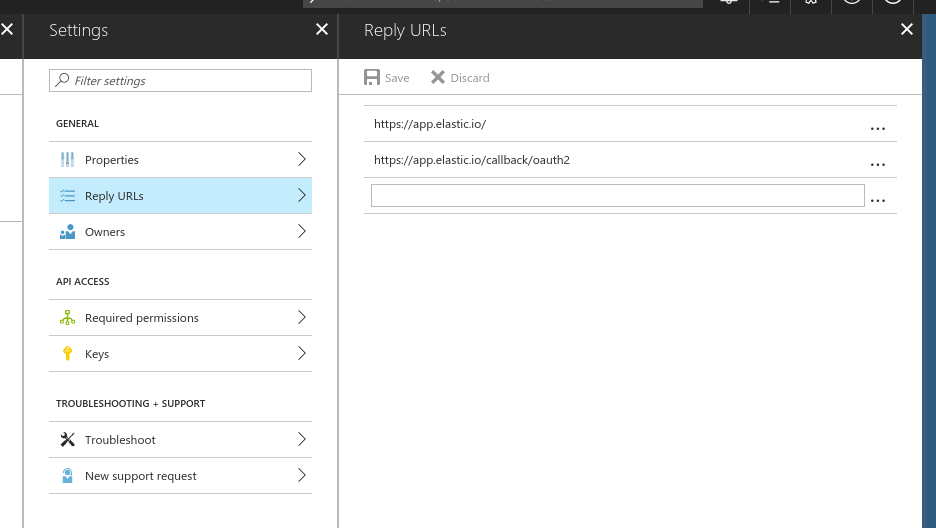
- Select the newly created application.
- Select Settings.
- Select Reply URLs. Add
https://app.elastic.io/callback/oauth2as a reply URL. Click Save.
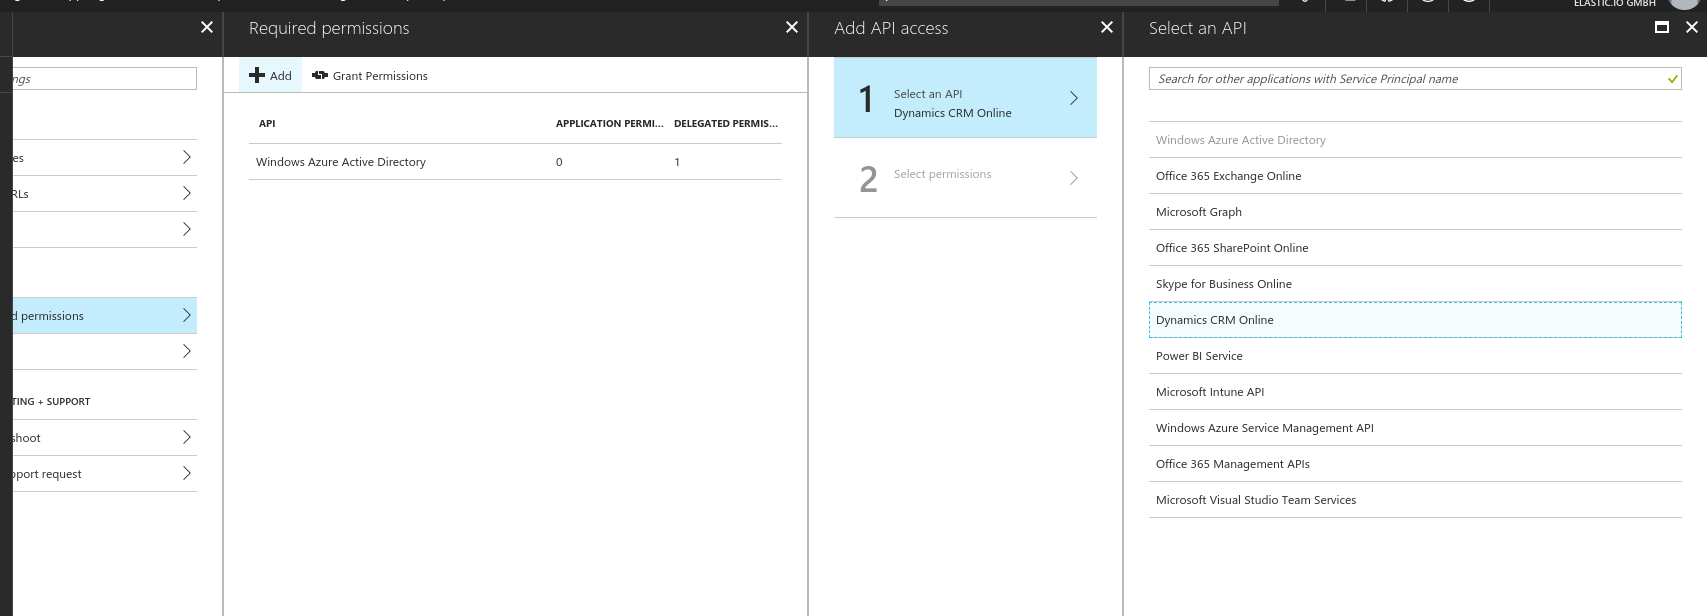
- Select Required Permissions. Click Add.
- Click Select an API.
- Click Dynamics CRM Online.
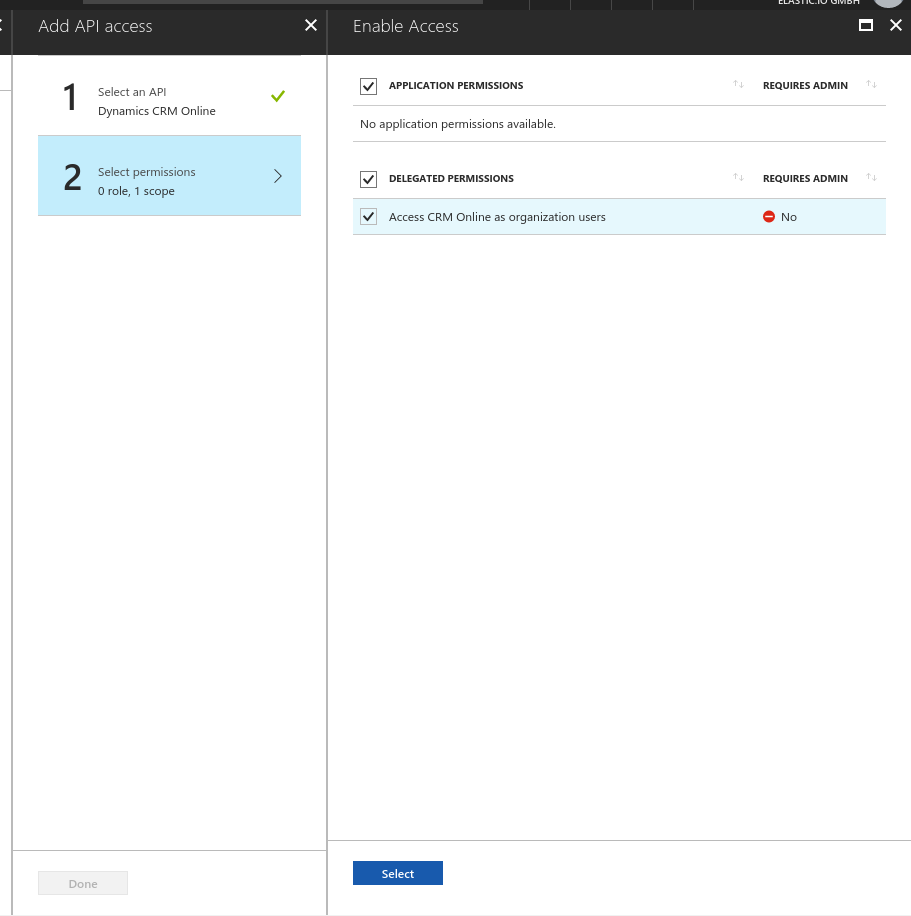
- Select the permission Access CRM Online as organization users.
- Click Done to add the permissions.
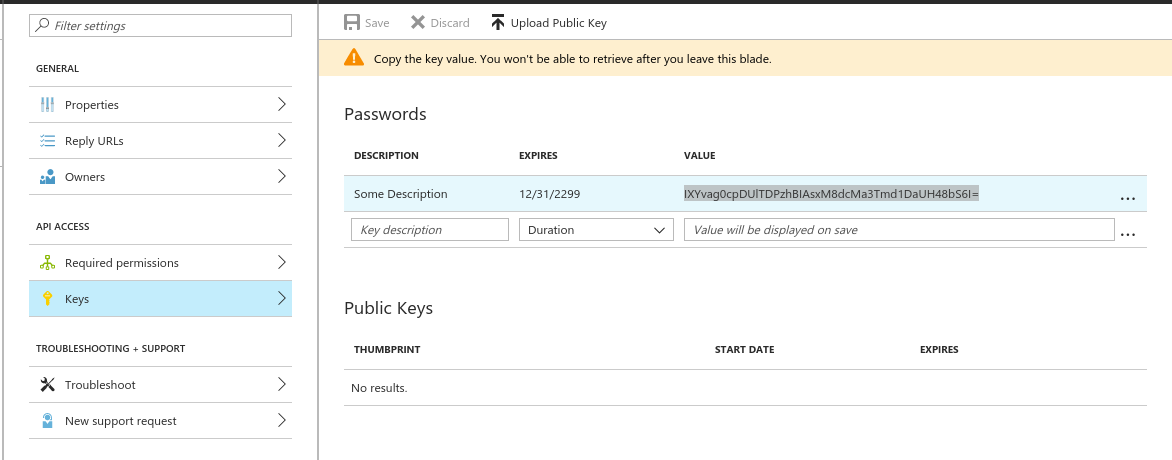
- Select Keys. Enter:
- Some description for Key description.
- Set Duration to Never expires
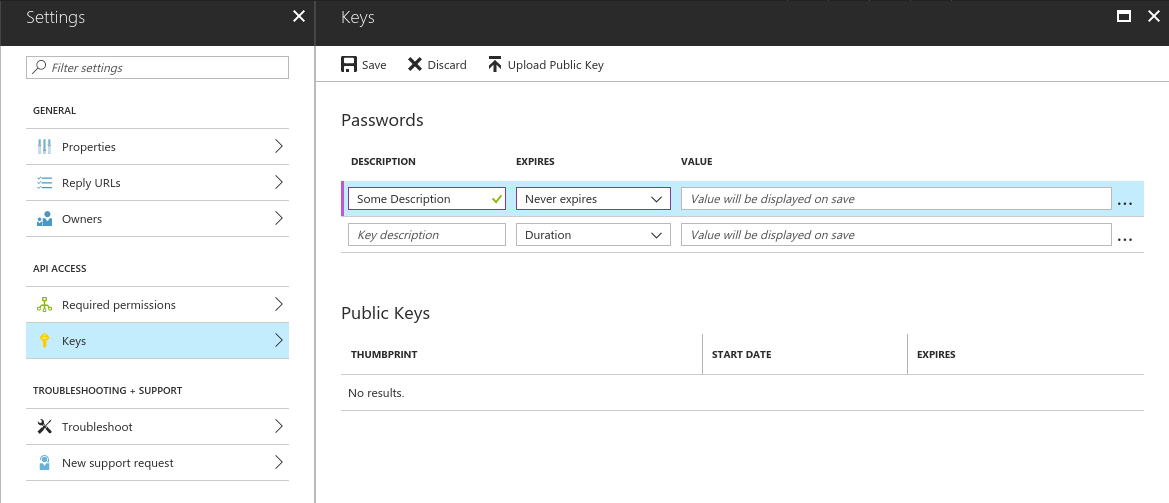
- Select Save. Copy the key value created. You will need this value in the Configure app details in elastic.io section.
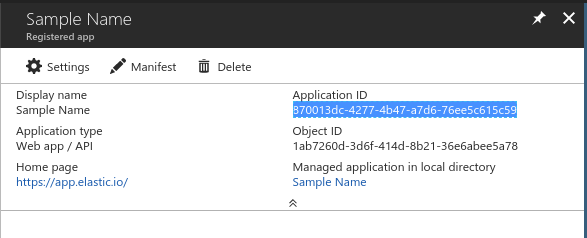
- Copy the value of the Application ID. You will also need this value in the next section.
Warning: To maintain a smooth experience, we recommend reusing stored credentials where possible. Duplicating secrets across OAuth clients can result in errors and complications.
Click here to learn more about the elastic.io iPaaS