NetSuite component
Table of Contents
General information
Description
An iPaaS component designed to facilitate robust connectivity with the NetSuite ERP API.
Purpose
The primary objective of this component is to provide a comprehensive suite of tools for interacting with and managing data within the NetSuite ERP ecosystem.
How it works
Communication with NetSuite is established using the native SOAP SDK, ensuring reliable and secure data exchange.
API version
This component is optimized for and supports NetSuite version 2022.1. While it is likely to remain functional with other versions, absolute compatibility is guaranteed only for the specified release.
Requirements
Environment variables
Component requires 1024 MB of RAM memory to properly function. It is recommended to increase the RAM memory prior any activity (credentials verify, retrieve sample). Contact support for more.
| Variable | Value |
|---|---|
| EIO_REQUIRED_RAM_MB | 1024 |
Enable web-service communication
NetSuite’s Web Services SOAP interface allows you to communicate with the ERP and to integrate external systems with it. NetSuite’s native SDK, which is used for the communication in the component, uses NetSuite’s SOAP Web Services under the hood.
By default web service communication is disabled in NetSuite. So it should be enabled in order to allow component make calls. To enable Web Service communication:
- Navigate to Setup > Company > Enable Features.
- Select the SuiteCloud tab and locate the SuiteTalk section.
- Check the Web Services box.
- Click Save.

Credentials
Netsuite connector since version 3.0.0+ only supports Token-Based Authentication (TBA). Support of a user credentials mechanism has been removed by Netsuite SOAP API.
Obtaining Credentials in NetSuite
To use Token-Based authentication you must at first setup a Netsuite account:
1. Enable Integration
- Navigate to Setup > Company > Enable Features > SuiteCloud > Manage Authentication.
- Enable Token-Based Authentication.
- Navigate to Setup > Integrations > Manage Integrations.
- Click New.
- Assign a name to the integration.
- Ensure Token-Based Authentication is checked.
- Uncheck TBA: AUTHORIZATION FLOW and AUTHORIZATION CODE GRANT.
- Ensure TBA: ISSUETOKEN ENDPOINT is checked.
- Important: Securely record the Consumer Key and Consumer Secret. These values are only displayed once.
2. Configure Role and Permissions
- Navigate to Setup > Users/Roles > Manage Roles > New.
- Create a new role and assign the required permissions (e.g., access to specific NetSuite object types and transactions).
- The role must include User Access Tokens and SOAP Web Services permissions.
- Assign this role to the integration user via Lists > Employees > Edit User > Access tab > Roles subtab.
3. Generate Access Token
- Navigate to Setup > Users/Roles > Access Tokens > New.
- Select the Integration, User, and Role created in the previous steps.
- Important: Securely record the Token ID and Token Secret. These values are only displayed once.
Required Fields
- Domain: Your NetSuite domain endpoint (e.g.,
https://{accountId}.suitetalk.api.netsuite.com). Locate this in the NetSuite UI under Setup > Company > Company Information in the Company URLs subtab.. Should be something likehttps://{accountId}.suitetalk.api.netsuite.com. - Account. Account Number to access NetSuite API. This number is required for the component to connect to NetSuite via native SuiteTalk API. Can be found here:
- Go to Setup -> Integration -> Web Services Preferences.
- Find
ACCOUNT IDfield there.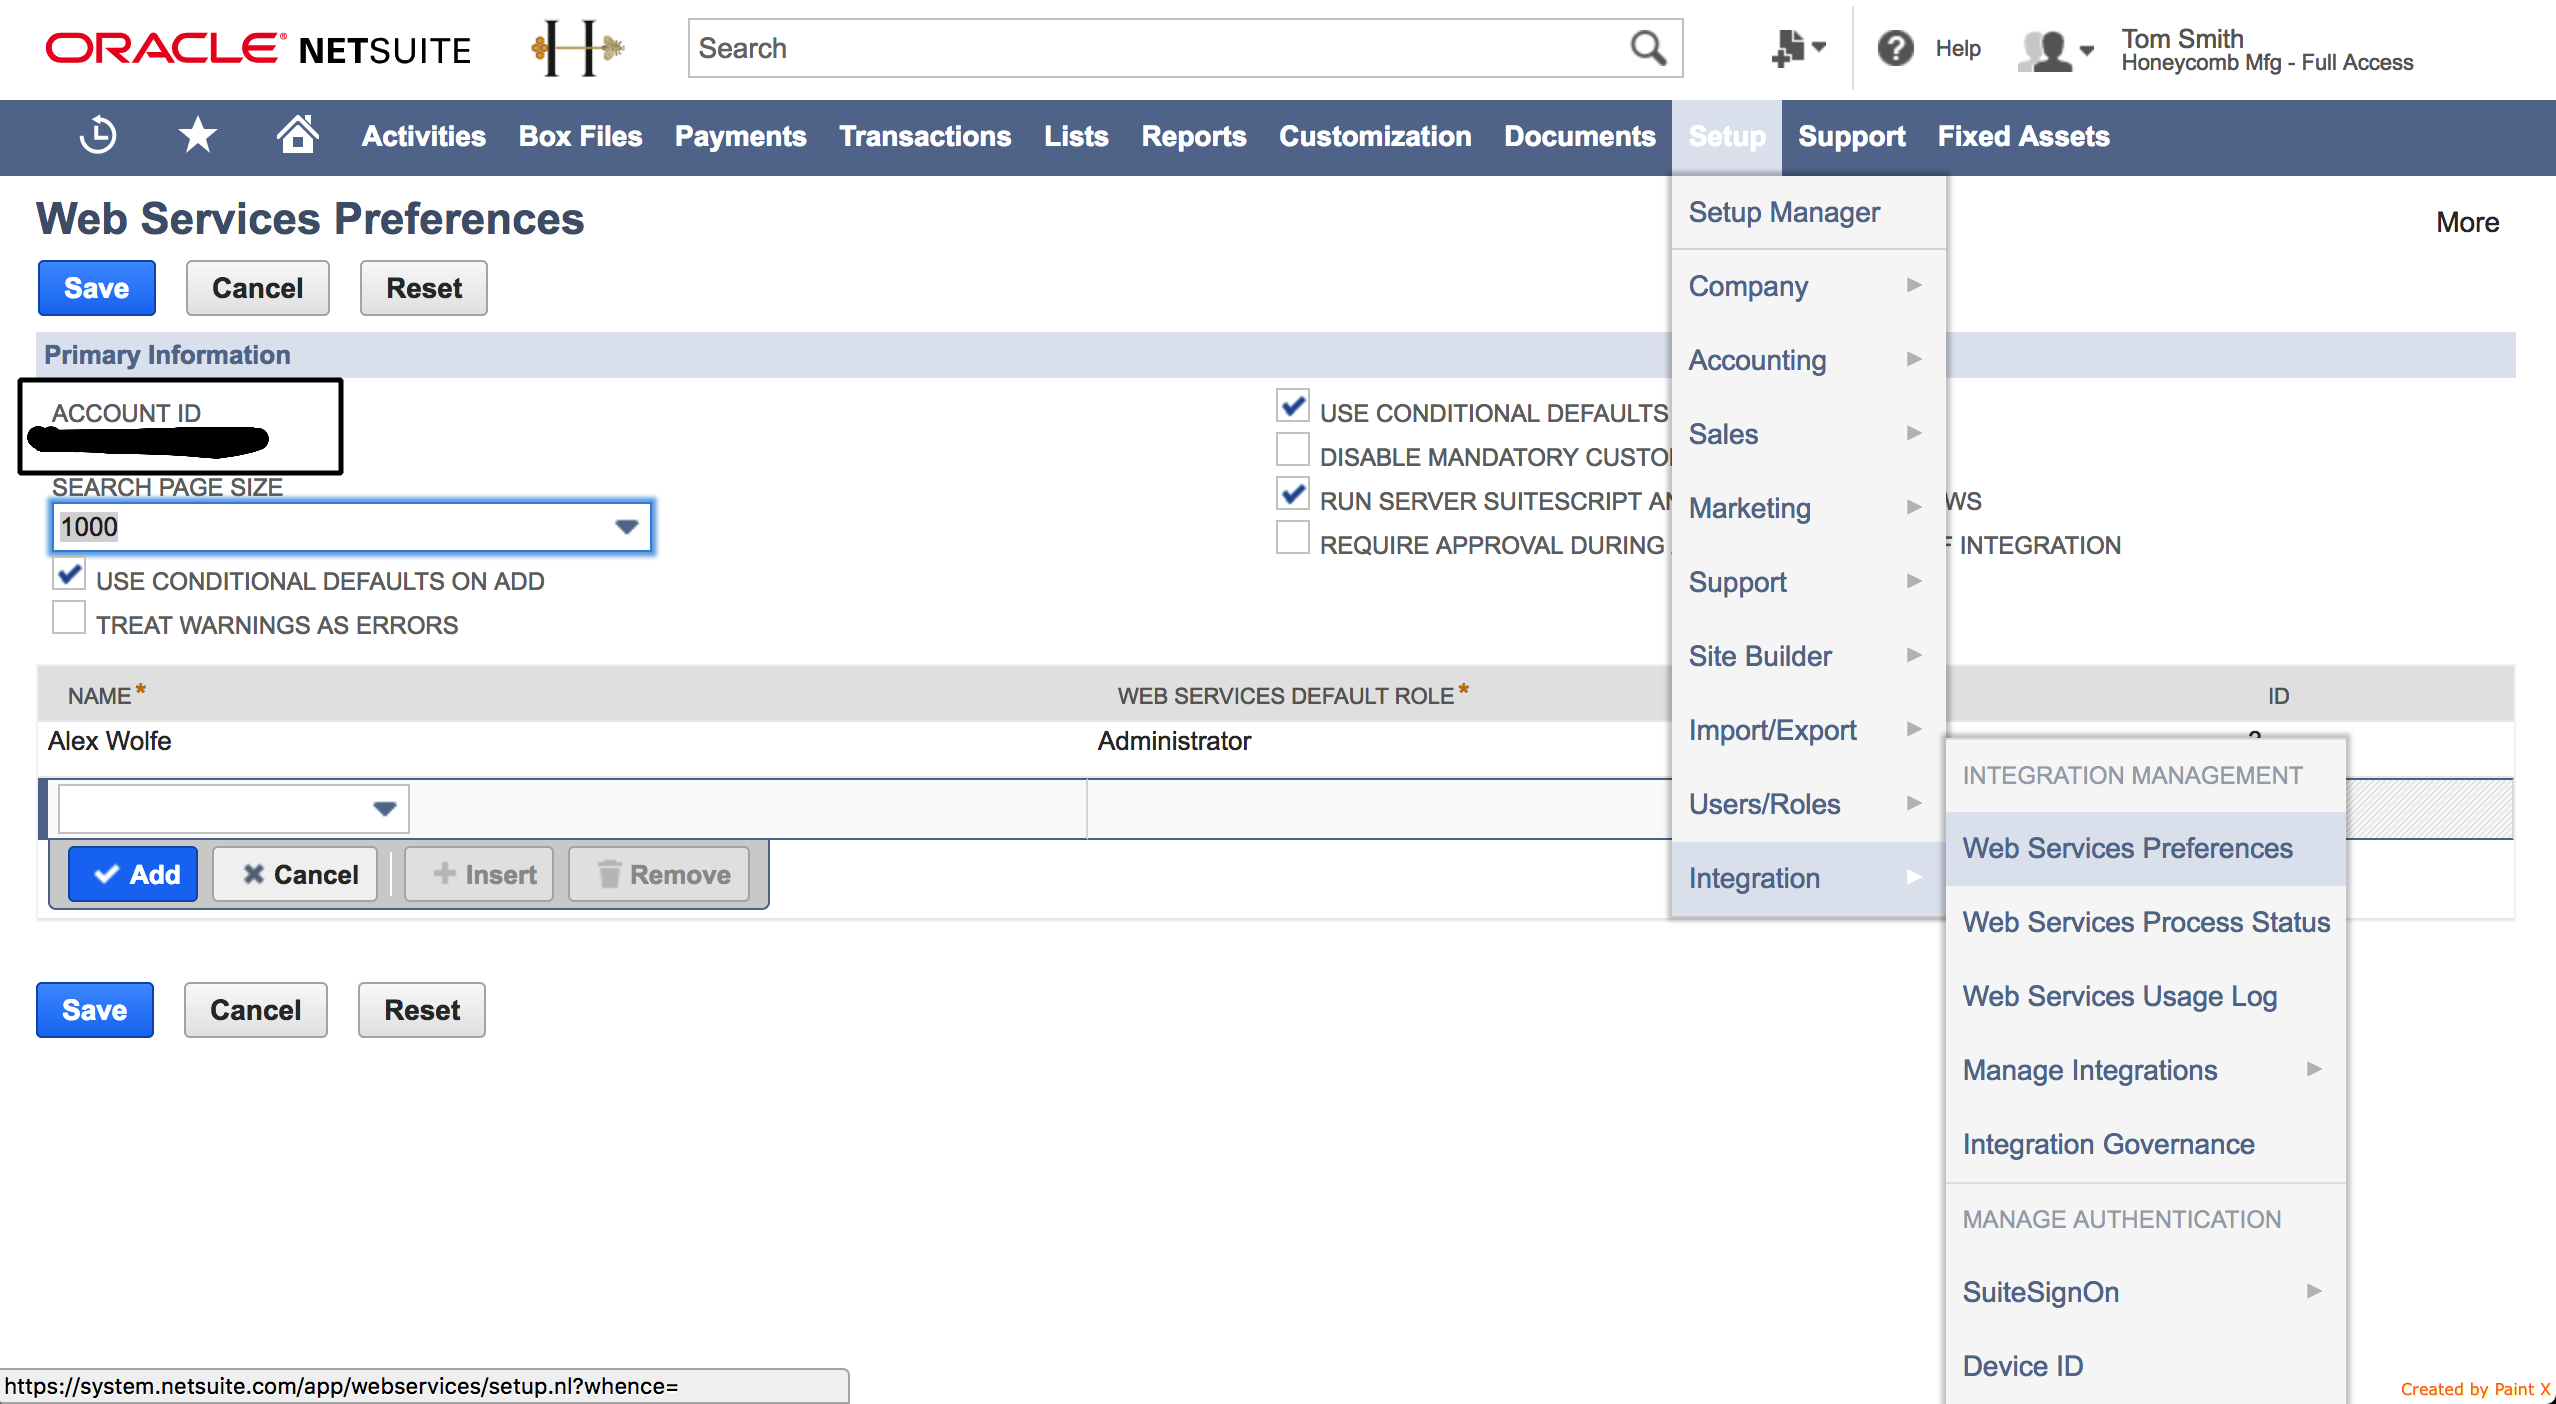
Please Note: Make sure you have copied an account name exactly how it is specified in Netsuite UI.
- Consumer Key.
- Consumer Secret.
- Token Id.
- Token Secret.
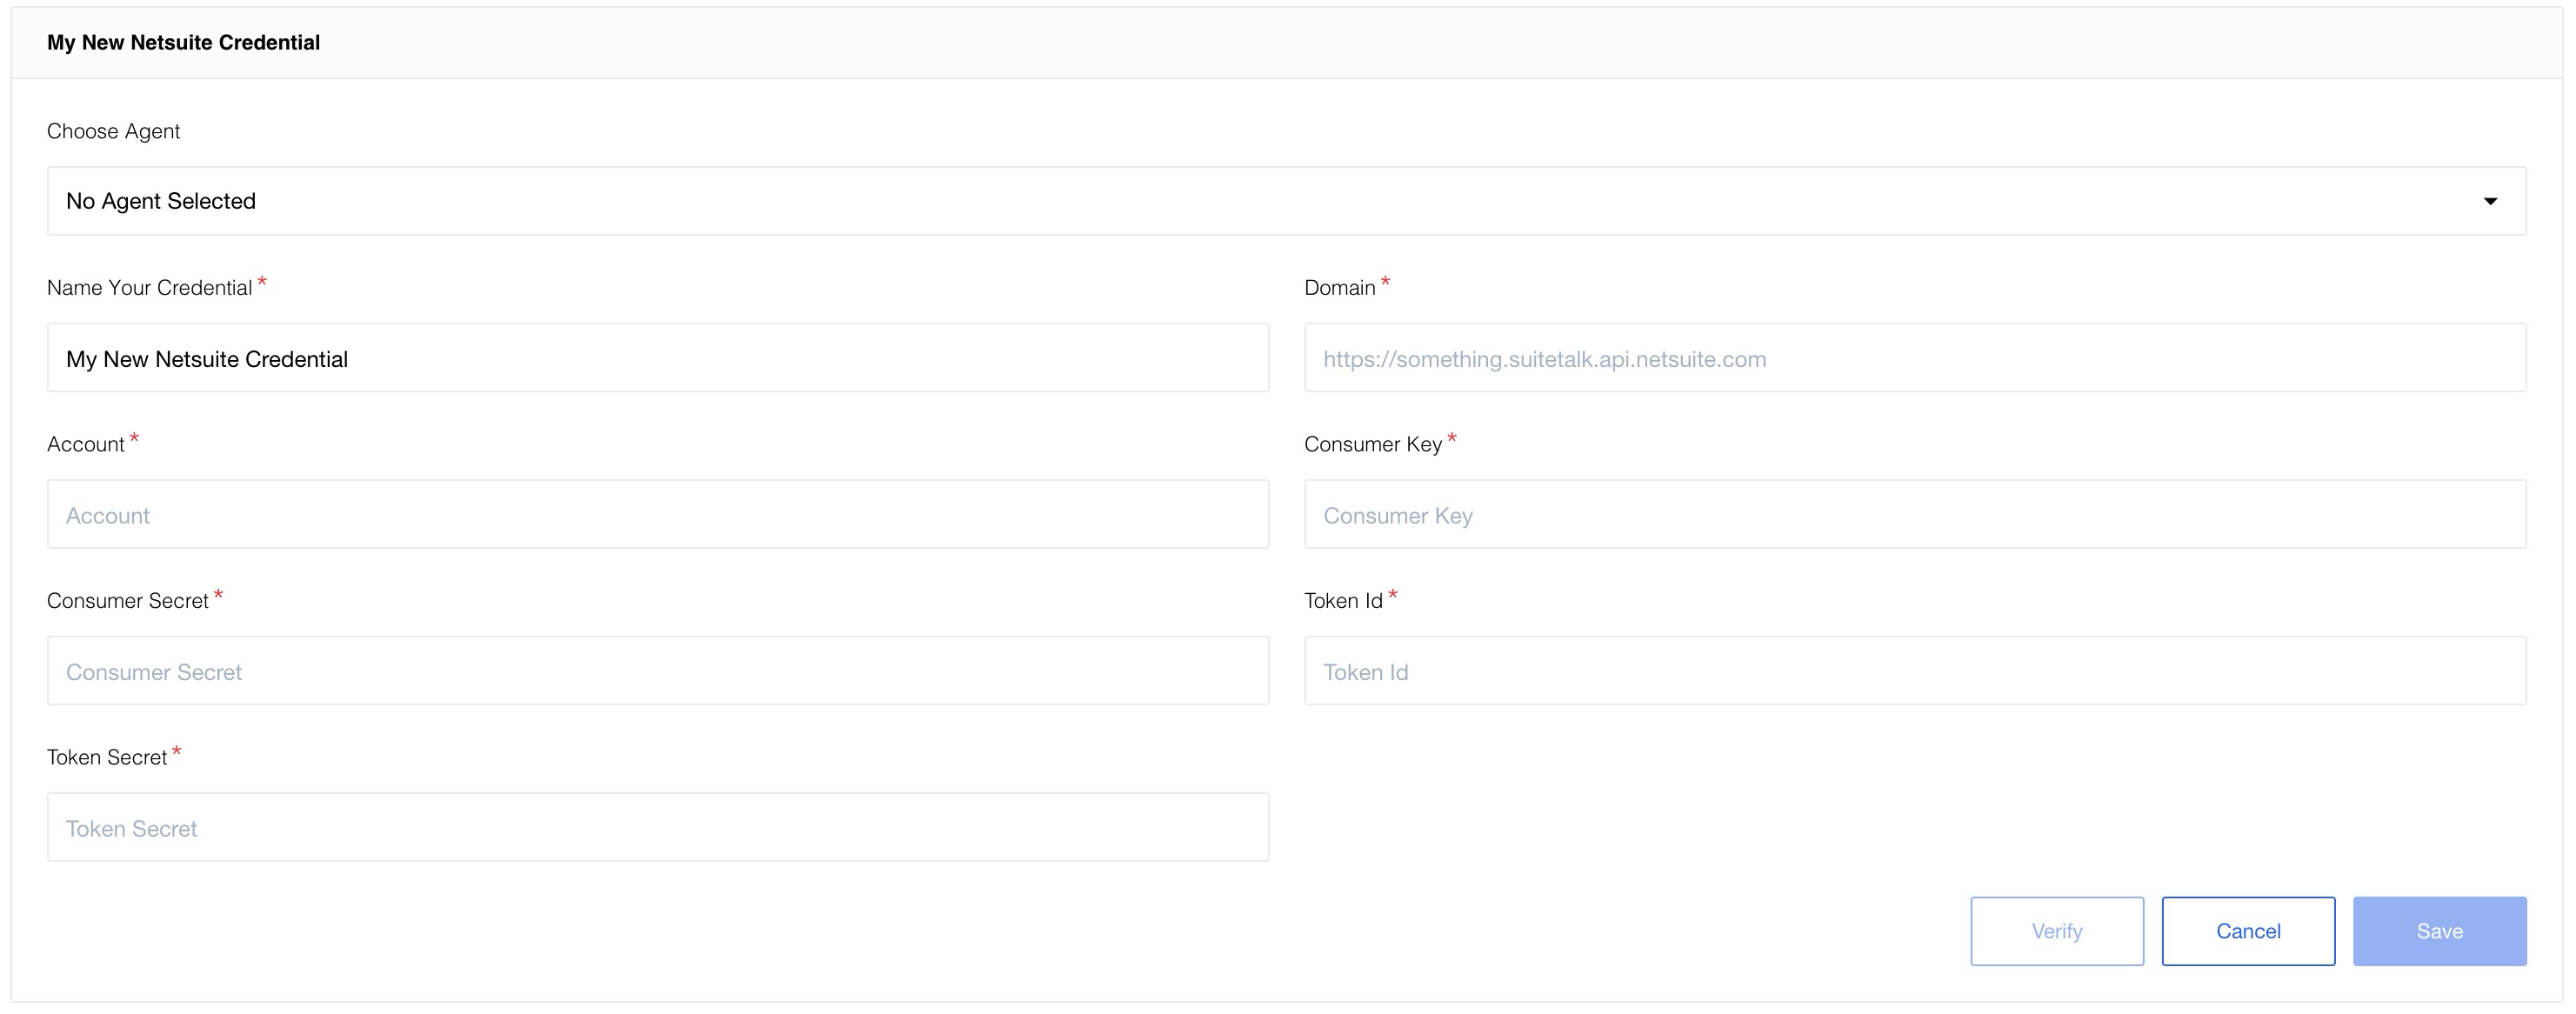
Authentication on the platform
In order to use the functions of the NetSuite component, you need to go through the authentication process.
Please paste the required fields described in the steps above. After filling in all fields, click Verify to validate the credentials, then click Save to store them.
Triggers
NetSuite component includes the following triggers:
- Get New and Updated Objects Polling
This versatile trigger monitors a NetSuite instance for new or modified objects across all supported types.
The following NetSuite triggers are deprecated:
- Search Entity (deprecated)
Deprecated. Use Get New and Updated Objects Polling trigger instead. Find an object or a set of objects using filter criteria (field, operator, value).
Actions
NetSuite component includes the following actions:
-
Add Object
Creates a new record in NetSuite. -
Delete Object By Id
Deletes a record from NetSuite using its Internal or External ID. -
Get Item Availability
Retrieves real-time availability for a specific item. -
Lookup Object By Id
Retrieves a specific record by its ID. -
Lookup Objects
Searches for objects in NetSuite that match specific criteria. -
Lookup Objects By Custom Field
Finds records matching a specific custom string field. -
Update Object
Modifies an existing record in NetSuite. -
Upsert Object By Id
Updates an existing record or creates a new one if the ID is not found. -
Upsert Custom Fields
Can upsert custom fields in NetSuite.
The following NetSuite actions are deprecated:
-
Lookup Customer (deprecated)
Deprecated. Use Lookup Object By Id action instead. This action enables to find the customer by provided ID. -
Lookup Invoice (deprecated)
Deprecated. Use Lookup Object By Id action instead. This action can be used to find invoices by provided ID. -
Upsert Customer (deprecated)
Deprecated. Use Lookup Object By Id action instead. Create new or update existing customer by provided external ID. -
Upsert Contact (deprecated)
Deprecated. Use Upsert Object By Id action instead. Create new or update existing contact by provided external ID. -
Upsert Invoice (deprecated)
Deprecated. Use Upsert Object By Id action instead. Create new or update existing invoice by provided external ID. -
Upsert Sales Order (deprecated)
Deprecated. Use Upsert Object By Id action instead. Create new or update existing sales order by provided external ID. -
Upsert Vendor (deprecated)
Deprecated. Use Upsert Object By Id action instead. Create new or update existing vendor by provided external ID.
Links
Click here to learn more about the elastic.io iPaaS