Creating OAuth App for Salesforce
Purpose
When you deploy the Salesforce component separately into a dedicated tenant or into your developer team it can not use the OAuth App specifically created for our main elastic.io tenant. For this purposes you must create a different OAuth App and add the required environment variables to the component setup.
Salesforce documentation page gives all specific details and explanation on how to create any app. We will go through the necessary steps to show where to locate those setup options.
Create new OAuth App
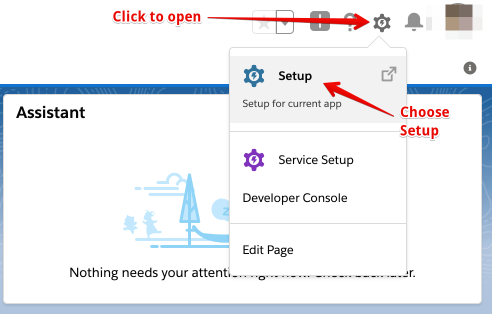
To start you need to navigate to the Setup section. Please log-in to your account and select the Setup menu.
Next on the left-side menu use the Quick Find and search for App Manager,
click to navigate to the page, and press on New Connected App to start.
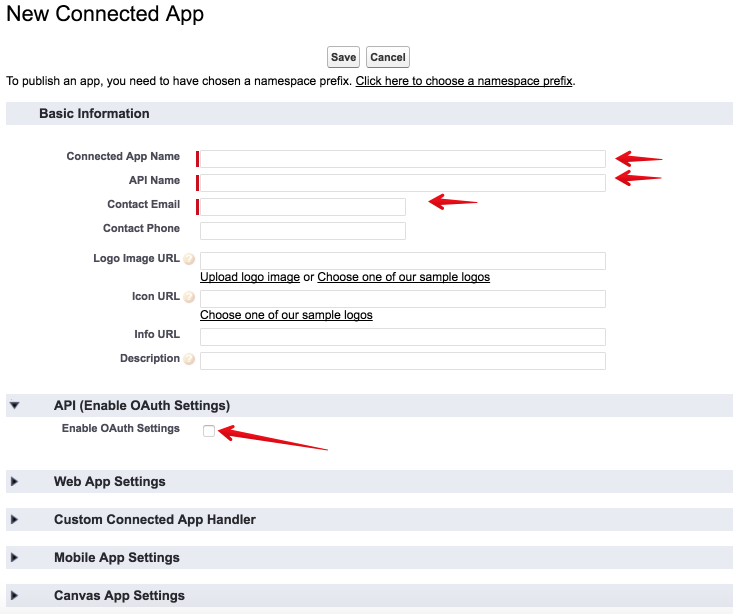
It will open a new page which should look like this:
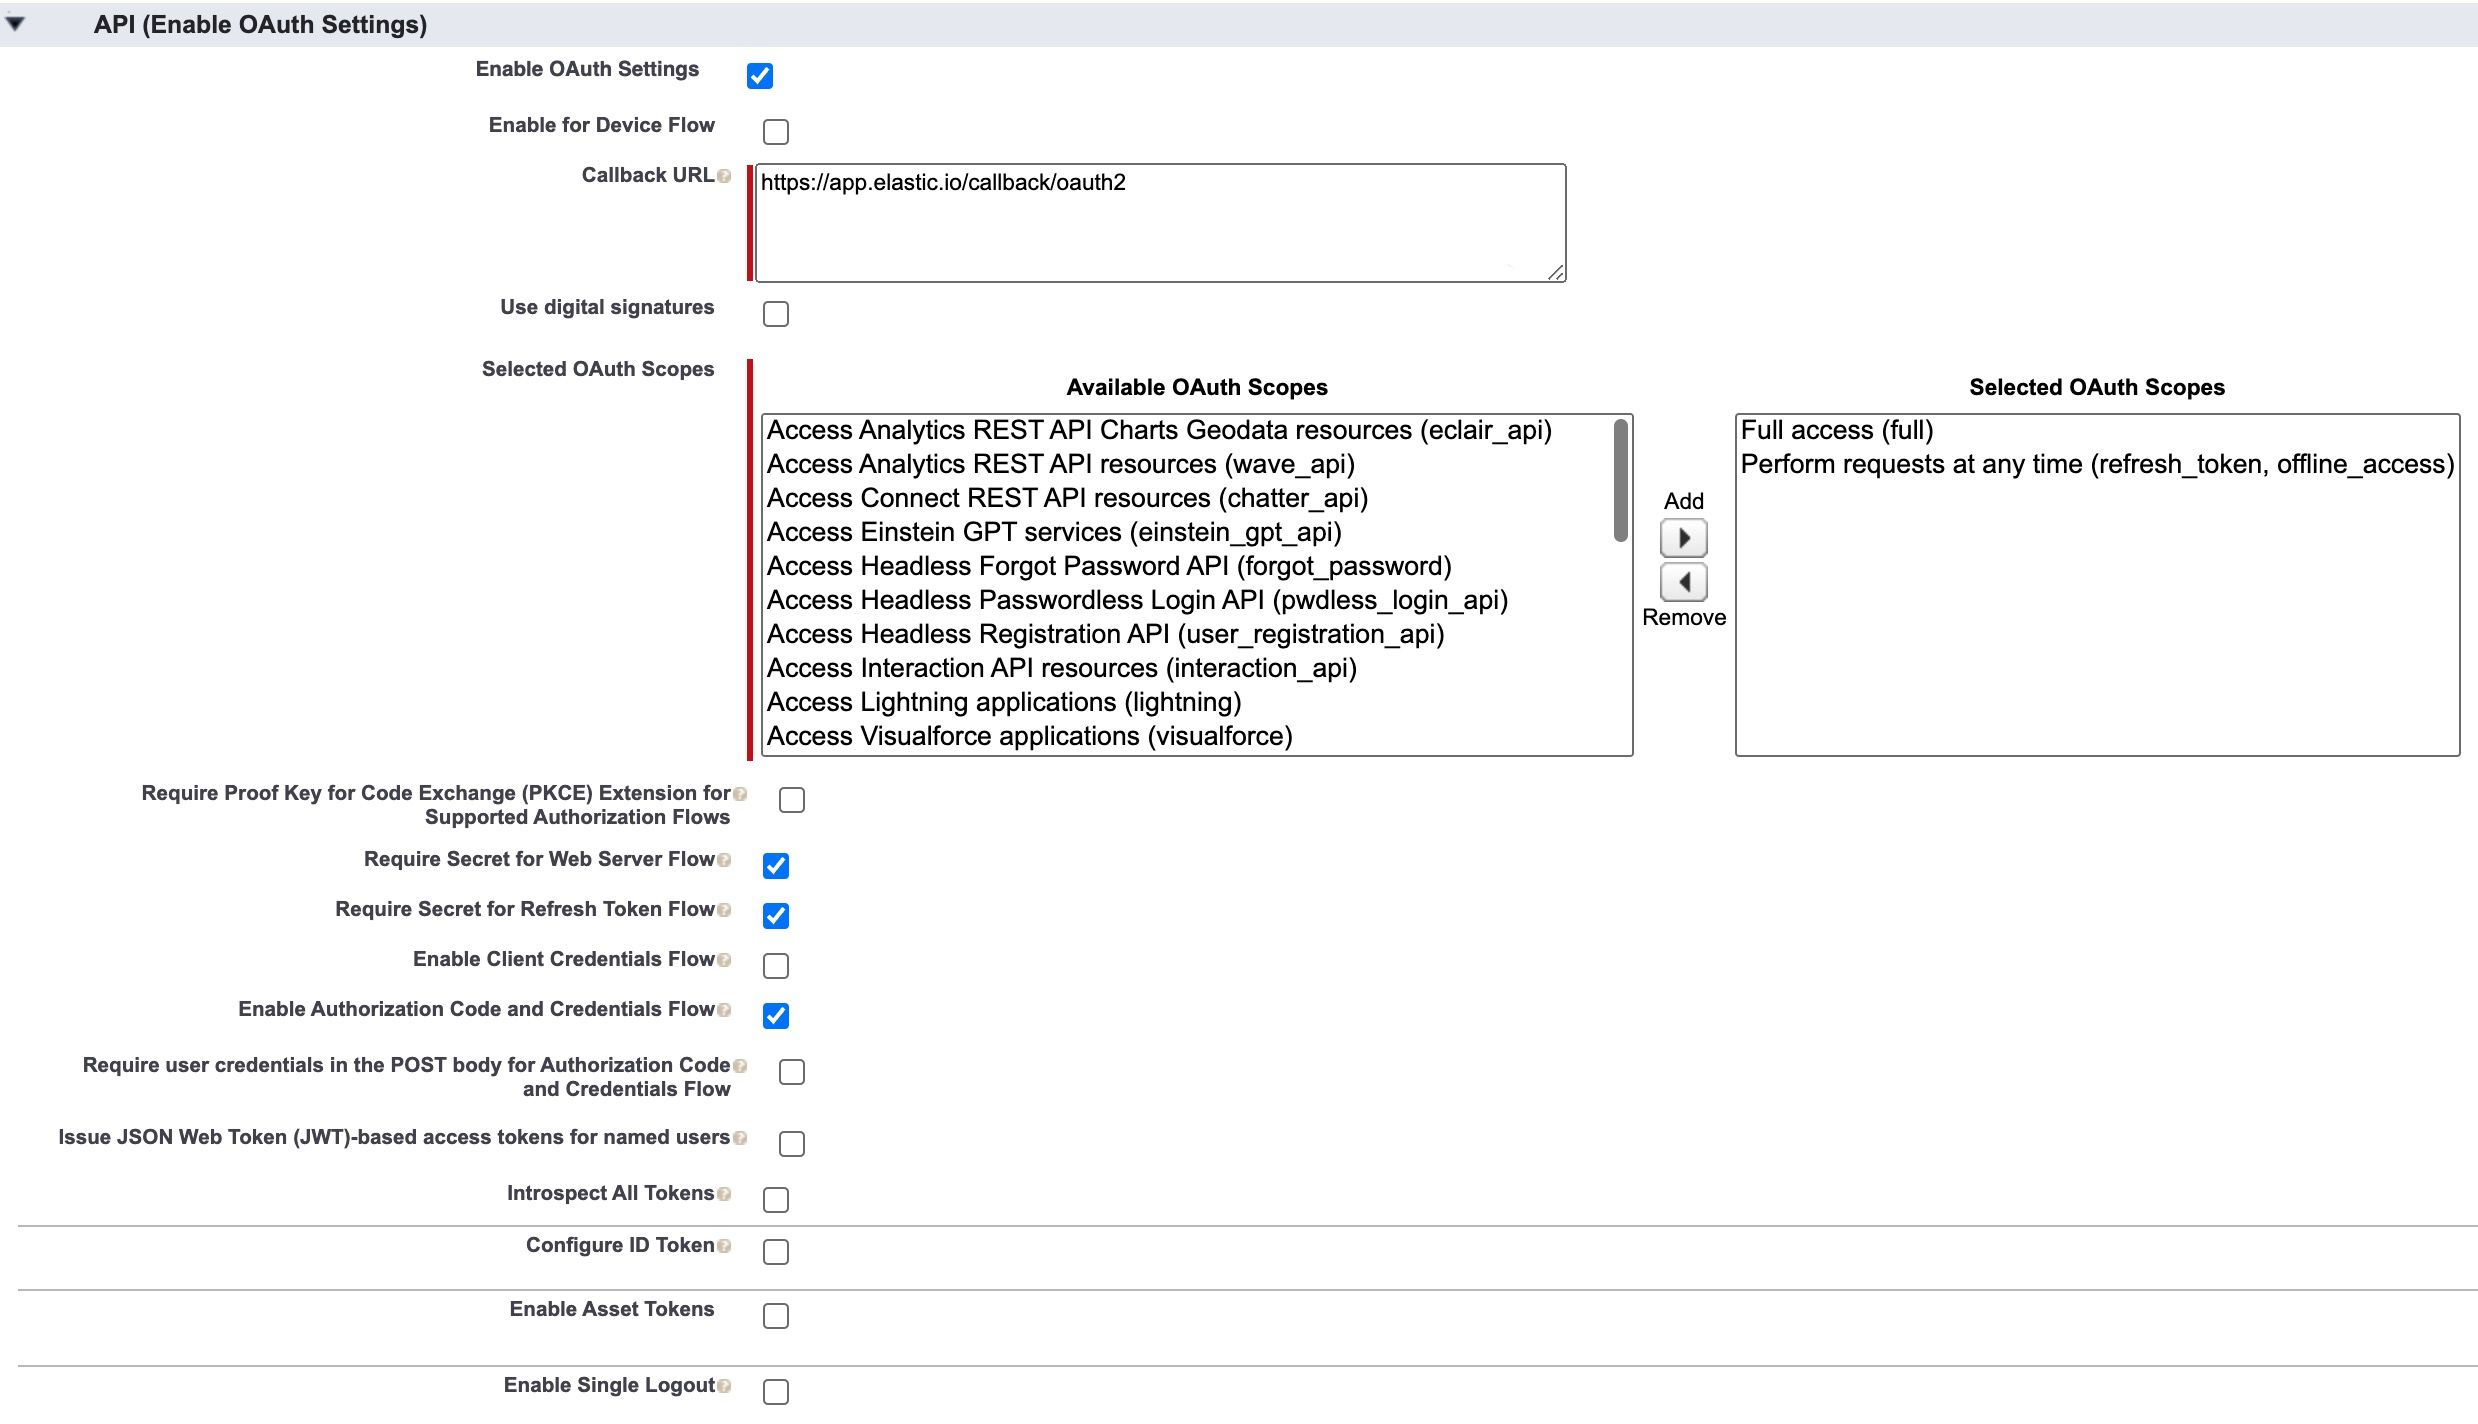
Fill-in the required details for Connected App Name, API Name and Contact Email and also select the check-box called Enable OAuth Settings at API (Enable OAuth Settings) section. After enabling this check-box it will extend into the following setup:
- Callback URL - put the correct URL which should of the
https://your-tenant-address/callback/oauth2form. - Selected Oauth Scopes - The Salesforce documentation explains API (Enable OAuth Settings) part requirements. In particular, a special care must be taken to select at least these two settings:
- Full access (full) - which allows access to all data accessible by the logged-in user, and encompasses all other scopes. This option, however, doesn’t return a
refresh_token. For that purposes you need to explicitly request therefresh_tokenscope to get one. - Perform requests at any time (refresh_token, offline_access) - This option would allows a
refresh_tokento be returned if you are eligible to receive one. This lets the app interact with the user’s data while the user is offline. Therefresh_tokenscope is synonymous with offline_access.
- Full access (full) - which allows access to all data accessible by the logged-in user, and encompasses all other scopes. This option, however, doesn’t return a
Check all required checkboxes from the list below:
- Require Secret for Web Server Flow
- Require Secret for Refresh Token Flow
- Enable Authorization Code and Credentials Flow (it is not enabled by default)
Press save to create your OAuth App.
After creating the OAuth App
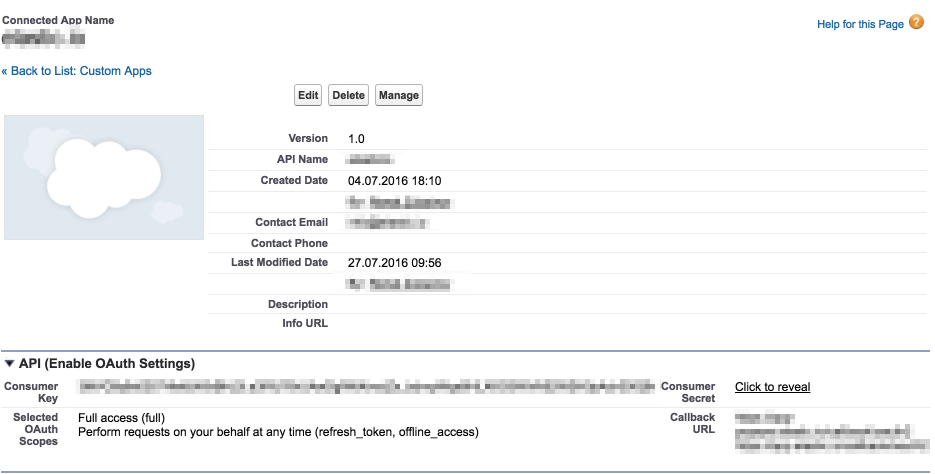
After creating the OAuth App Salesforce would show you a screen containing all the necessary details of your newly created OAuth App.
From this setup you would need to copy the Consumer Key and the Consumer Secret for use in your custom installation of Salesforce component.
These two keys would need to be defined as Environment Variables for your custom deployed component.
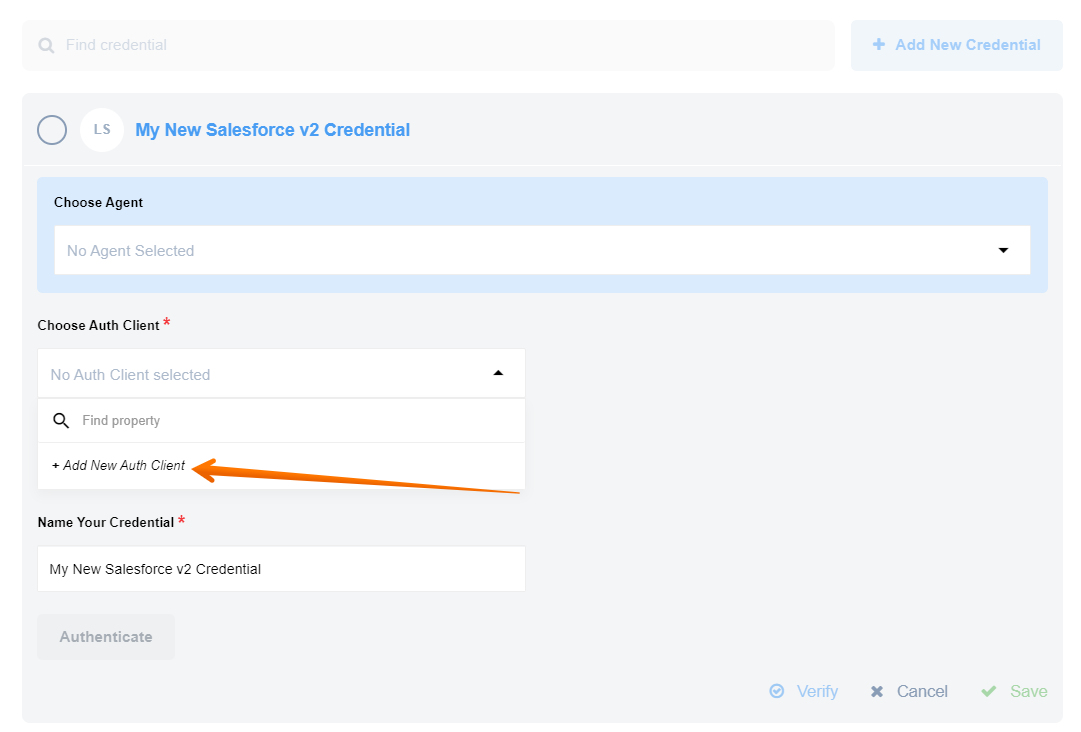
You can create a Auth client directly in the credentials section:
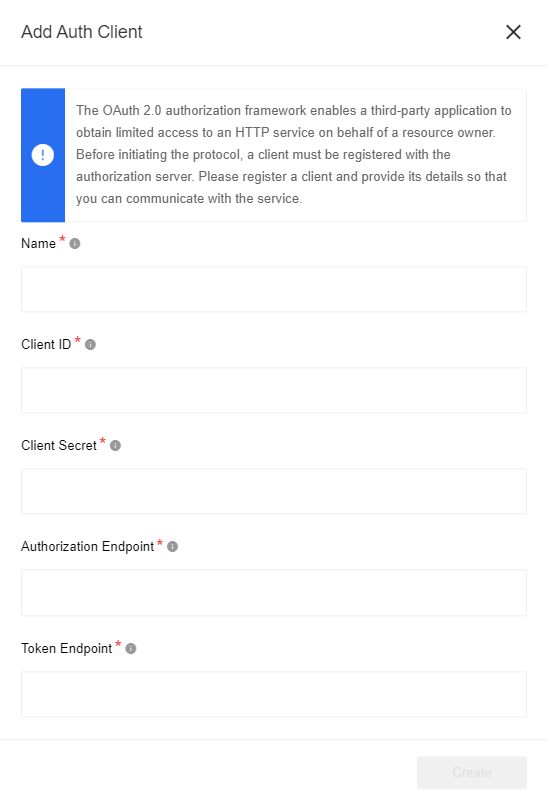
You would need to define four variables here:
- Client ID - your OAuth client key, meaning the Consumer Key.
- Client Secret - your OAuth client secret, meaning the Consumer Secret.
- Authorization Endpoint - The authorization endpoint is used to interact with the resource owner and obtain an authorization grant. For production use
https://login.salesforce.com/services/oauth2/authorize, for sandbox -https://test.salesforce.com/services/oauth2/authorize. - Token Endpoint - The token endpoint is used by the client to obtain or refresh an access token. For production use
https://login.salesforce.com/services/oauth2/token, for sandbox -https://test.salesforce.com/services/oauth2/token.
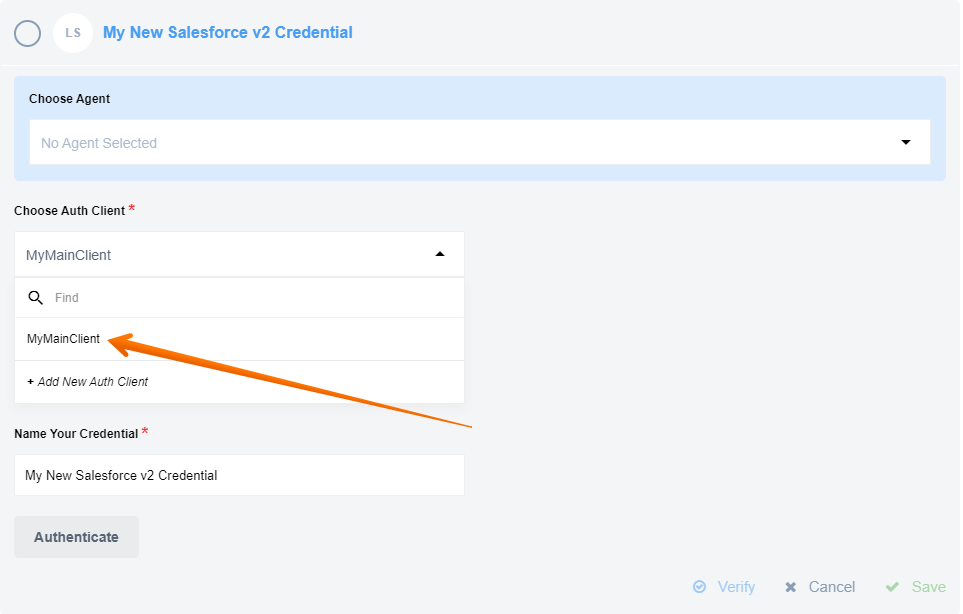
Here you can see how to select an existing client:
For more information pleas read our Secrets feature article.
Click here to learn more about the elastic.io iPaaS
