Passthrough Feature
This document introduces the passthrough feature, explains why would you use it, and gives a real-life example on how to use it.
What is passthrough
Most components in an integration flow receive, process and send data. Incoming data typically differs from the outgoing one, so the last step may receive a message without even a small trace of the initial data. If you want a component to map data other than what it receives from the previous step, you can use the passthrough feature.
Passthrough enables the data re-usability along the integration flow; meaning we can re-use and re-mapp again - nothing is lost. This feature enables mapping of the data from non-adjacent steps. Thanks to this, you can use the passthrough feature for a content enrichment purposes.
With this feature enabled you can pass-it-through the data from the component not only to the next step but to the step after that and thereafter. This means you can use and reuse the data of any particular step along with the integration flow several times.
Basically, passthrough maintains copies of all messages per step in the flow, and adds them to each following message. This way, data received by Step 4 will contain the message sent by Step 3, and a special section with the messages received by Step 1, Step 2 and Step 3. Here is how it looks schematically:
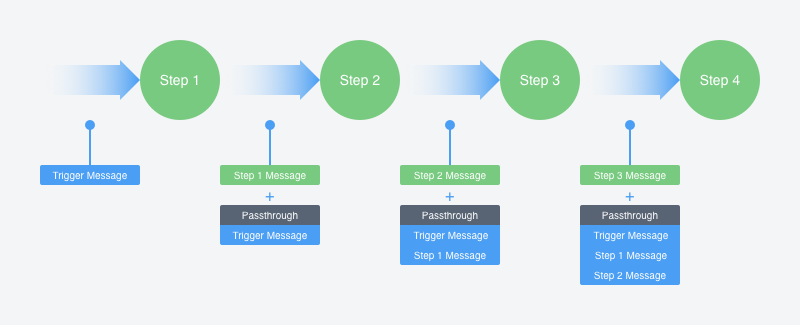
The schematics above shows the passthrough feature in the flow. Without this feature the Step 4 reads and processes the data sent by Step 3, but you can configure it to choose a messages from any other previous steps, if required.
Passthrough Usage
An ability to access the data on different steps of the integration flow and combine them into one outgoing message is an important advantage for many integration use-cases. Here are some scenarios when the passthrough feature makes a significant difference.
- As an integrator you want to retrieve the data from more than one external resource and combine it into one outgoing message to store it in your desired storage. Without the passthrough feature you would need to retrieve the data separately from different resources, synchronize them and store in the storage. For this you would definitely need to use more than one integration flow and make sure not overwrite it every time.
- As an integrator you would like to retrieve the data at least two times from the third party resource due to limitations of the third party API abilities. Without the passthrough you would need to use two different integration flows and somehow synchronize the information between them.
Let us have a look into an example on how the passthrough feature can help to solve a real-life integration dilemma.
Real-life Example
In this use case, we want to transfer Orders from Google Spreadsheets into Salesforce Orders. We aim to have all information about the orders found in Spreadsheet synchronized in the Salesforce. In fact, it makes absolutely no difference whether Spreadsheet will be the source or it will be a database or some CRM component. The Spreadsheet example would just be more visual, because we can see the tables themselves and the relationship between them.
Since within any database, the relationship between Orders and Items are formed by one-to-many or many-to-many relations, services form an additional table OrderItems from which you can understand which order refers to Item. As an example, we will use two tables for Orders and for OrderItems:
- When we query the list of orders from Orders sheet we get information about orders such as IDs, the Update and Index dates of orders, descriptions, etc. But this answer does not include information about specific items included in those orders.
- To get items (listOrderItems) we need to store the order IDs and then use them to query the items belonging to those orders.
- Then we need to combine both: Orders and items (OrderItems) together to store this information into Salesforce. But, without having the order IDs, we can not get item IDs.
We can address the above-presented scenario in two ways:
- We use multiple flows (the sequential mechanism) and external ID to pass the information gradually or
- Use the passthrough feature to merge all the information on-the-fly.
Sequential mechanism
In the imaginary unlucky case when we didn’t have passthrough, we would have to create a second flow for second query. There may be problems of synchronization between the two flows, which we can try to solve with rebounds. The system tries to get the external IDs of those orders before asking for items. If the IDs are still not there it will try again later and later. However, there is always a limit on how many times the system can try and that many connections can fail if one end of integration reports a timeout.
We need a solution which would not fail and would do it in one go! Solution to this dilemma is provided by the passthrough feature.
Using the passthrough
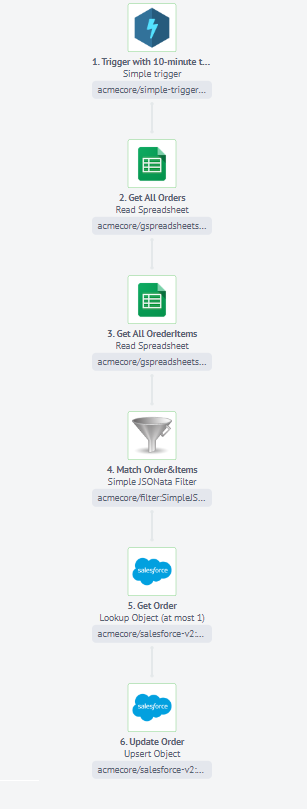
Using the passthrough features we can get the list of Orders and list of the OrderItems in two separate steps. Let’s take a look at our flow:
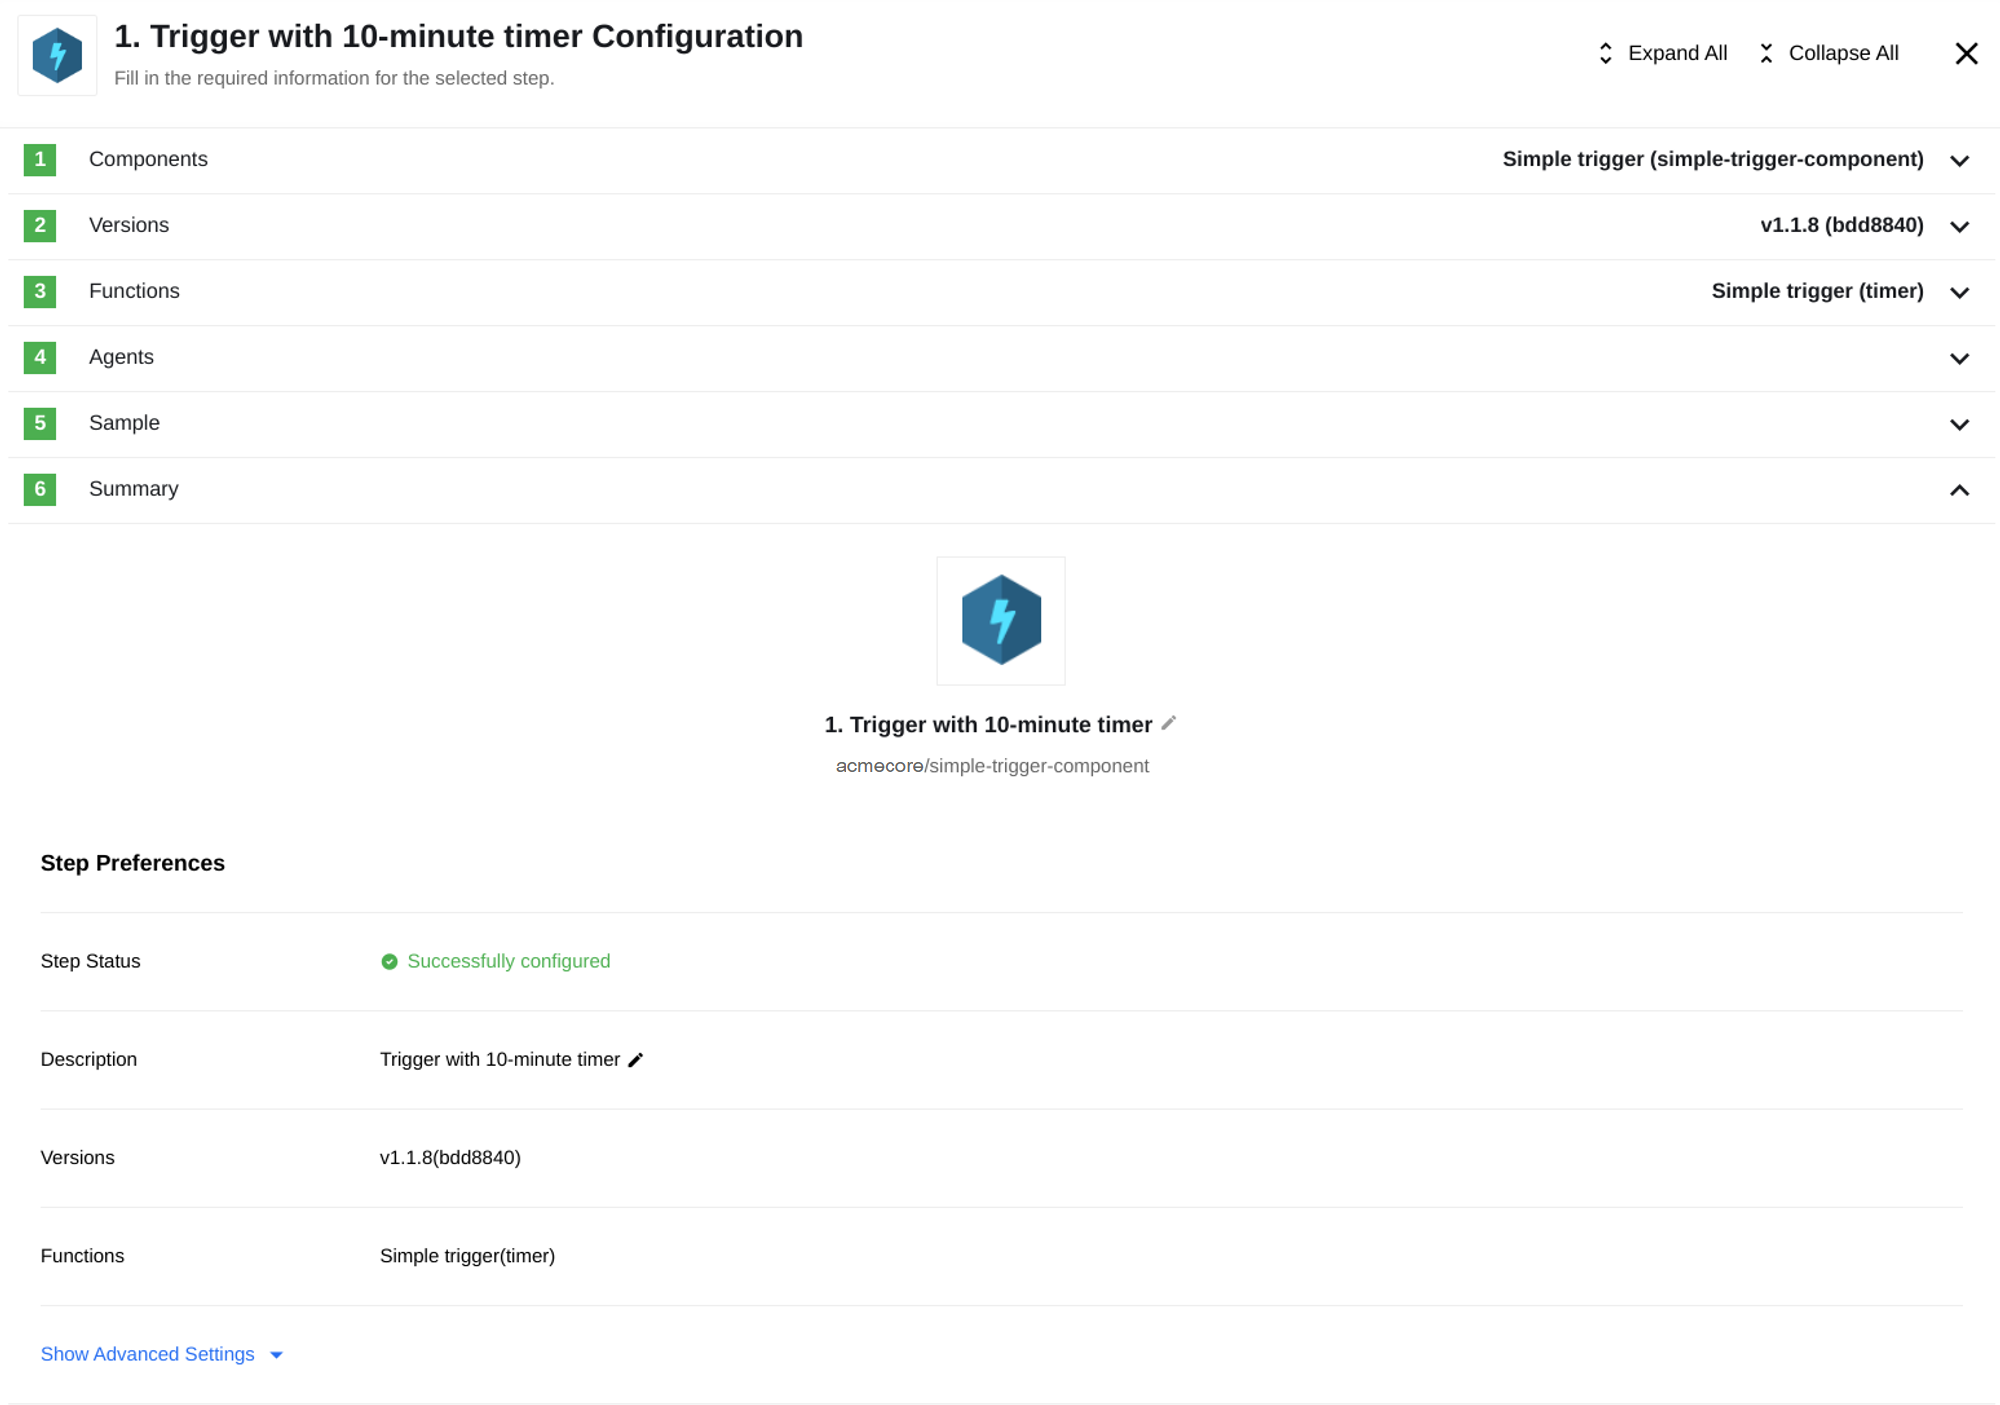
Step 1
In the first step we use Simple trigger component with a preset timer that will start the flow.
Step 2
In the second step we use Google Spreadsheet component that accesses the Orders table and retrieves data for all Orders.
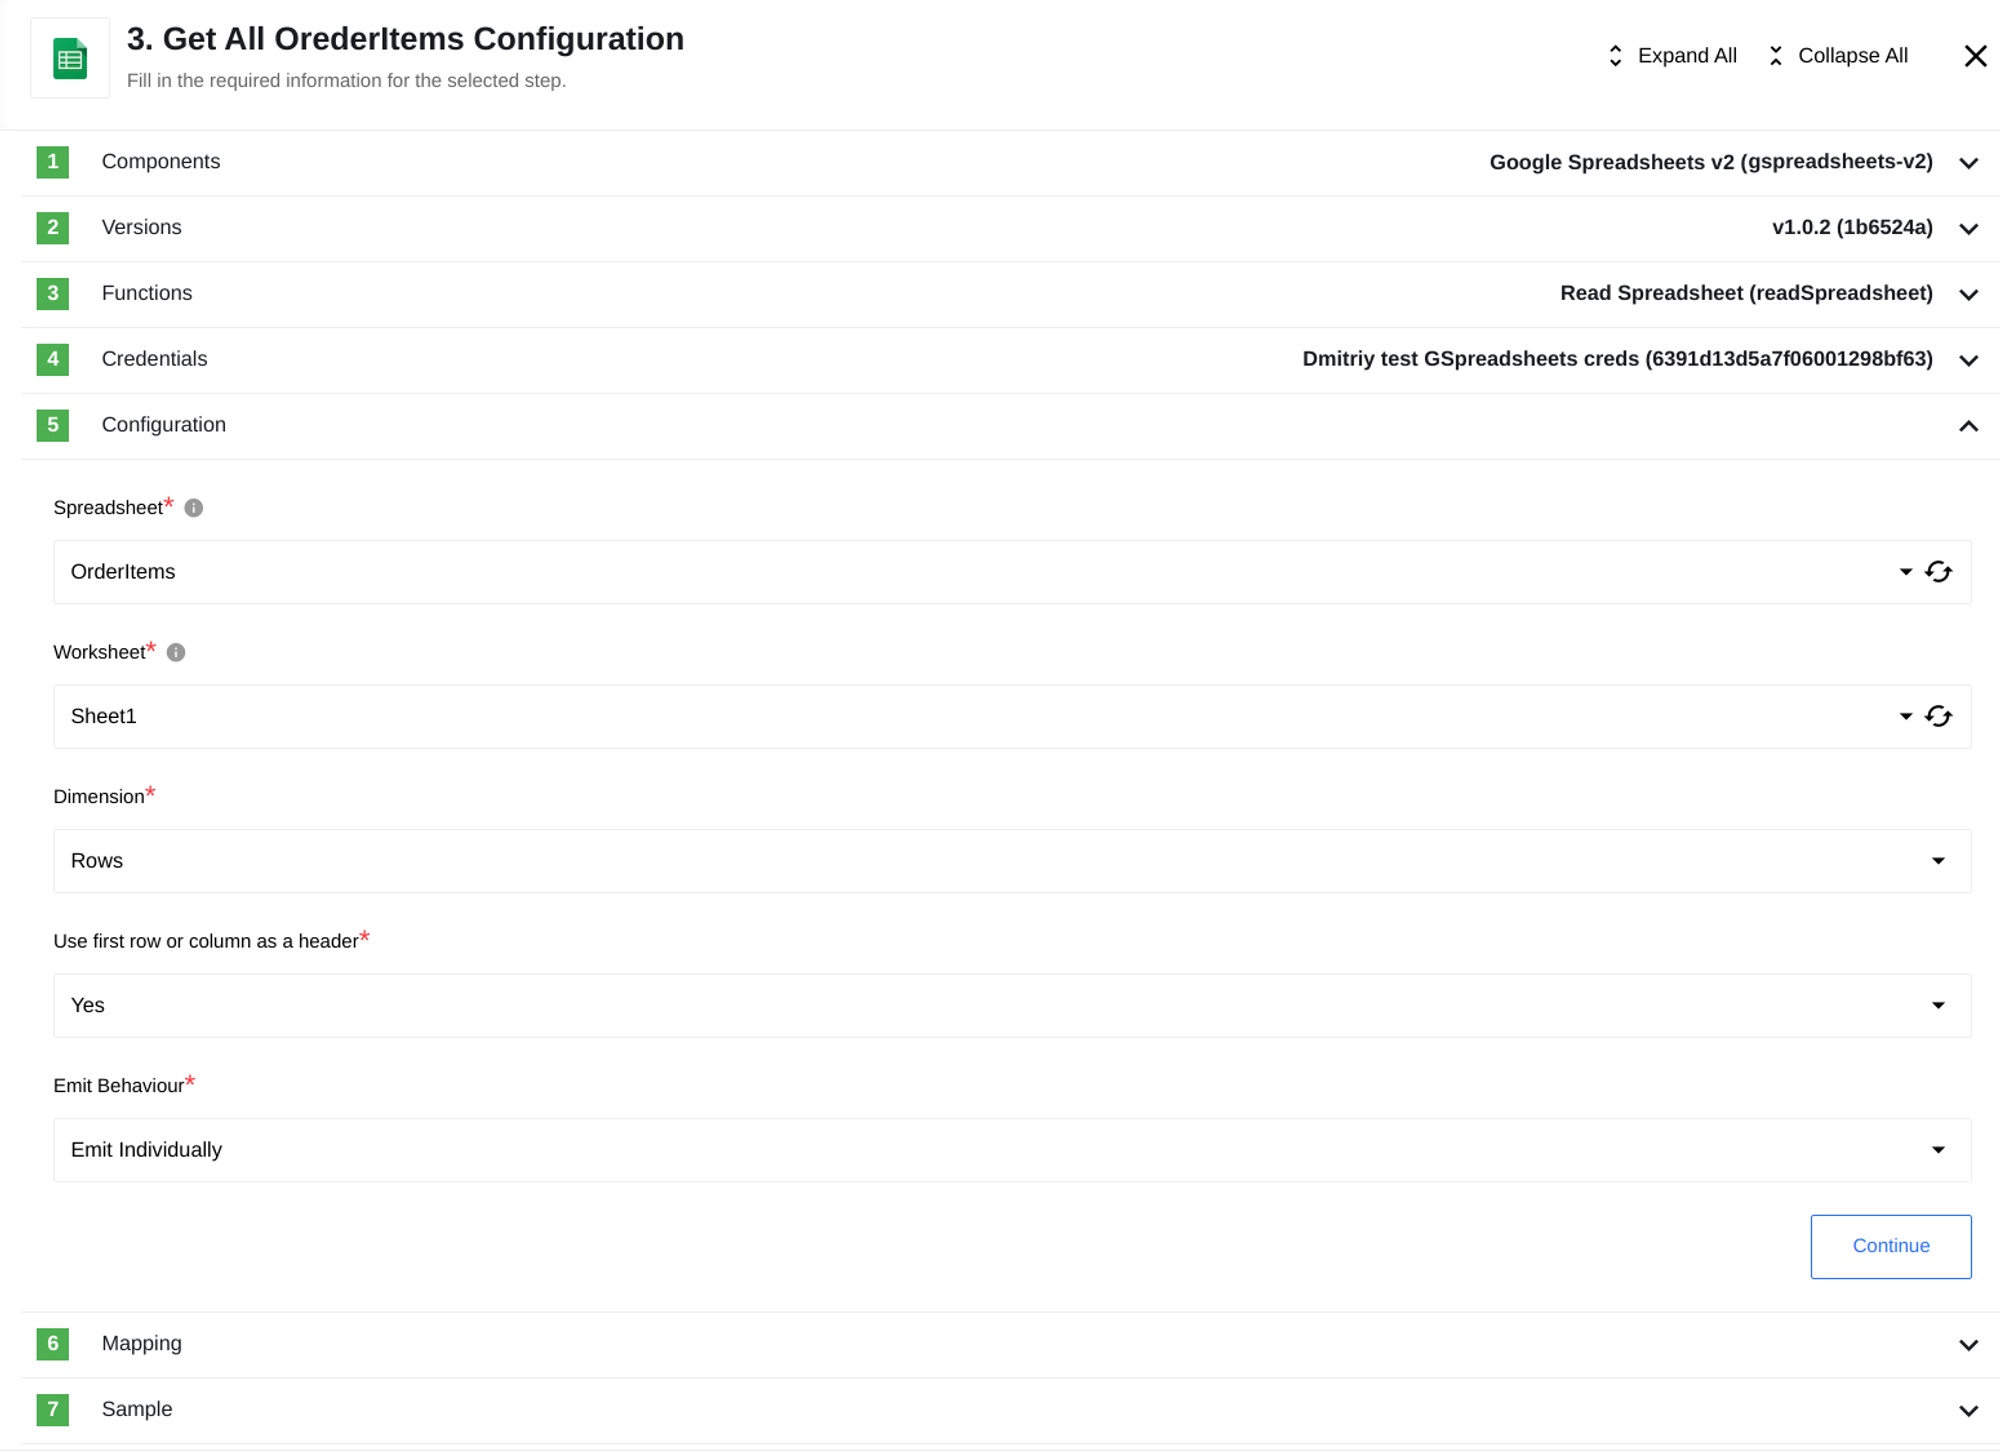
Please Note: With the function Emit Behaviour - Emit Individually, we have the ability to immediately divide the received array of Orders into individual messages and work with each message individually in the next step
Step 3
In this step in the same way as in the previous step we use Google Spreadsheet component that accesses the OrderItems and retrieves data for all Orders.
Step 4
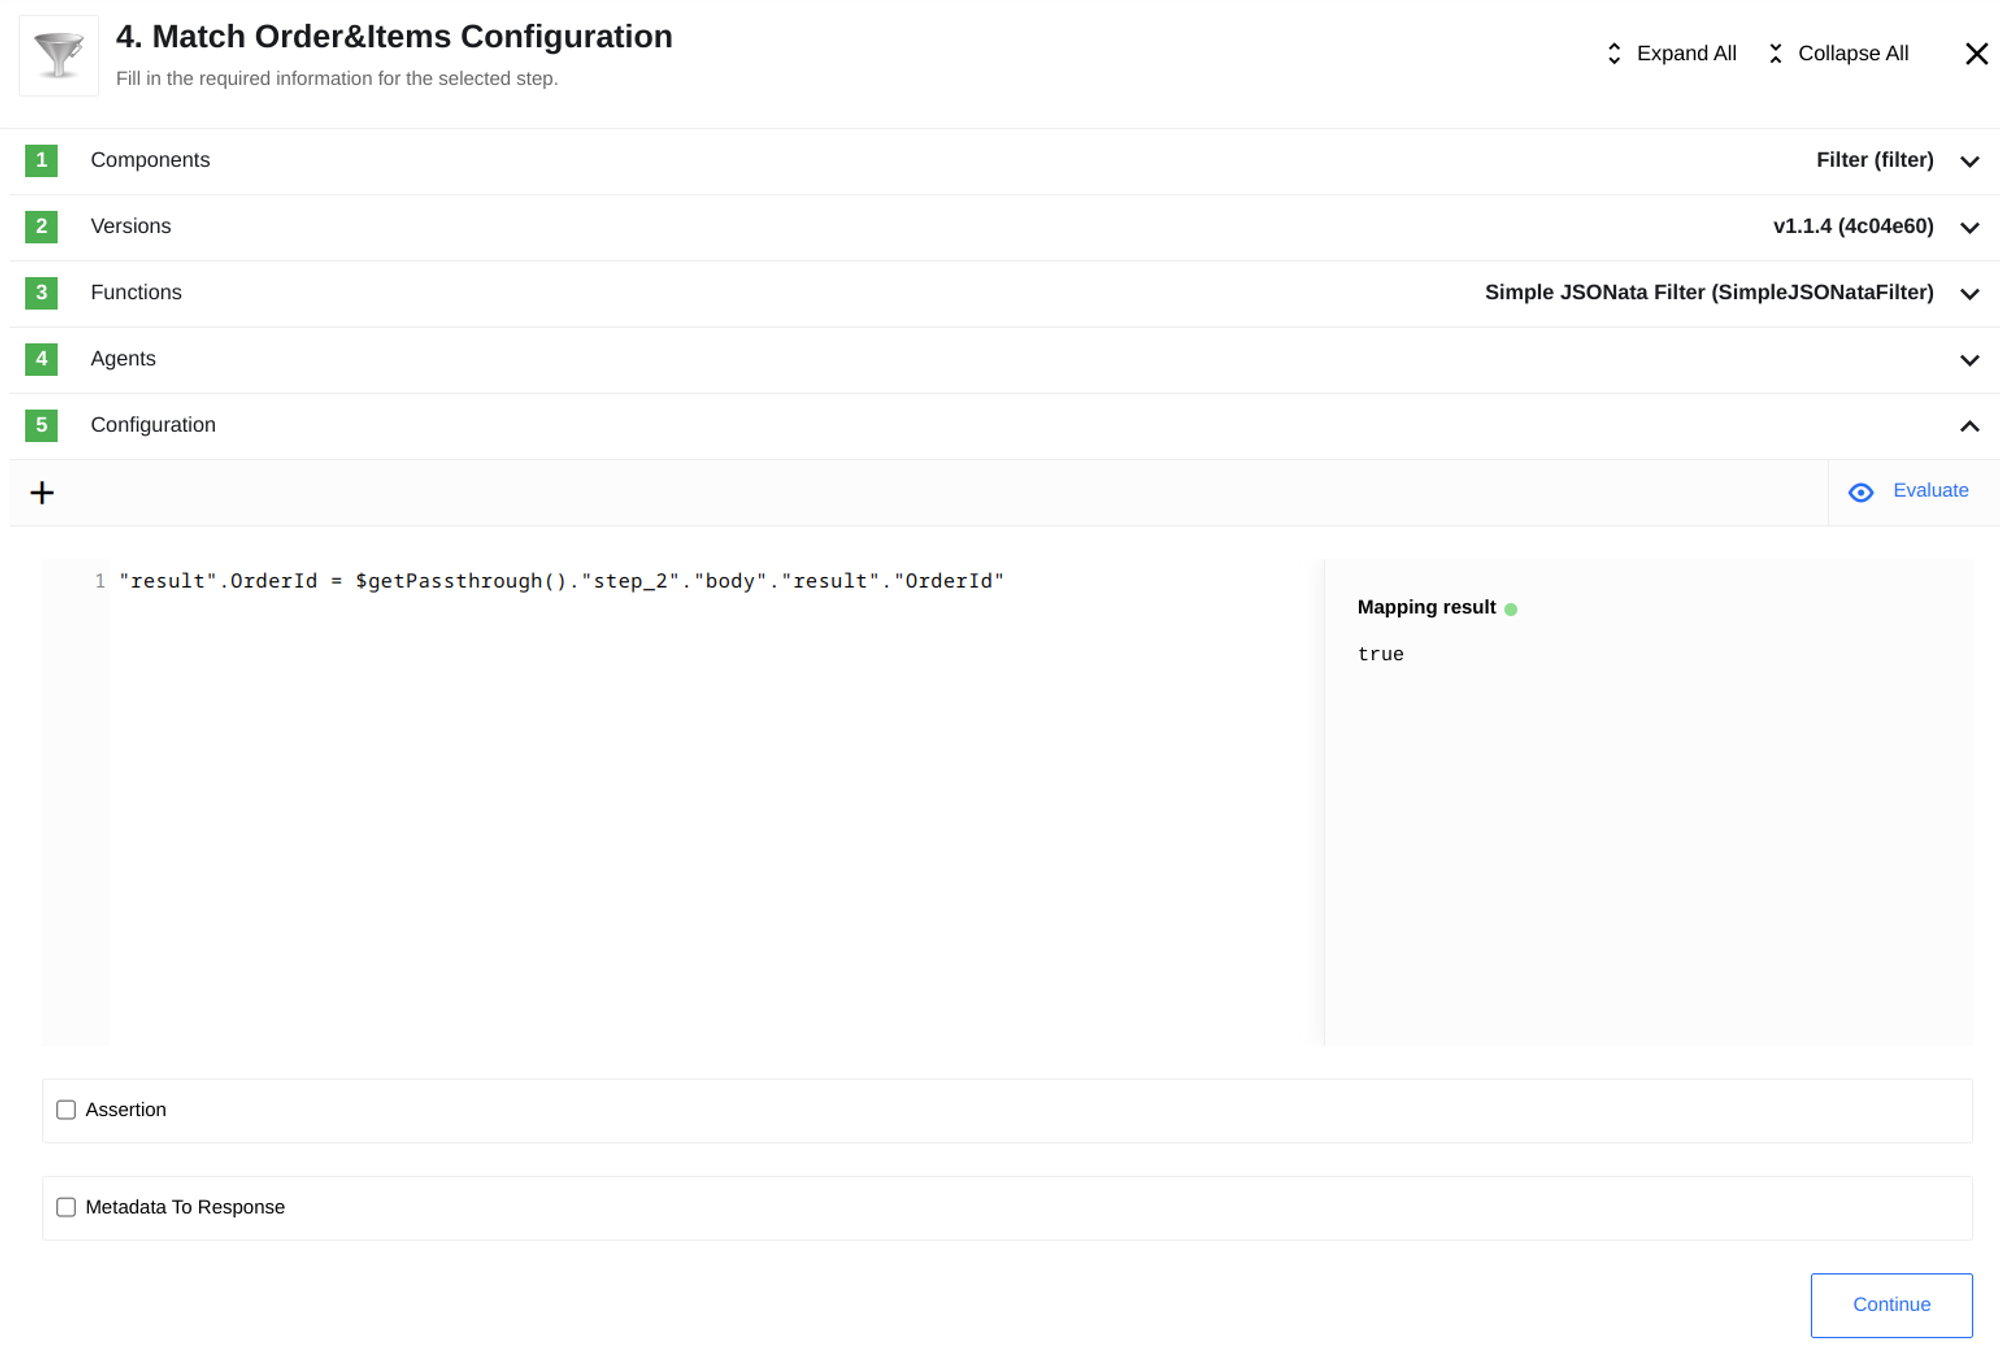
In this step Filter component allows you to match Order ID’s from the Orders table with Order ID’s from the OrderItems table.
Please тote: If you use DB instead of Google Spreadsheets, you won’t need filtering step, because there is possibility to query records with regard to ID at once.
In this step, we already use the passthrough feature to match the data from the tables
Step 5
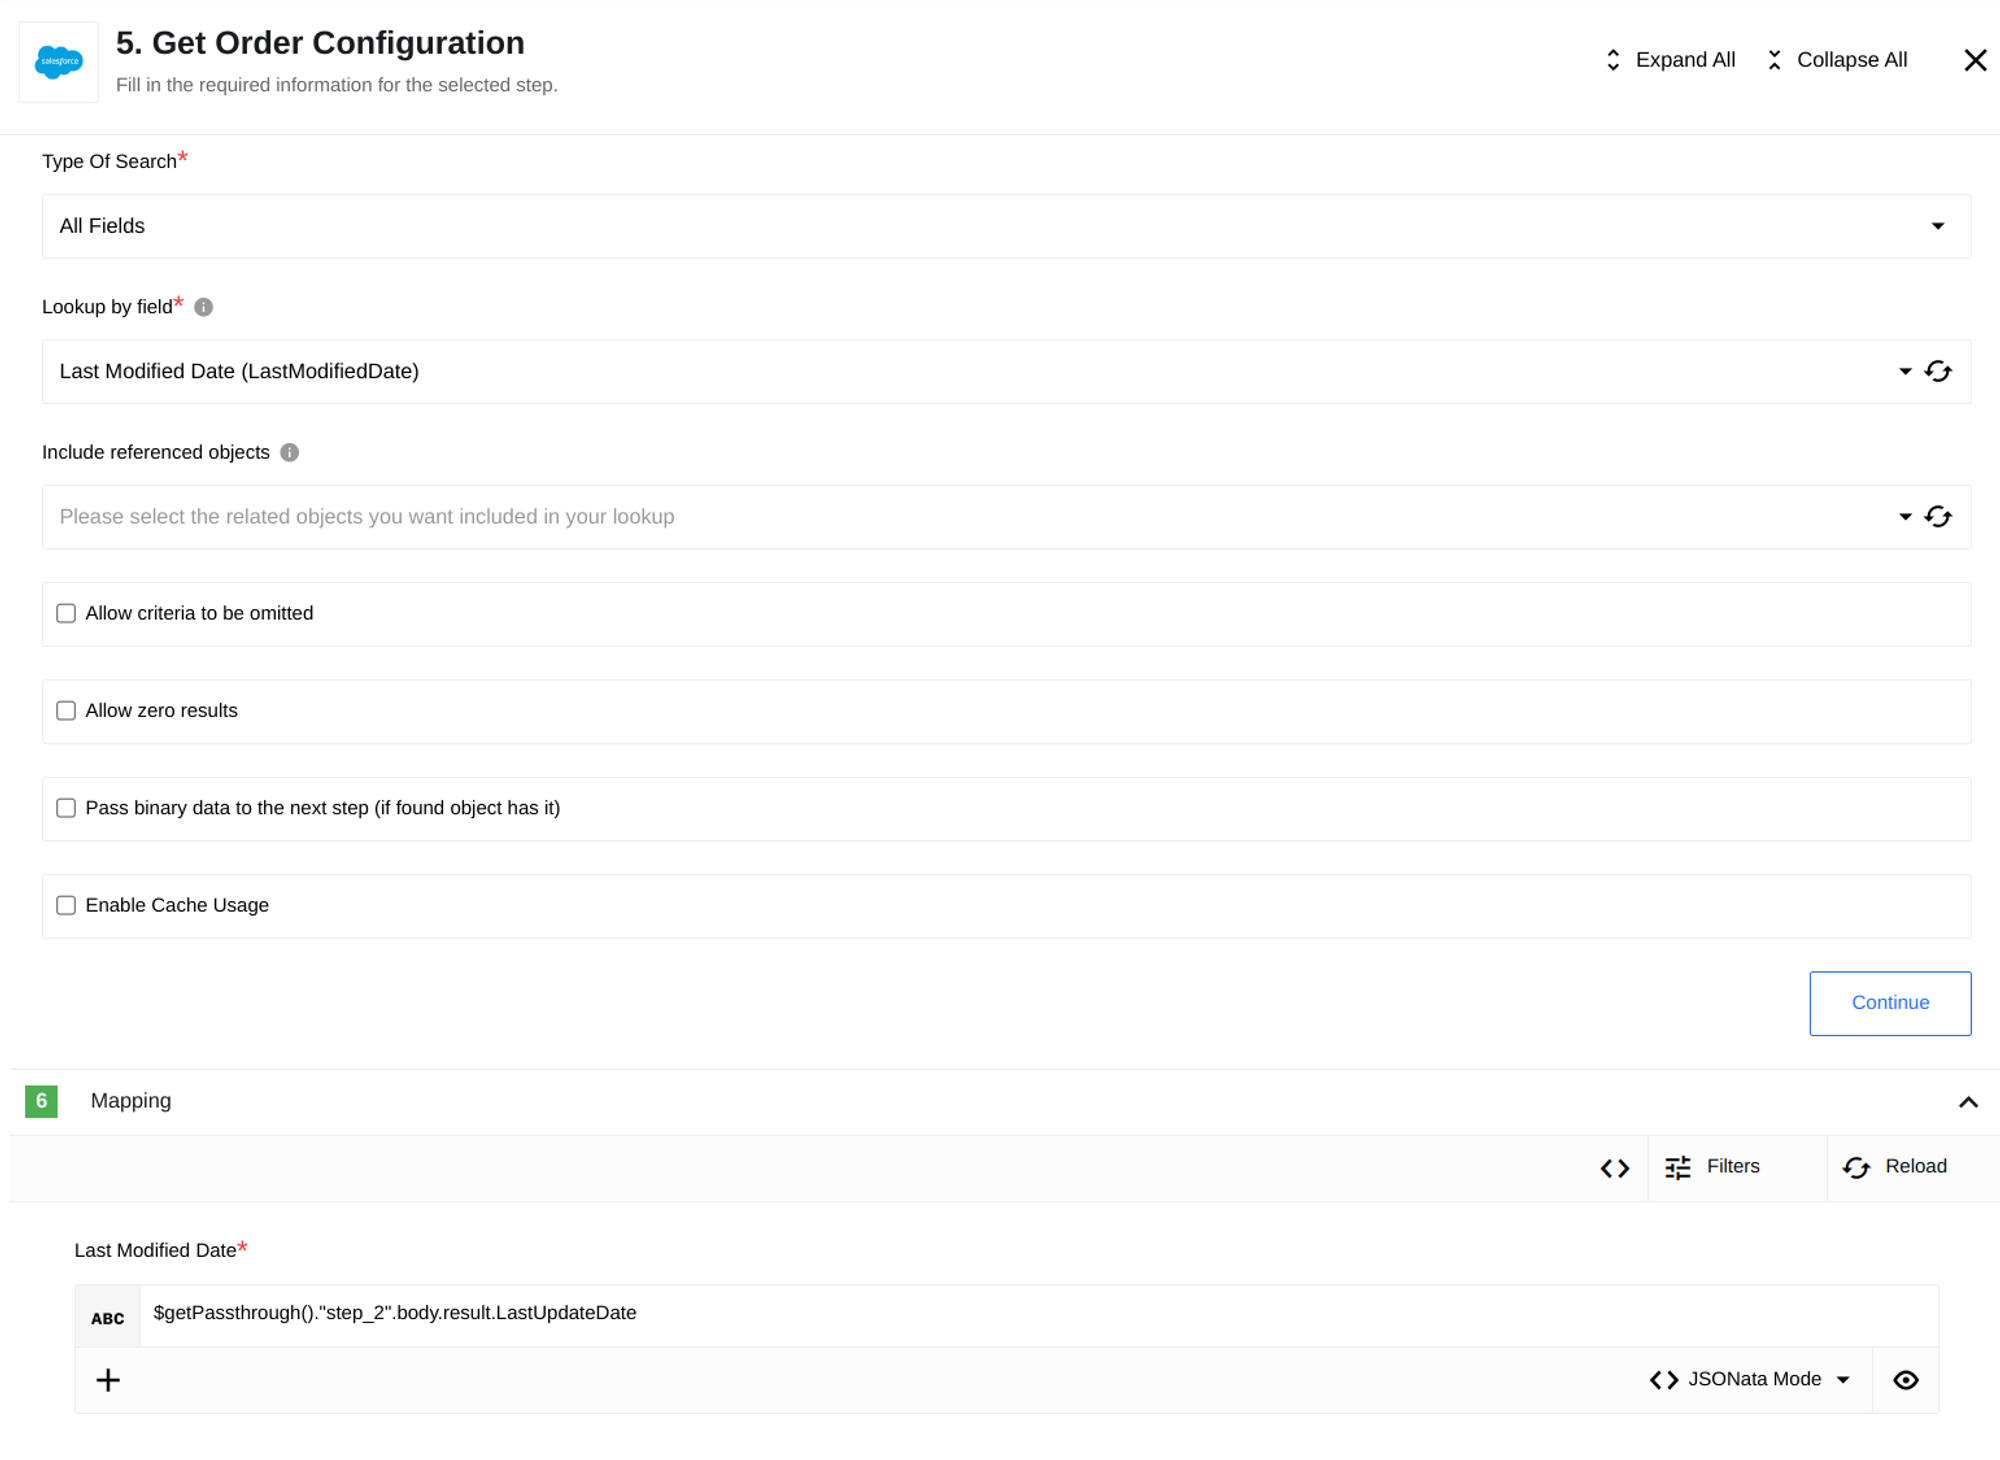
Now we are using Salesforce component that retrieves orders from Step 2 via passthrough by update date.
Step 6
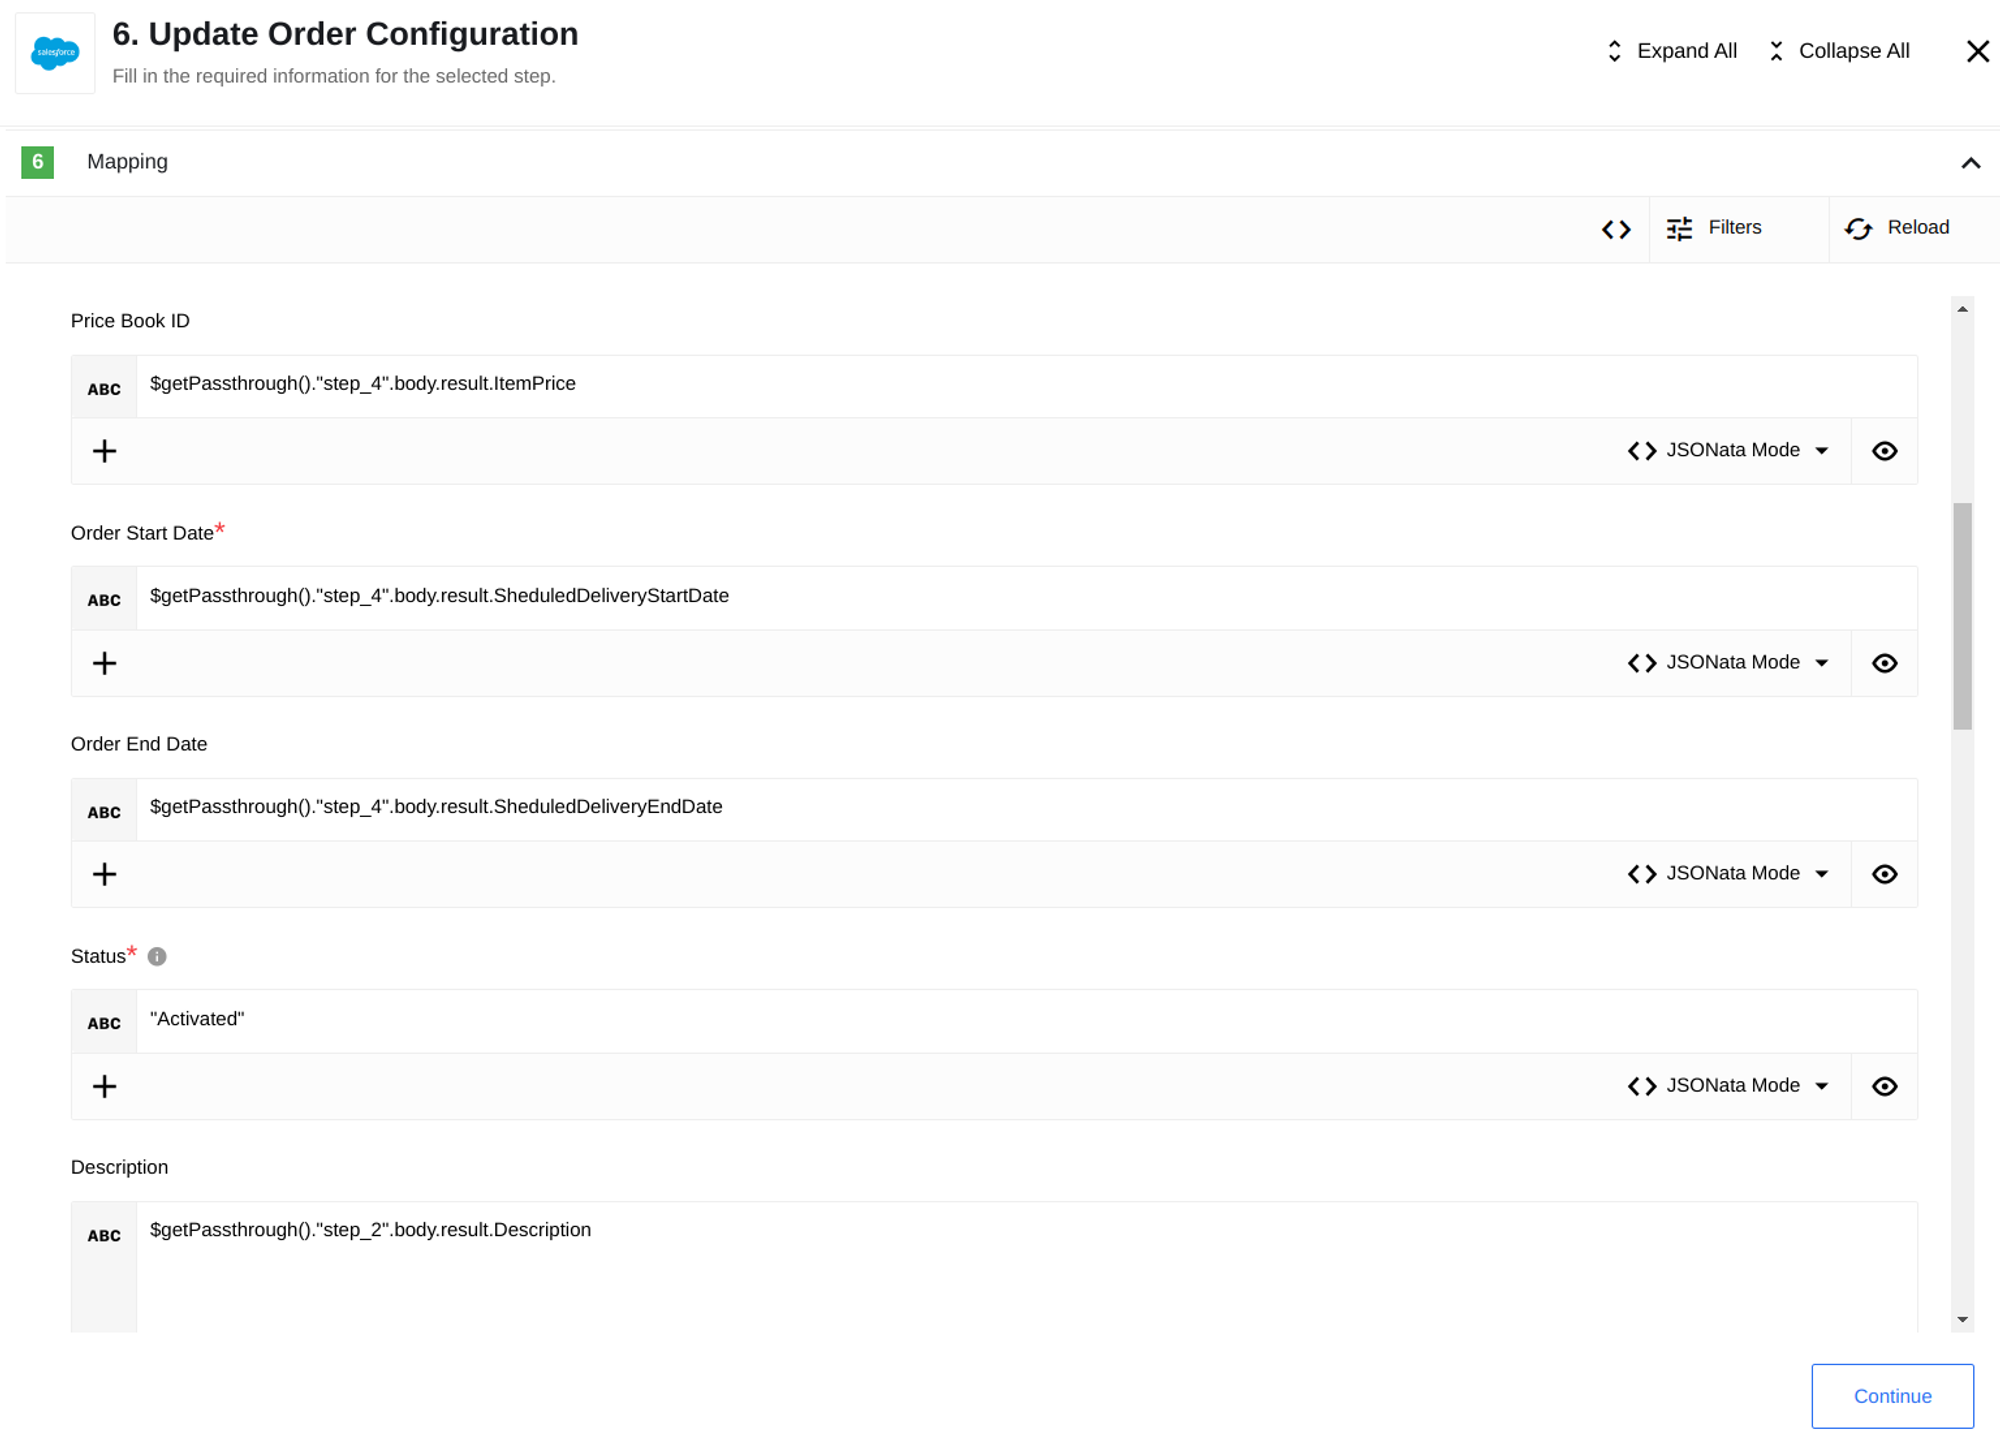
In the last step we are using Salesforce component again. This time it retrieves order items from Step 3 via passthrough, adding data on scheduled delivery date, shipping date, item price and other necessary parameters.
Summary
With the passthrough feature, we cut the complexity of the task in half, or to be more precise, we don’t need to create a second flow to separate the processing of orders and items. It’s important to note that this is one of many examples of using this feature. In most cases, using the passthrough feature will reduce the complexity of the task and the time it takes to solve it.
Disable passthrough
In larger integration flows having large body of passthrough message can have an adverse affect. The accumulating passthrough message can quickly create a large overhead and cause out of memory by its own. To avoid this, you can disable the passthrough from any particular step. This would mean the passthrough message will be dropped from that point on and the subsequent steps would not have access to the data from previous steps.
Please note: The passthrough messages will start accumulating again after the particular step where passthrough was disabled.
For this to work the Node.js components must have sailor version 2.6.0+, and Java
component to have sailor version 3.0.0+.
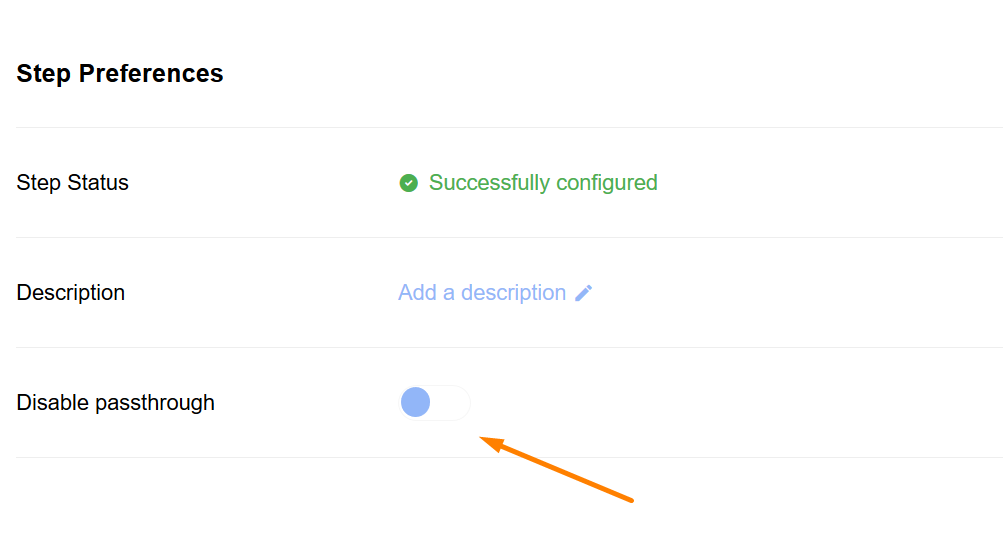
You can disable passthrough during the flow creation/editing via the UI:

