Mapping Data
This article shows how to map the data between integration components to keep them in sync.
An integration flow on elastic.io platform must have at least two components, one trigger and one action. Trigger emits a data for the action component to receive and process it. Between these two components seats the elastic.io data mapper, which maps or matches the incoming data to the specific fields where the next component expects them to receive.
To understand how the data-mapping works in practice visit our tutorials and platform feature sections. We recommend starting from steps-by-step instructions in how to create your first integration flow and creating a webhook flow followed by the data samples articles as an introduction to the data-mapping.
If you have already followed the tutorials you realise that the data-mapping on elastic.io platform is an important part of the integration process which warrants detailed explanation in its own.
Mapping simple values
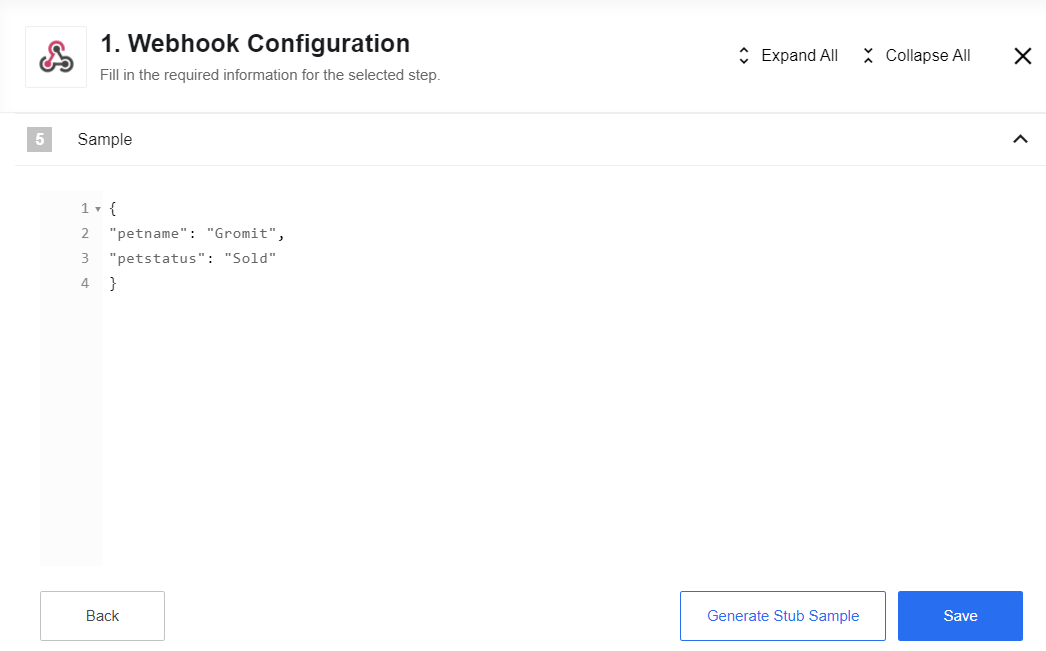
Let us consider a simple scenario when we have an incoming data through the
Webhook component like the following JSON structure.
{
  "name": "Gromit",
  "status": "Sold"
}
You can add this structure manually using the appropriate function:
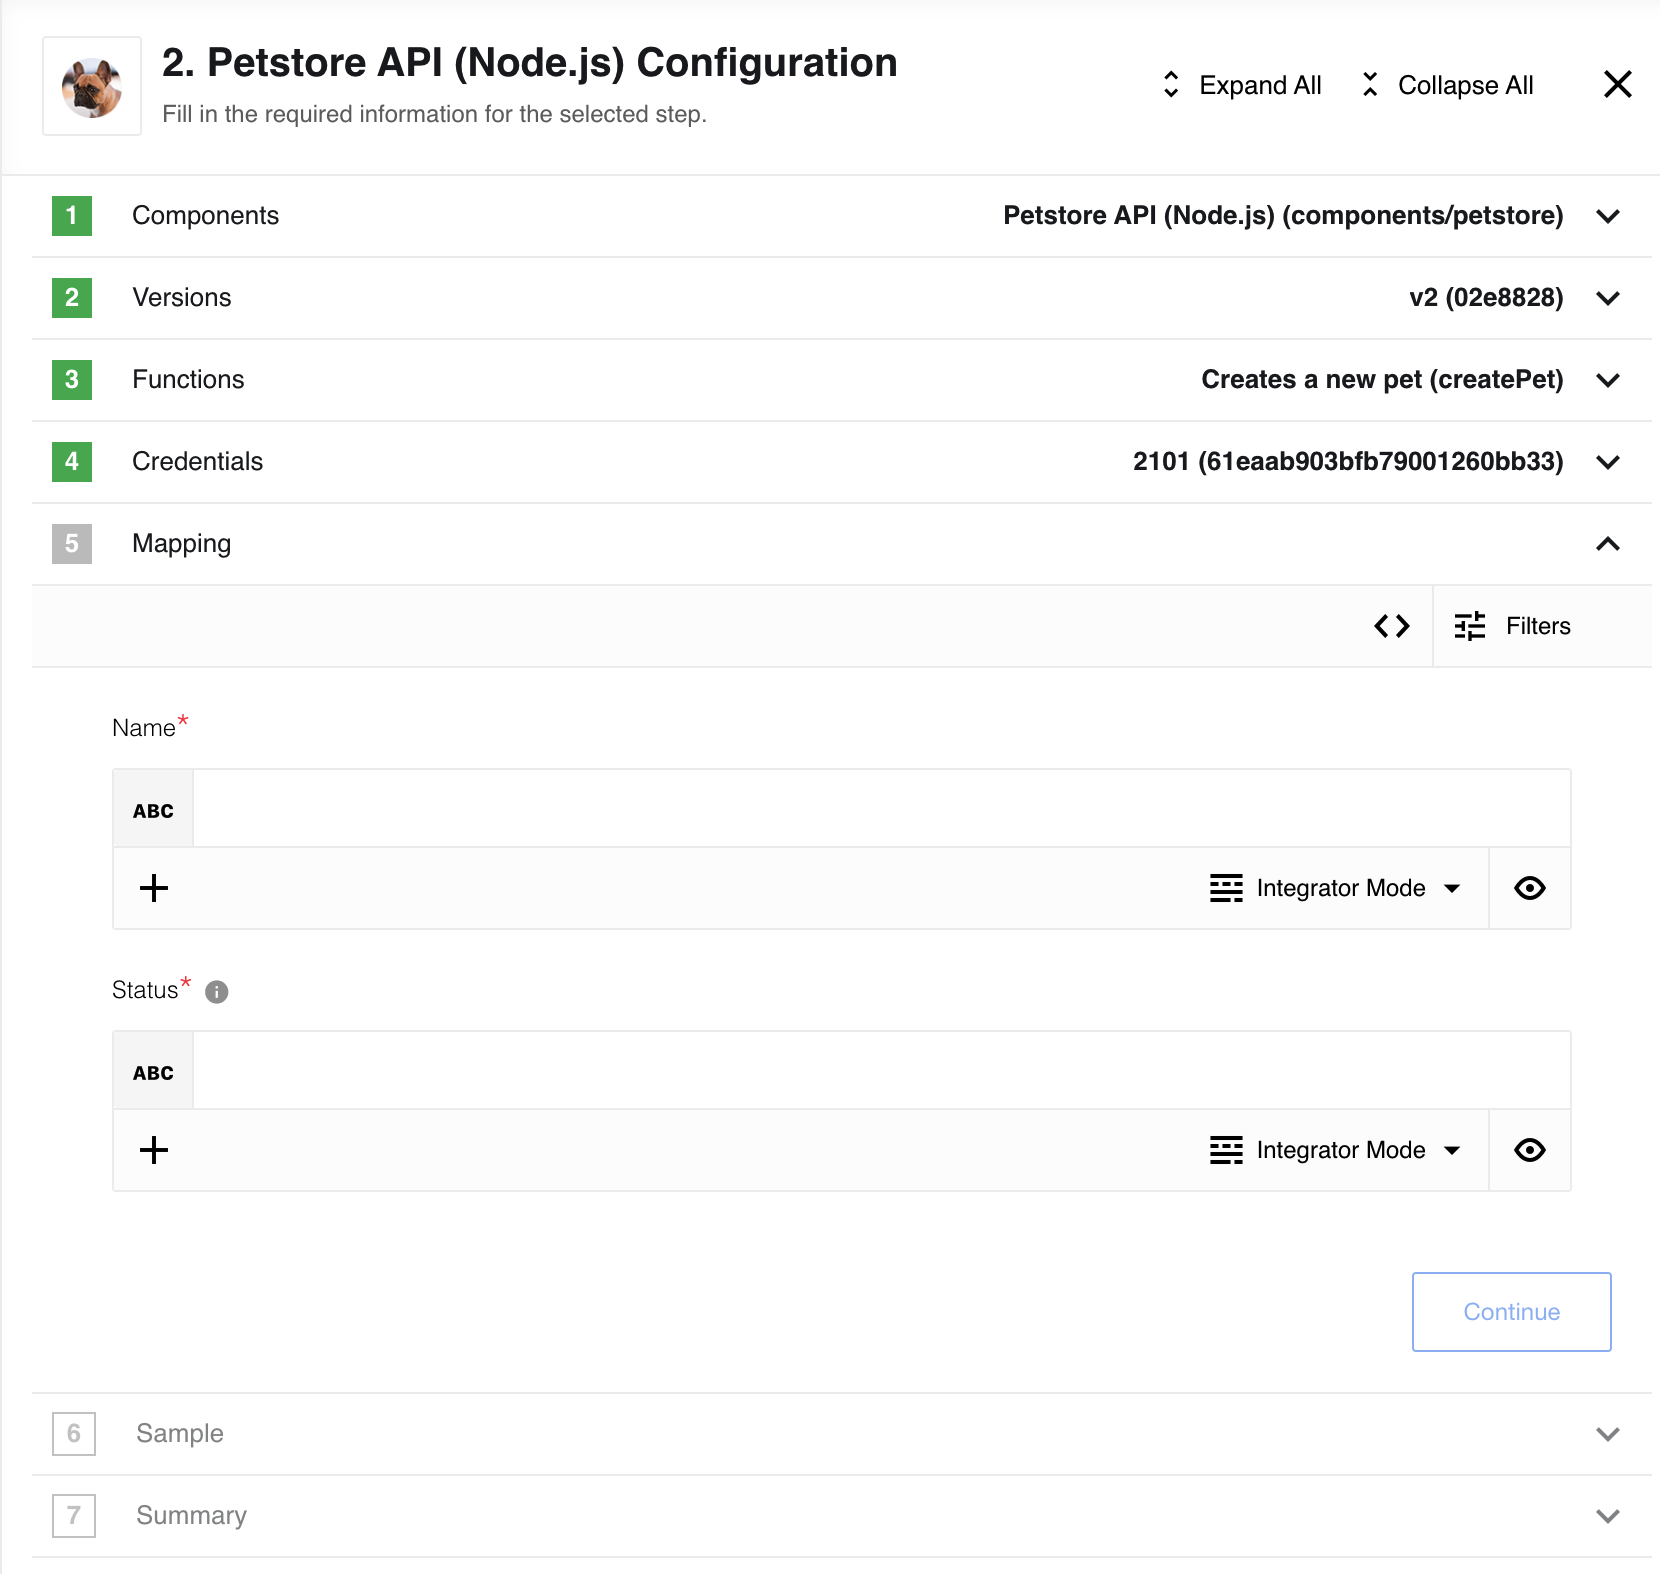
We intend to map these values into outgoing fields in the Petstore component. Let us jump into the integration flow design right at the mapping stage.
The screenshot above shows the stage in integration flow designer where you can do the actual mapping or matching of the values. Here we choose to create a Pet and need to provide values for Name and Status required fields (red asterisks) to proceed further.
Here we will map these required fields using incoming data from the previous step(s).
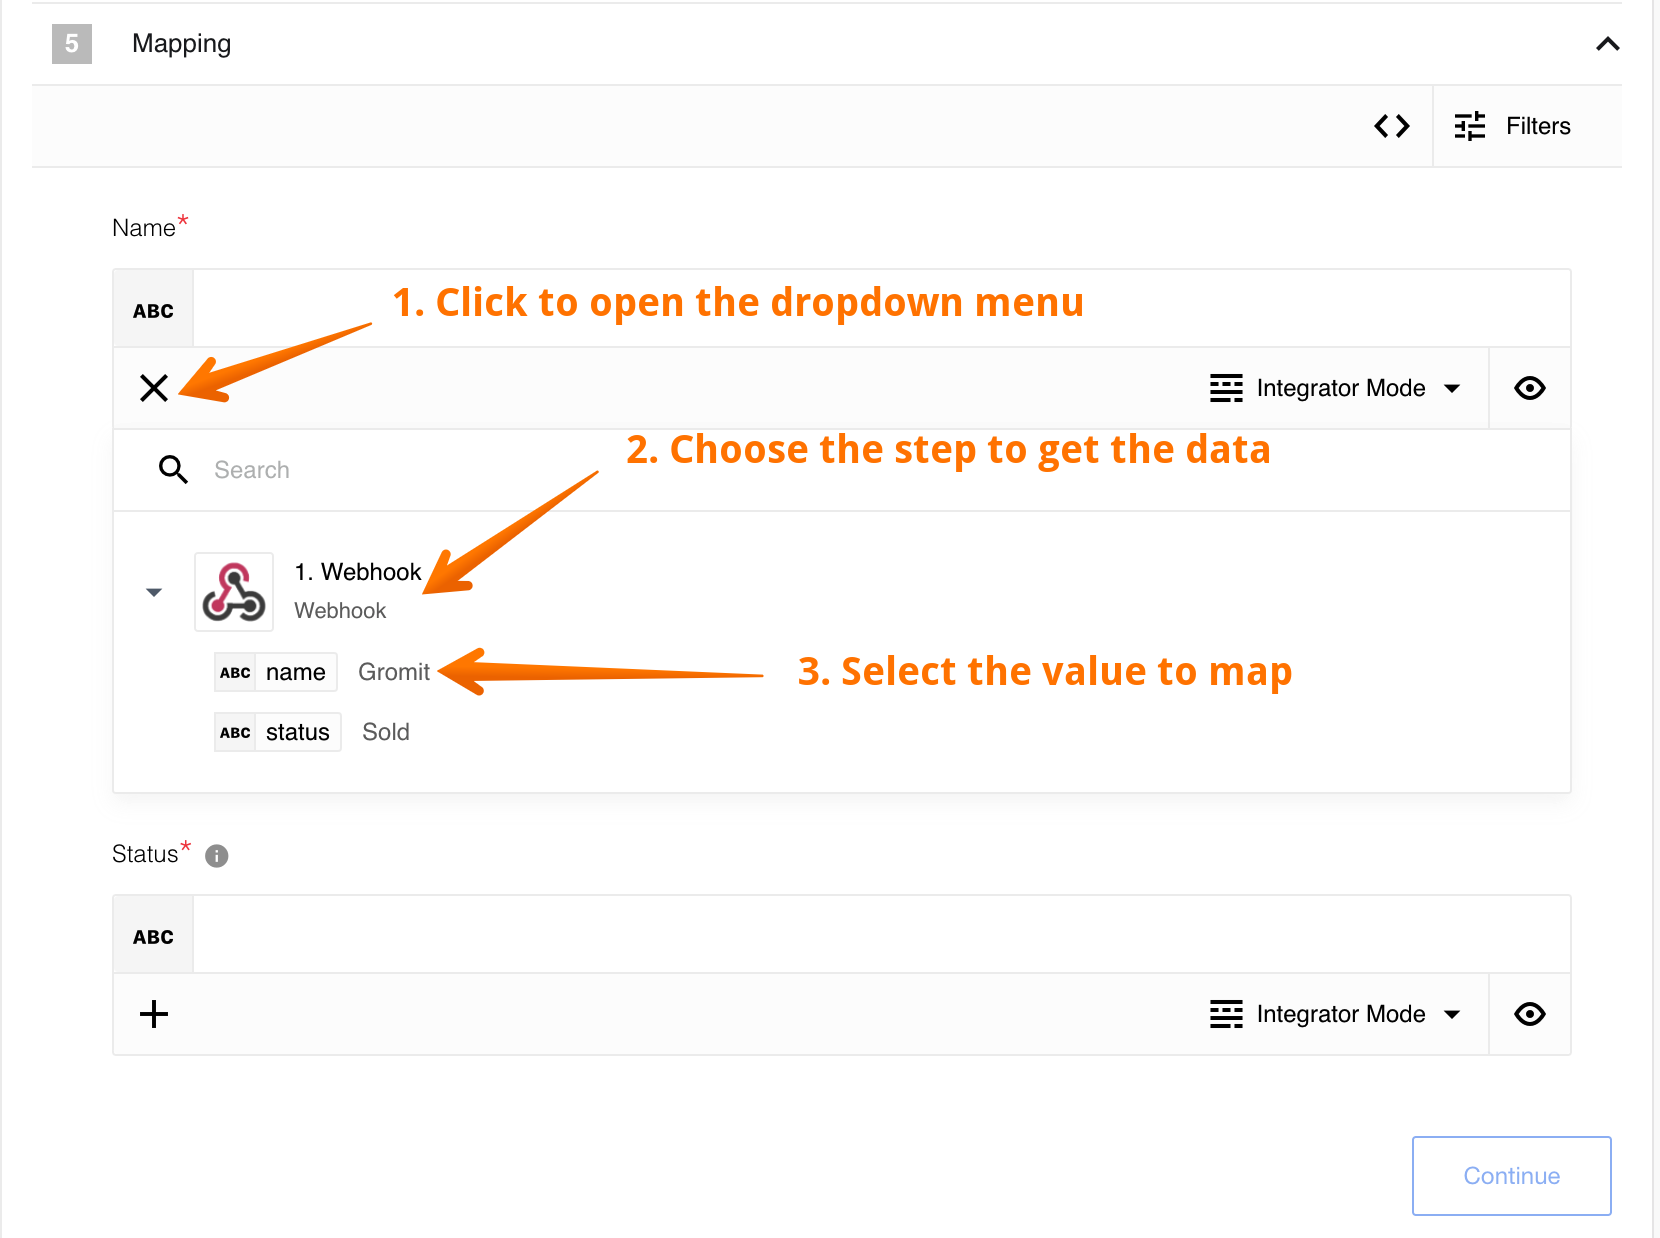
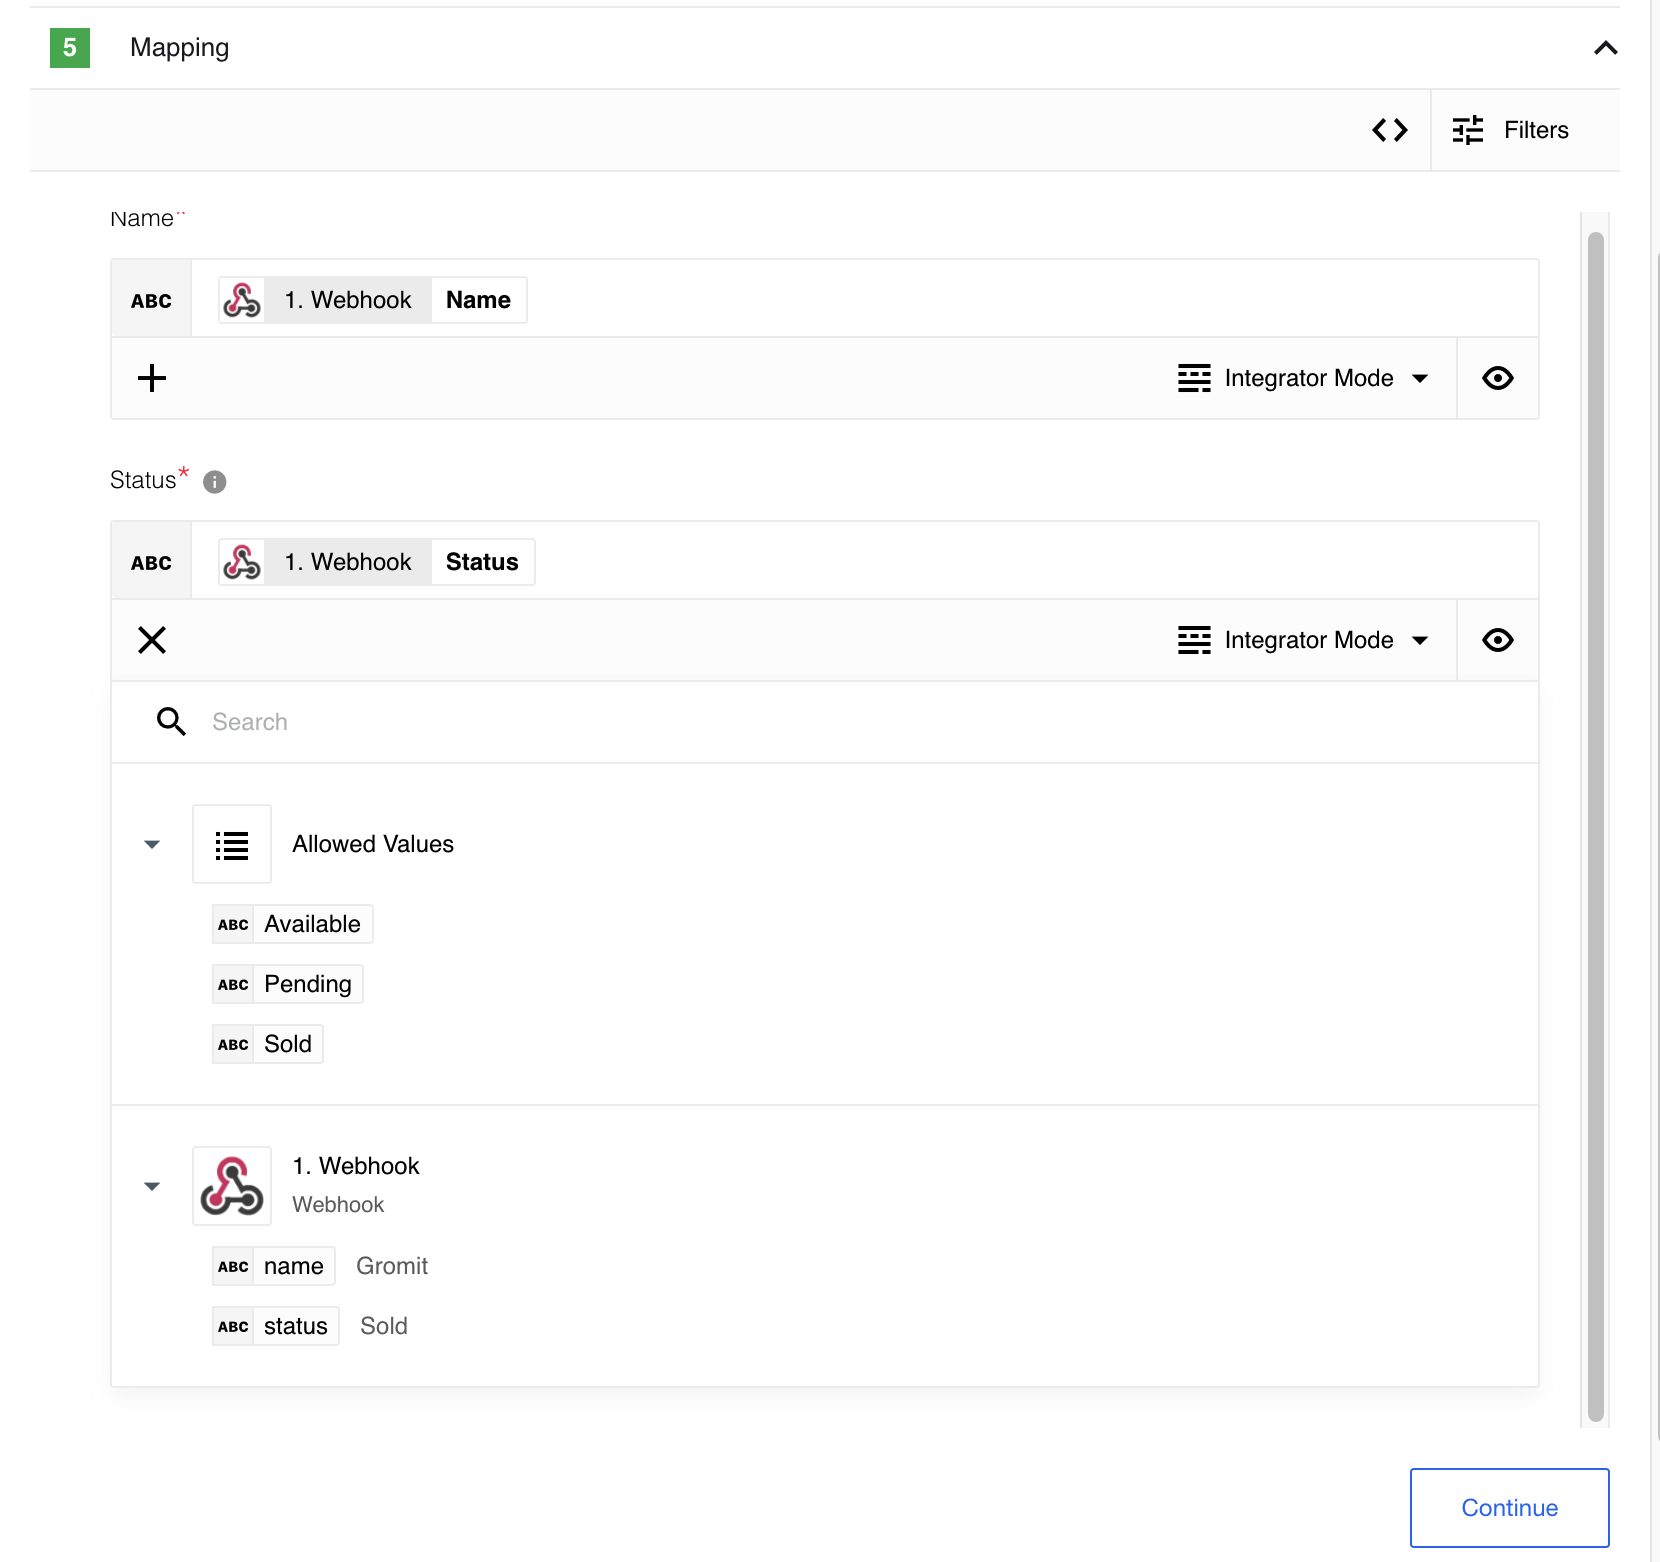
To map the Name field click on cross to open a drop-down menu (1), choose
the step you need (2) and select the matching value from the provided values (3) .
For example, our incoming data has a field name which we match with the Name
field from the Petstore component.
The screenshot above shows the successful mapping result which is Gromit. You
have to click to the Eye button here which shows the successful evaluation result.
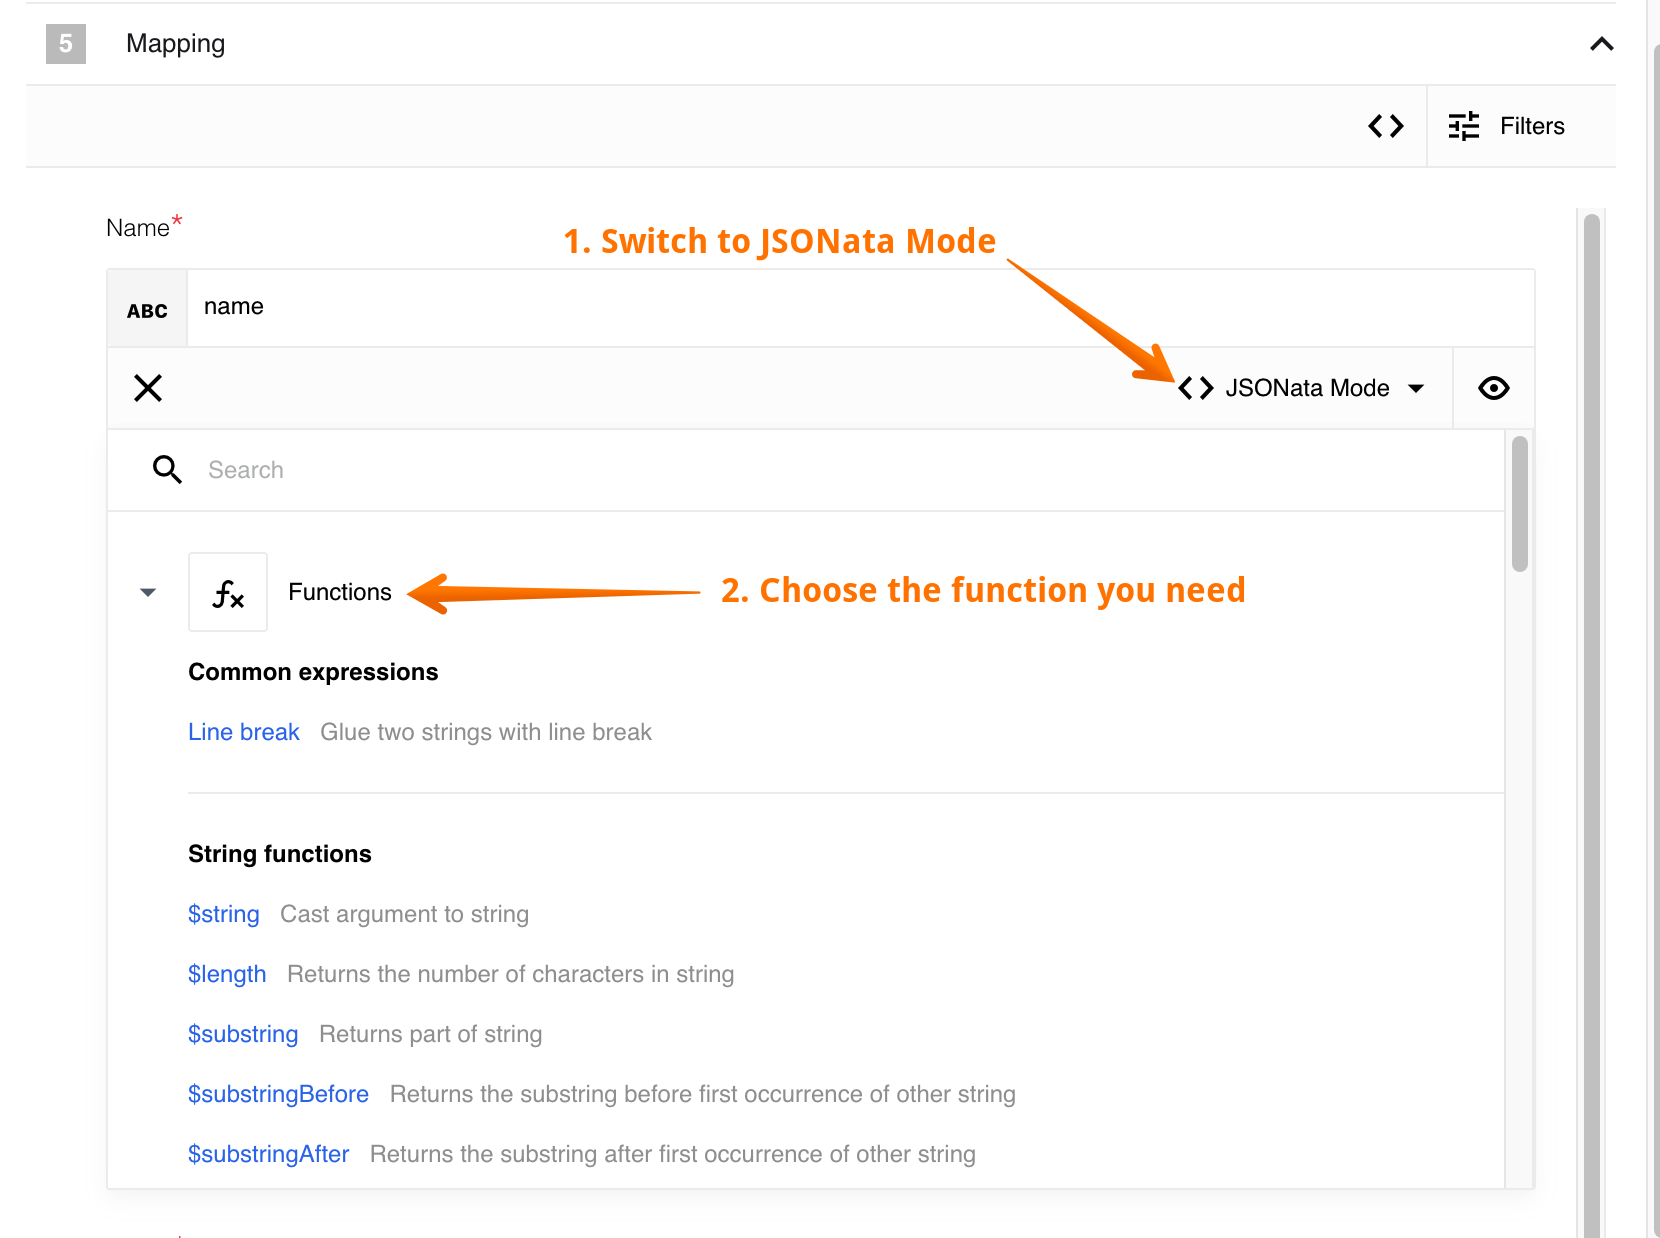
JSONata Mode
Before going further we can check the JSONata Mode here (1). Here you can look under the hood of the JSONata powered mapper and see the list (2) of expressions and functions you can use. We have already used them in the how to create your first integration flow tutorial.
We can match the Status field with the incoming status value as well to
complete the mapping and go forward. Using the Status field as an example,
you can see that there are fields that accept fixed values. In this case,
the Petstore component accepts: available, pending and sold values.
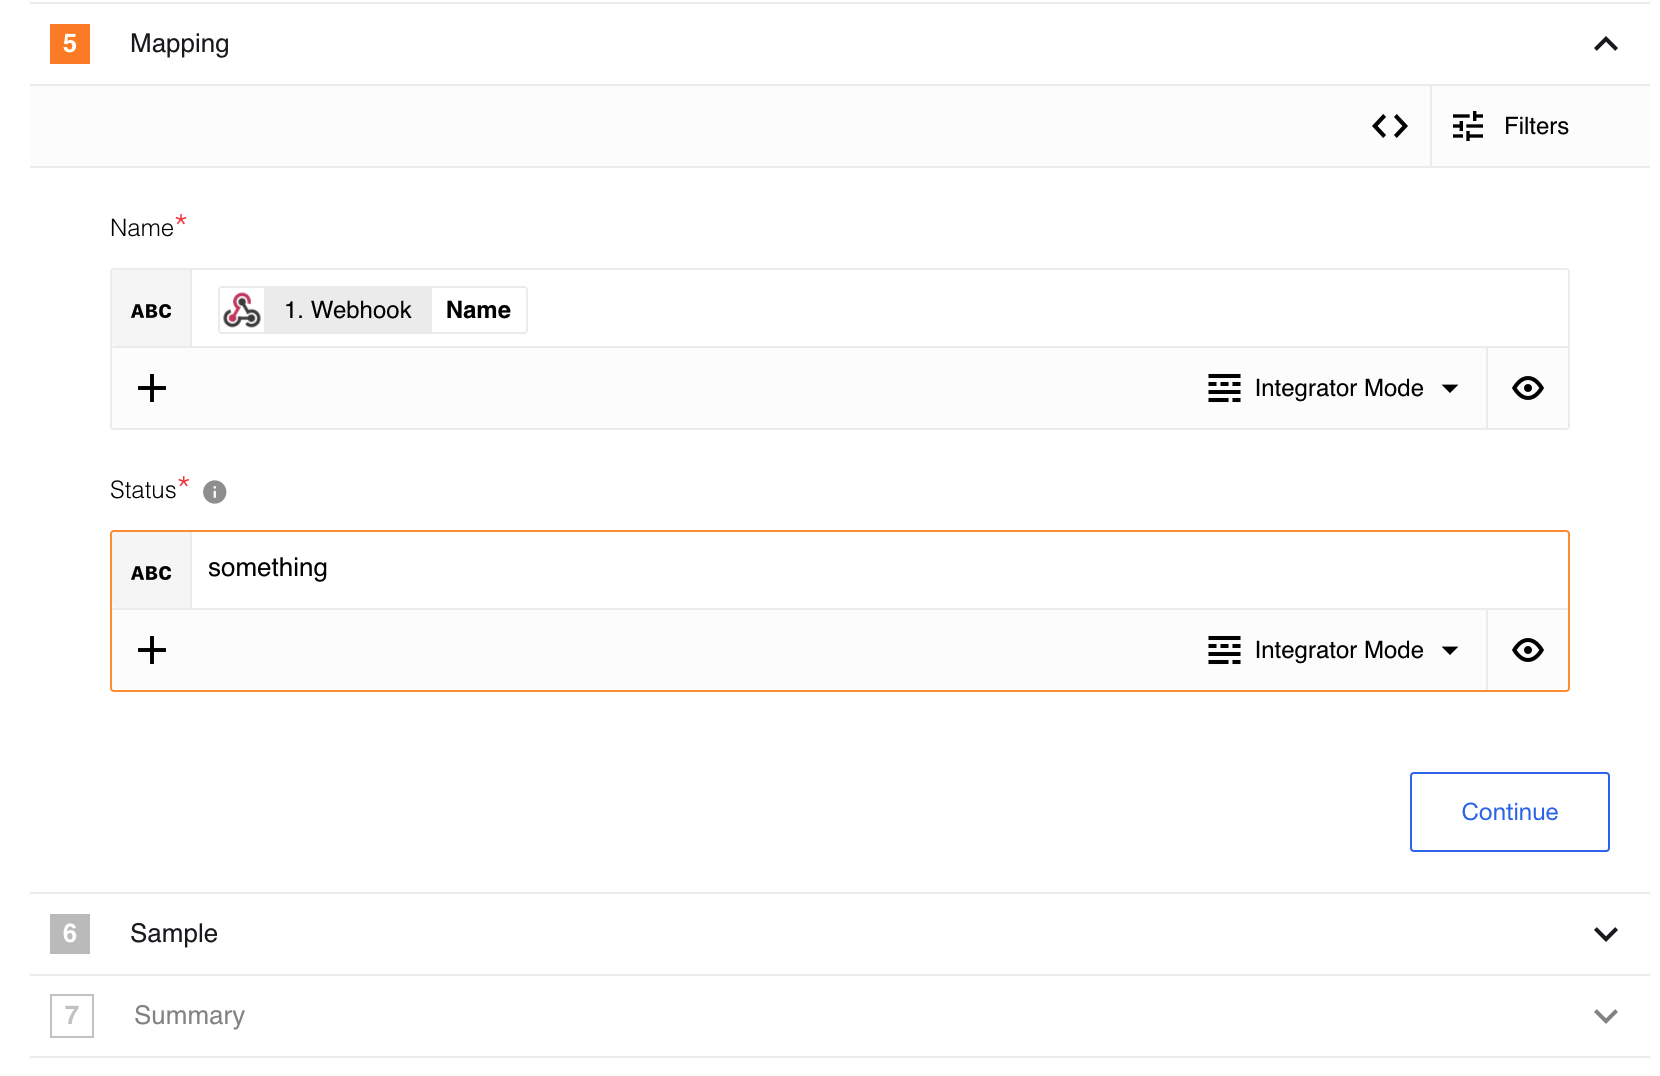
If you enter an incorrect value, the platform user field as well as the step number will be highlighted in orange:
Note During the flow building process the platform evaluates mapping expressions using samples. During the component execution it evaluates these expressions based on the incoming data which can differ from the presented sample. Use data samples as close to your real data as possible to avoid inconsistencies in outcome.
Required and optional fields
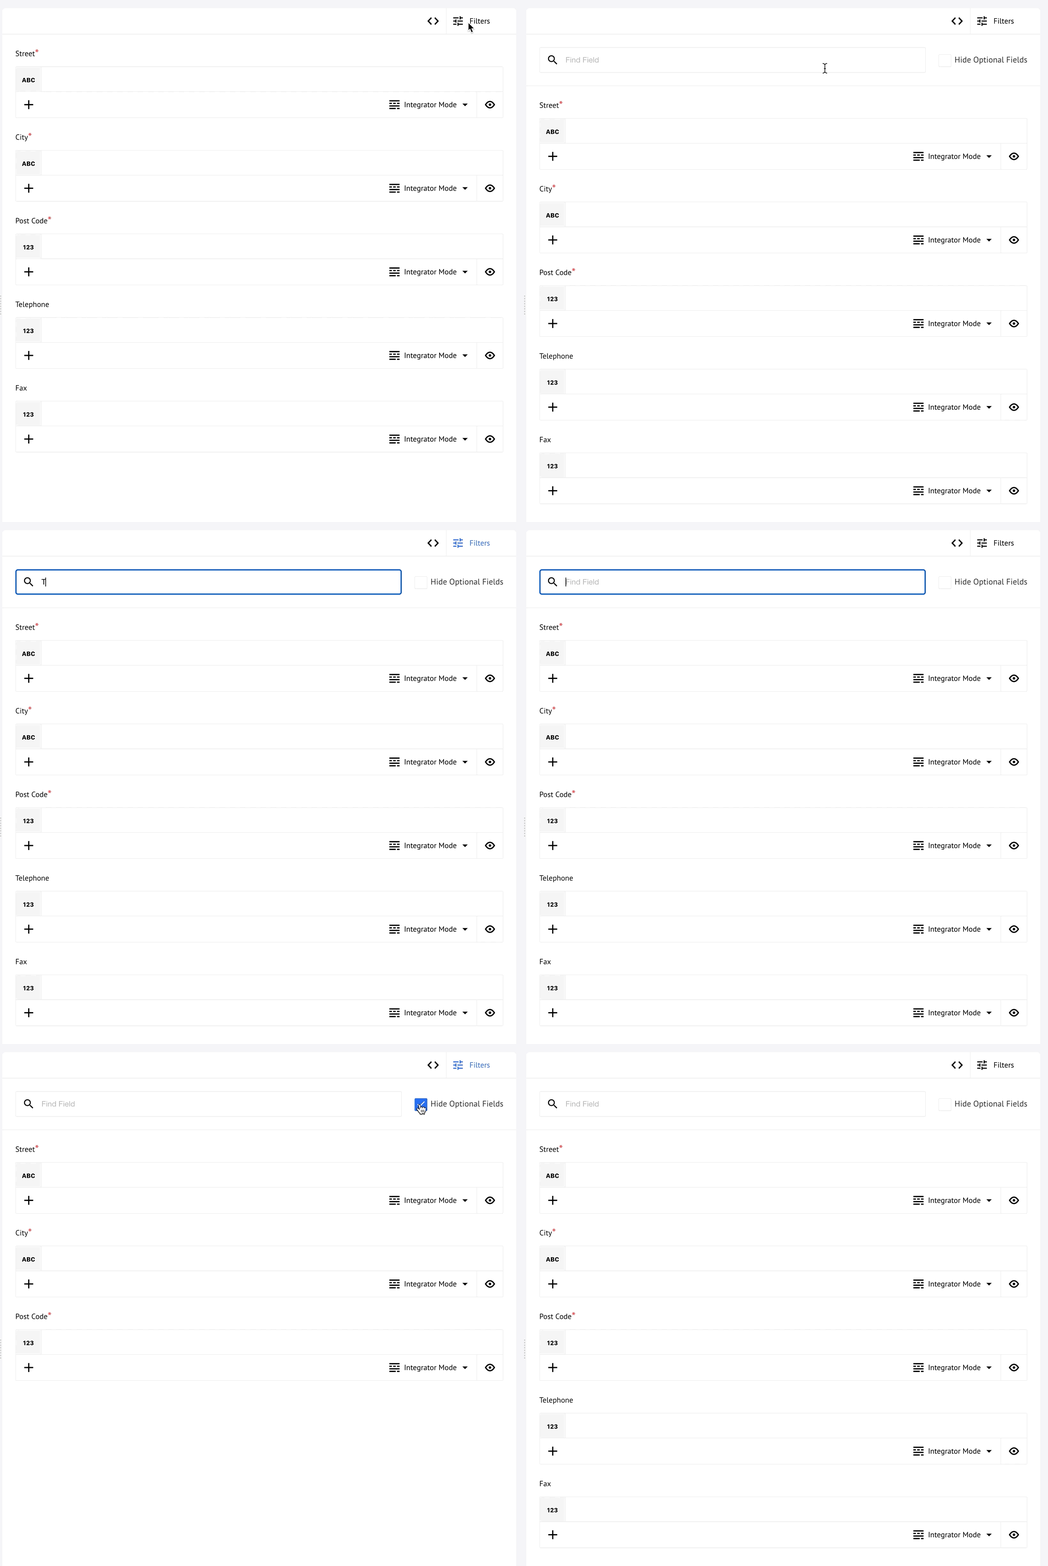
There is a way to filter mapping view to see mandatory fields only by hiding optional fields:
Developer mode
In the previous section you learned how to map data between two steps of an integration flow using a JSONata expression. This is a convenient approach, however, the graphical mapping in the Integrator mode has certain limitations.
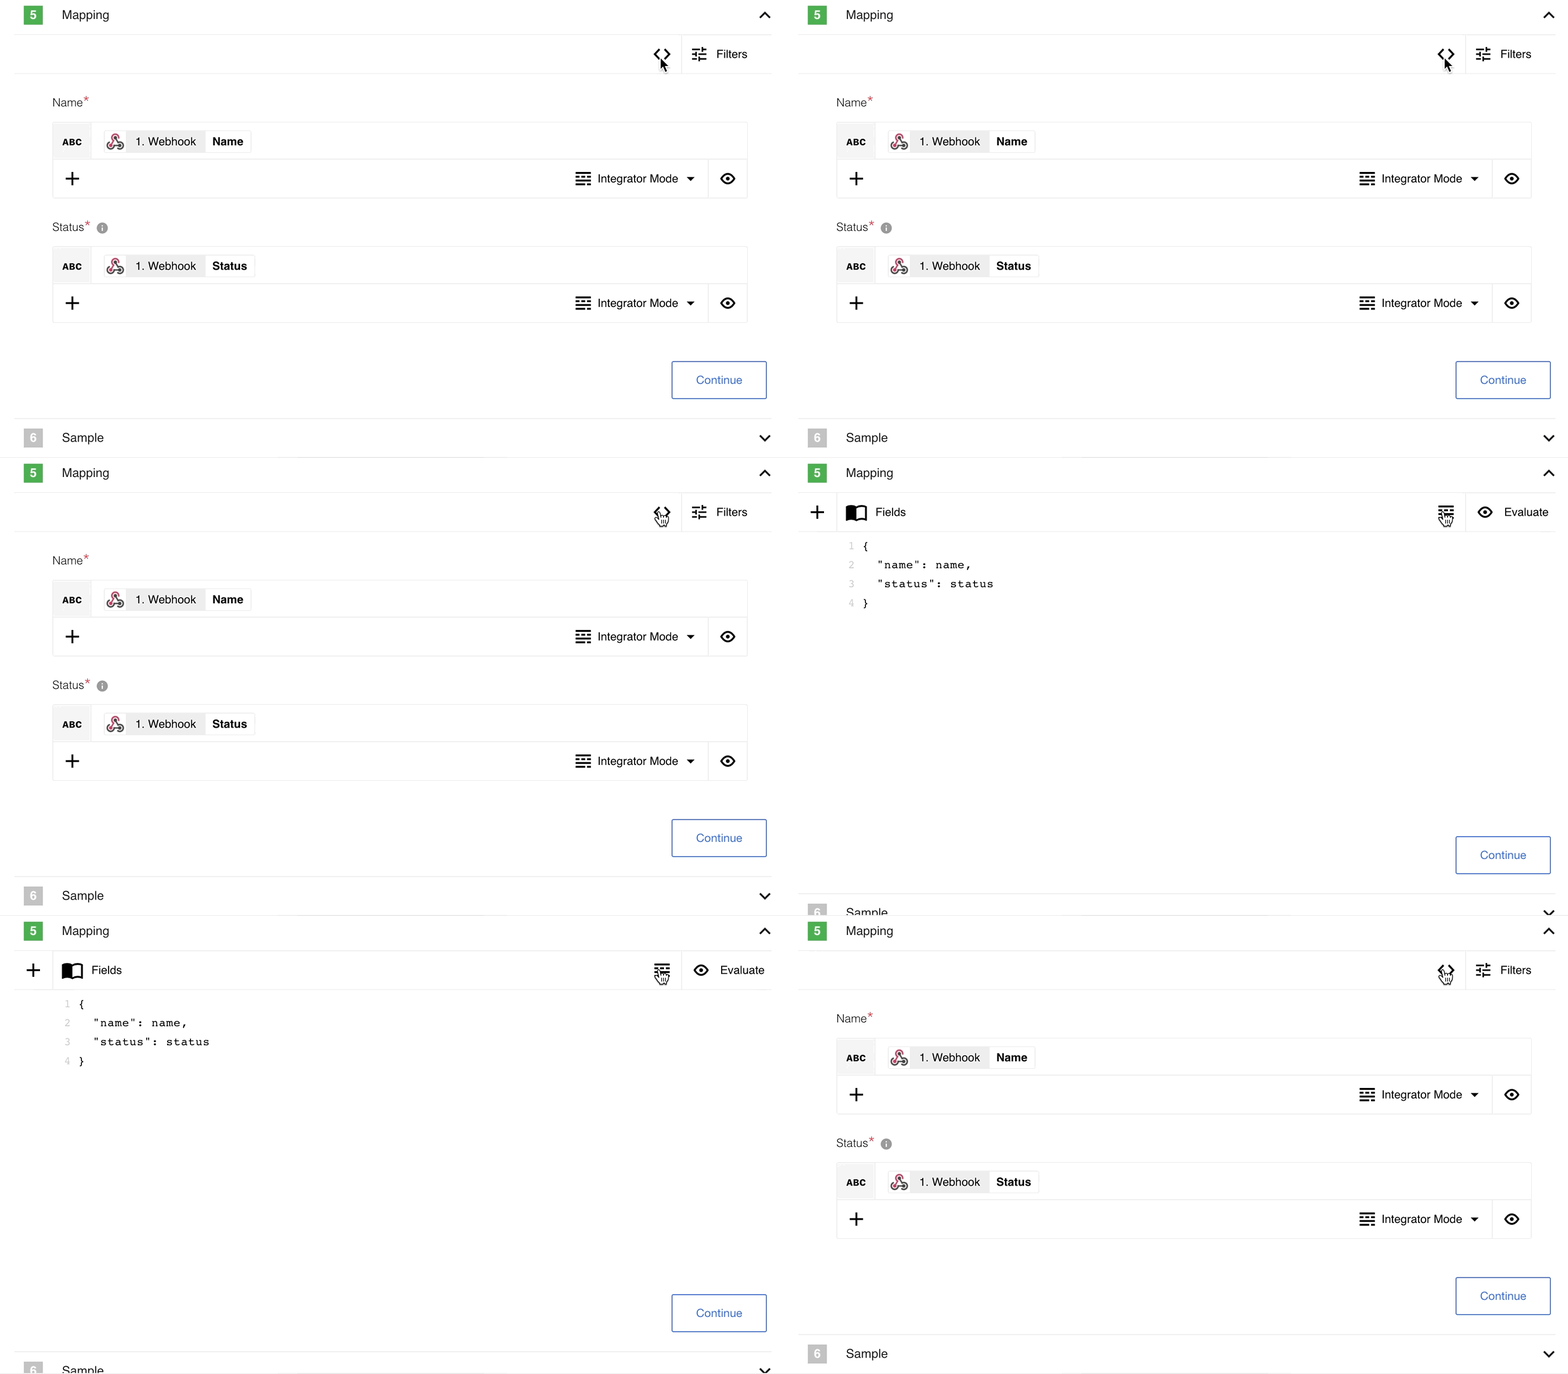
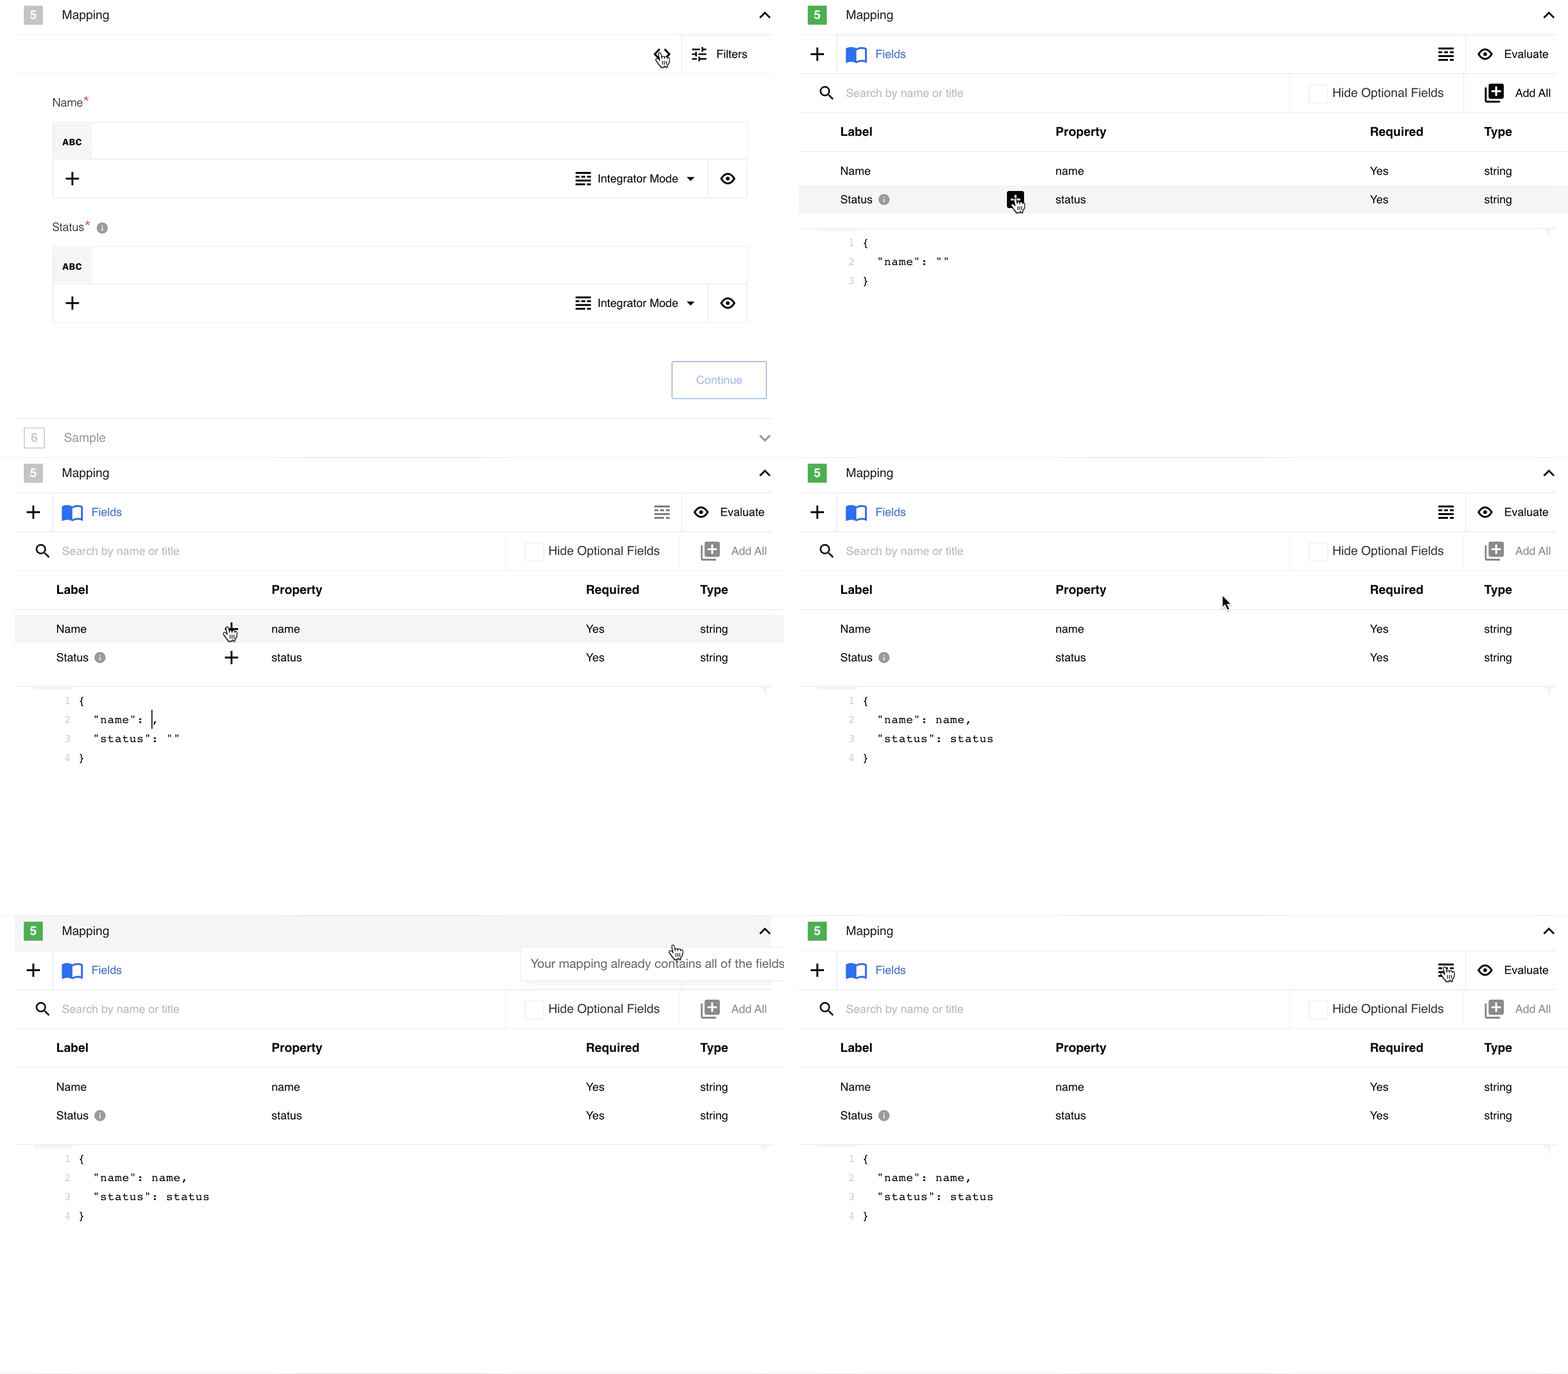
The following short animation demonstrates how to switch to the Developer mode.
In the Developer mode you can write a JSON containing JSONata expressions for the entire input object instead of defining expressions for each individual field as in case of the Integrator mode.
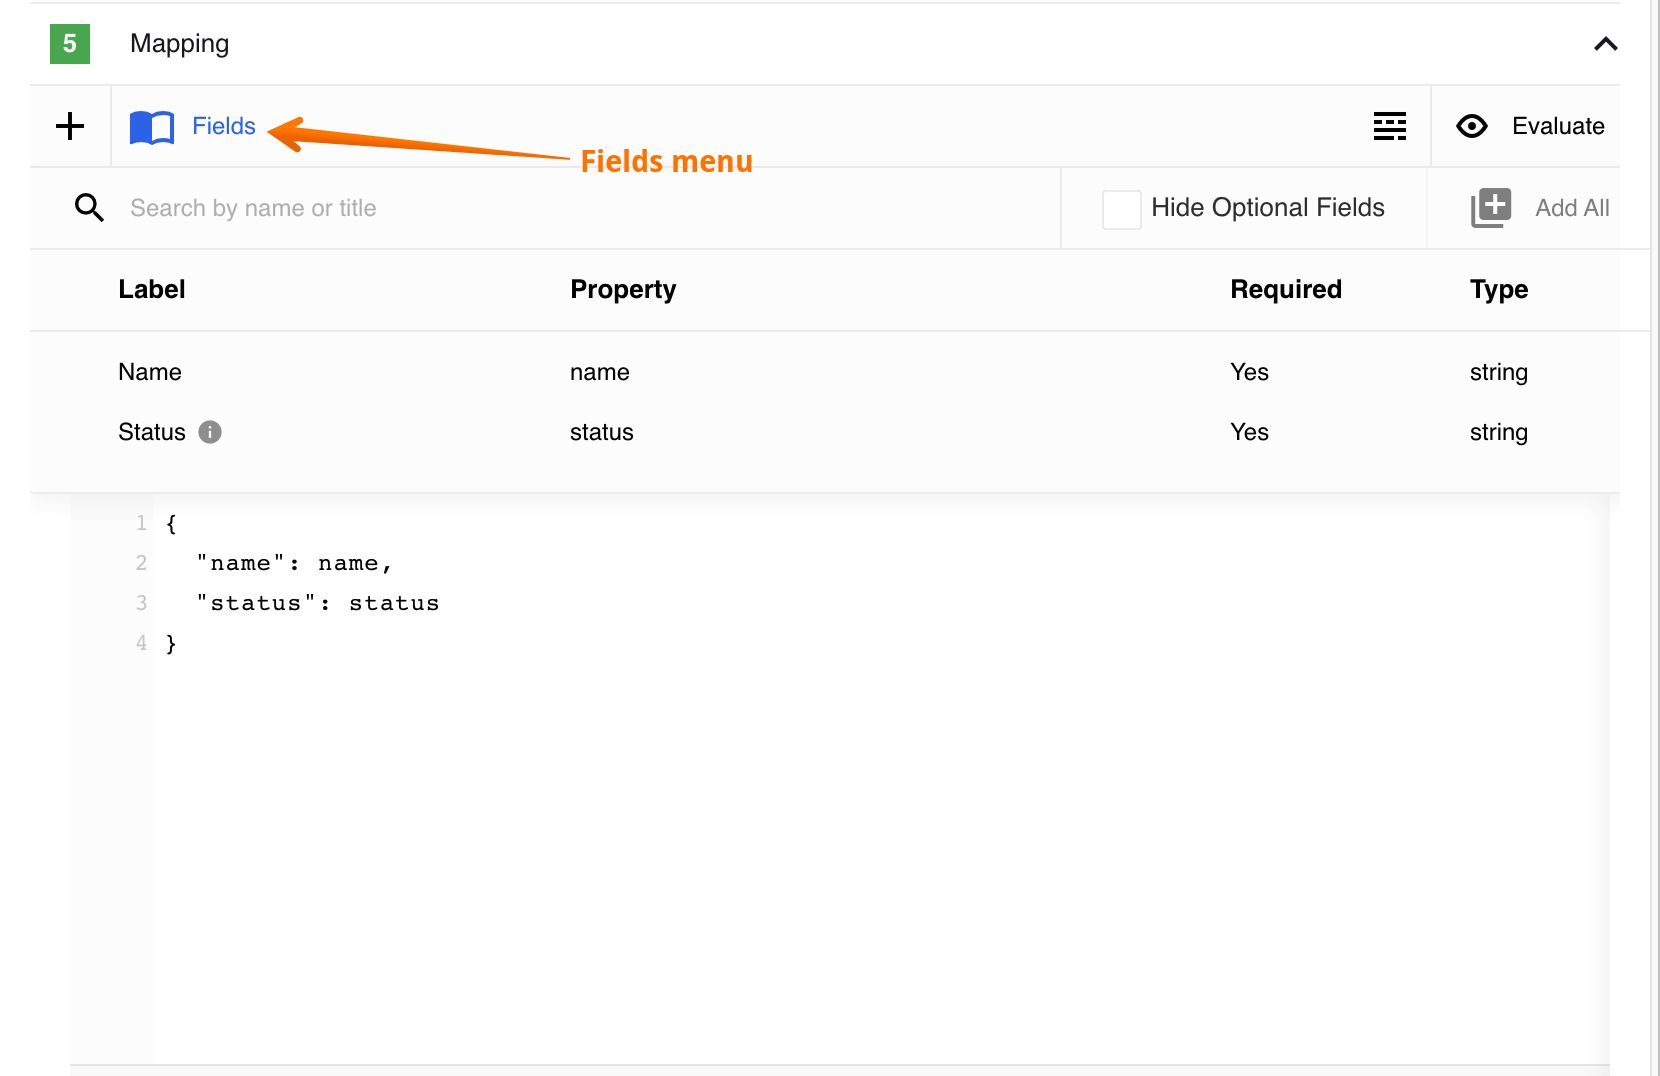
Here you can write your own JSON if you know the meta-model of input data structure or open the Fields menu which lists all incoming meta-model fields. For example the Petstore component has two fields to choose from:
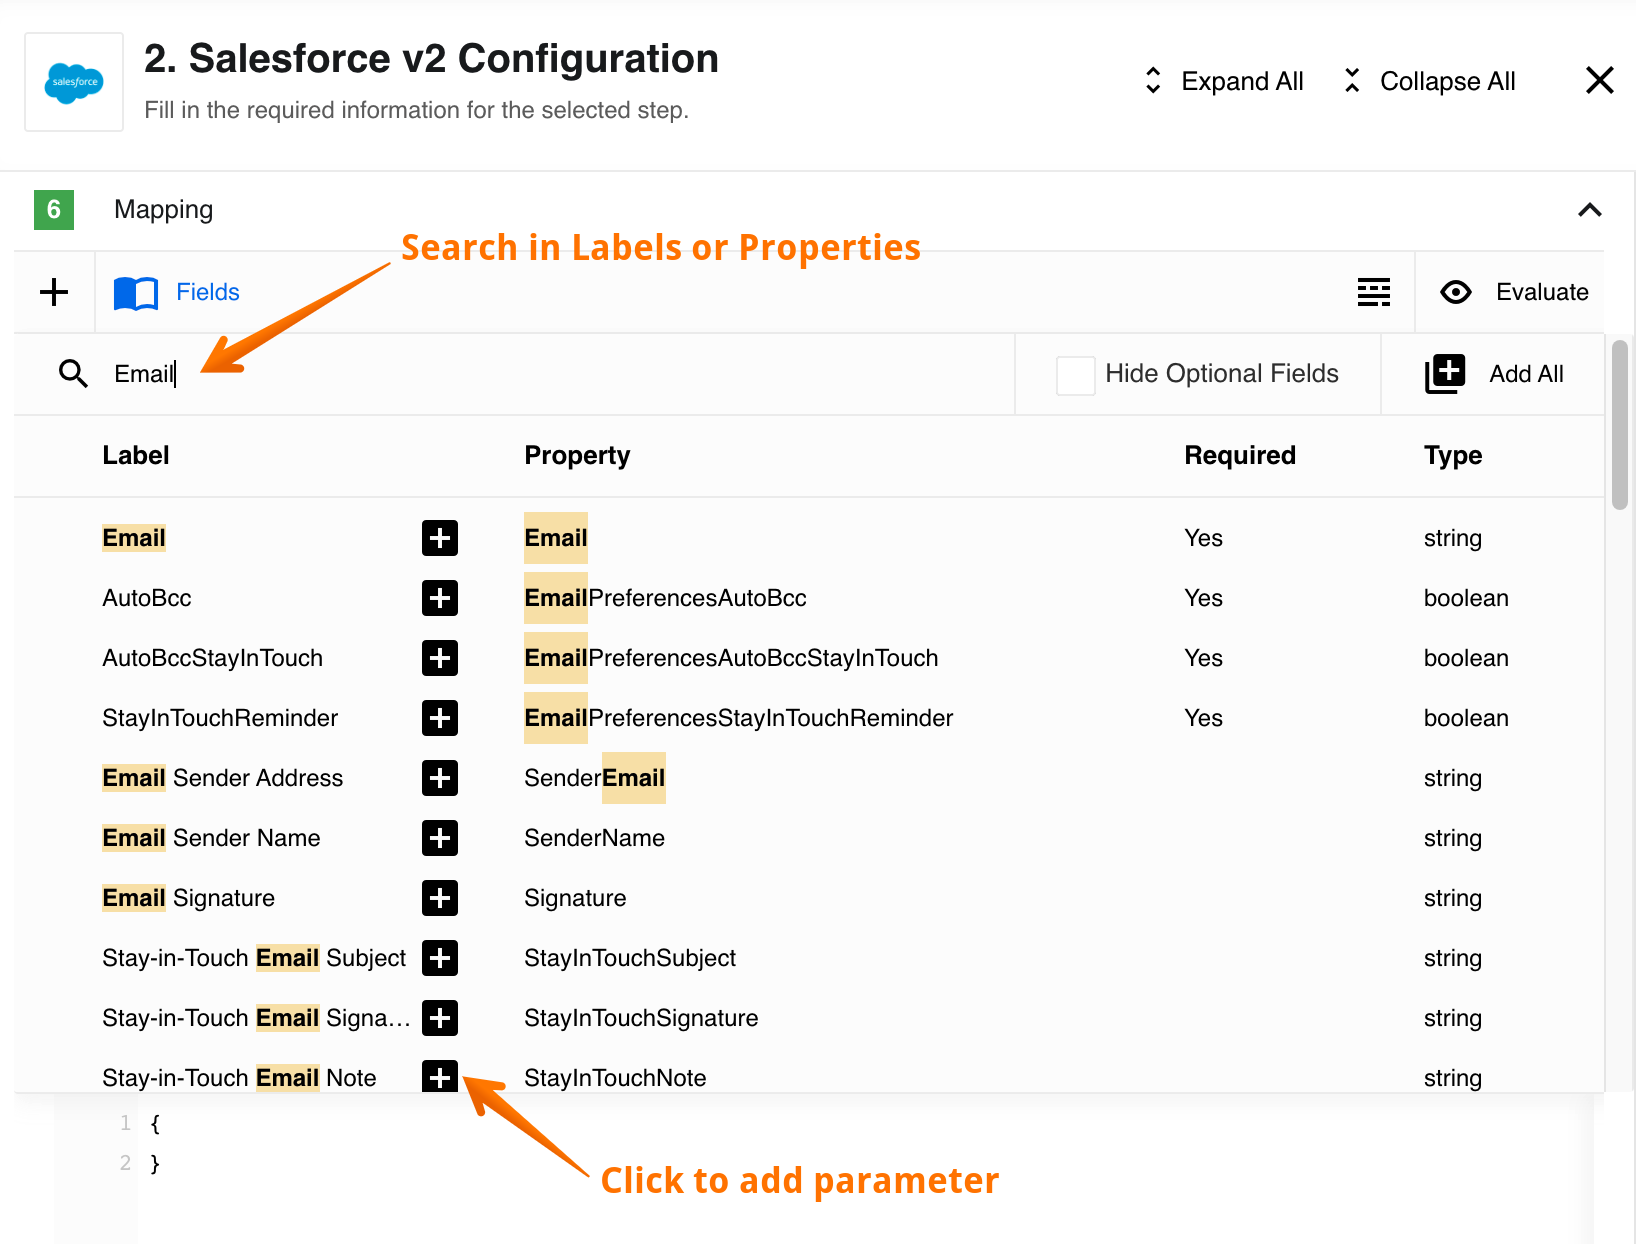
The Fields menu will contain more values for components with extensive meta-model structure such as the case of the Salesforce component:
In this long list you can Search to find the parameter you need and click on plus sign to add to the JSON structure.
Please Note The platform user interface assumes that you know what you are mapping when you switch to Developer mode. It will allow an empty JSON
{}as an input structure. You are responsible to ensure the validity of your mapping.
To avoid unexpected results we recommend to:
- Include and map the Required fields to avoid unexpected behaviour from the API provider.
- Make sure to use correct data Type while filling-in the parameter values.
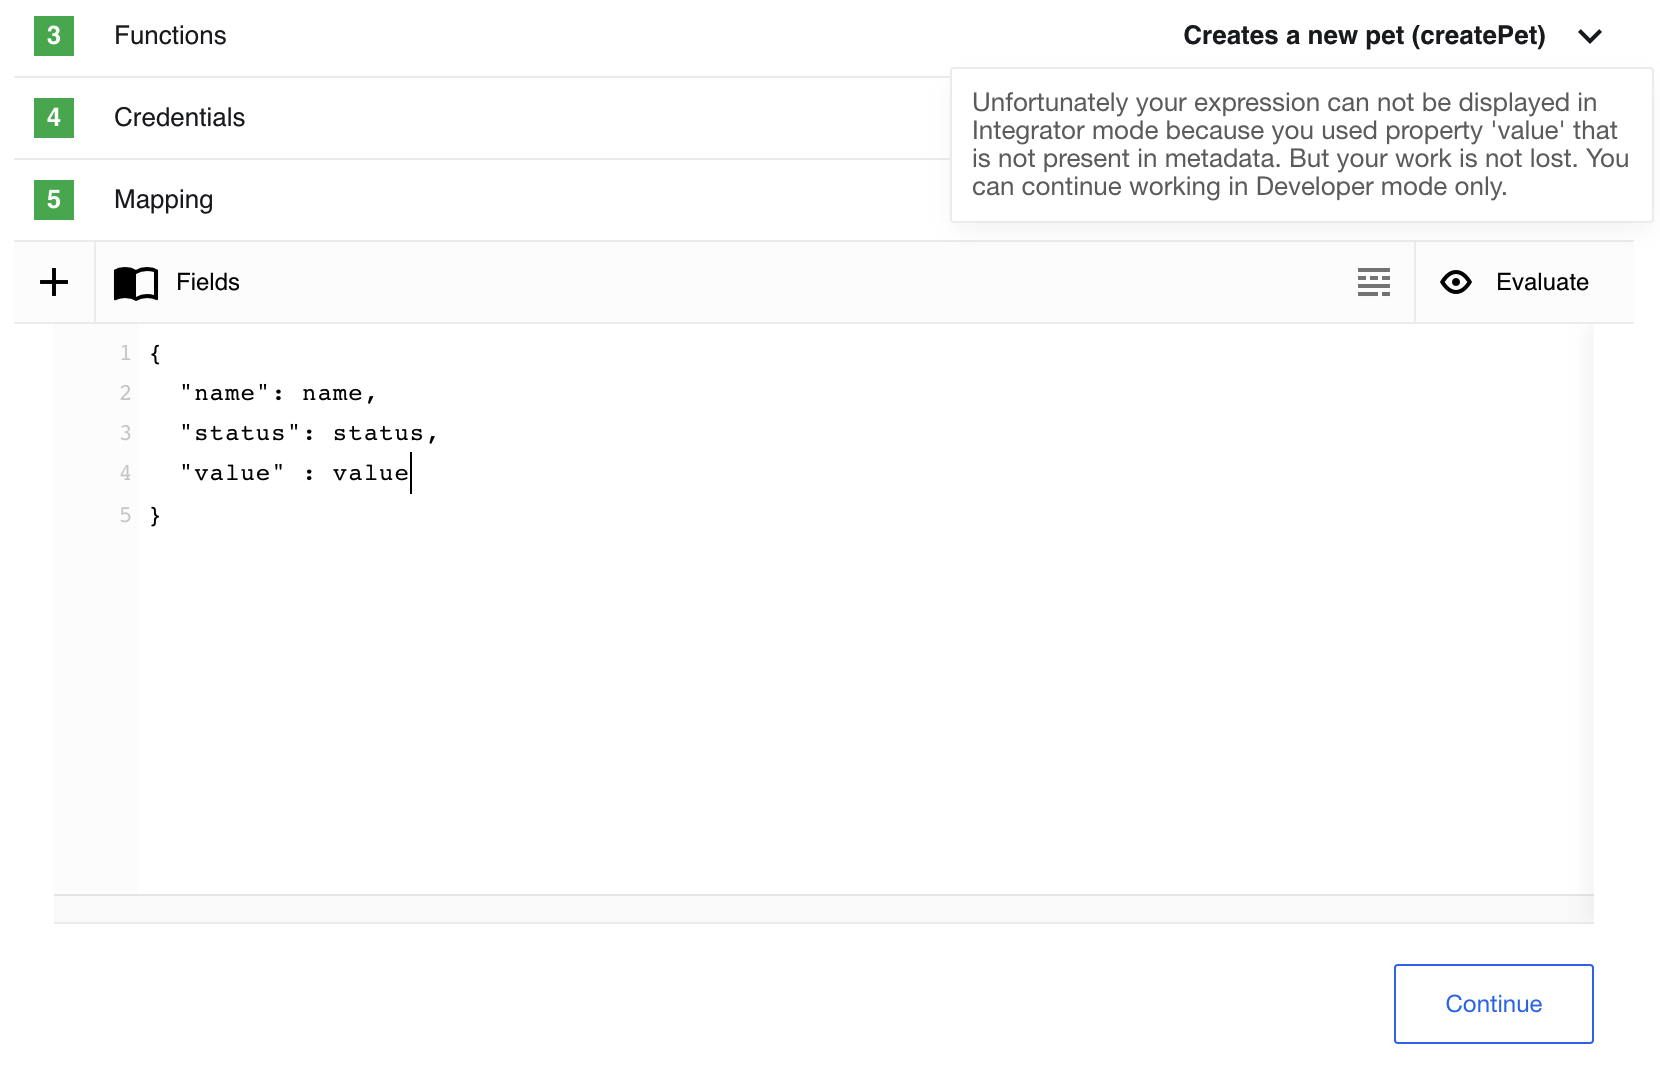
When you write a JSONata expression which contains property not included in input meta-data the platform user interface will block switching back to Integrator mode.
Evaluate results
You are already familiar with evaluation function. In the Developer mode it evaluates the whole JSON structure in input field rather than individual fields like in the Integrator mode.
The following animation shows how you can use the Fields menu to choose values, fill-in, get their property values and Evaluate the result.
We can see in the evaluation stage how the platform interface replaces the property
values name and status to their real values from the incoming payload.
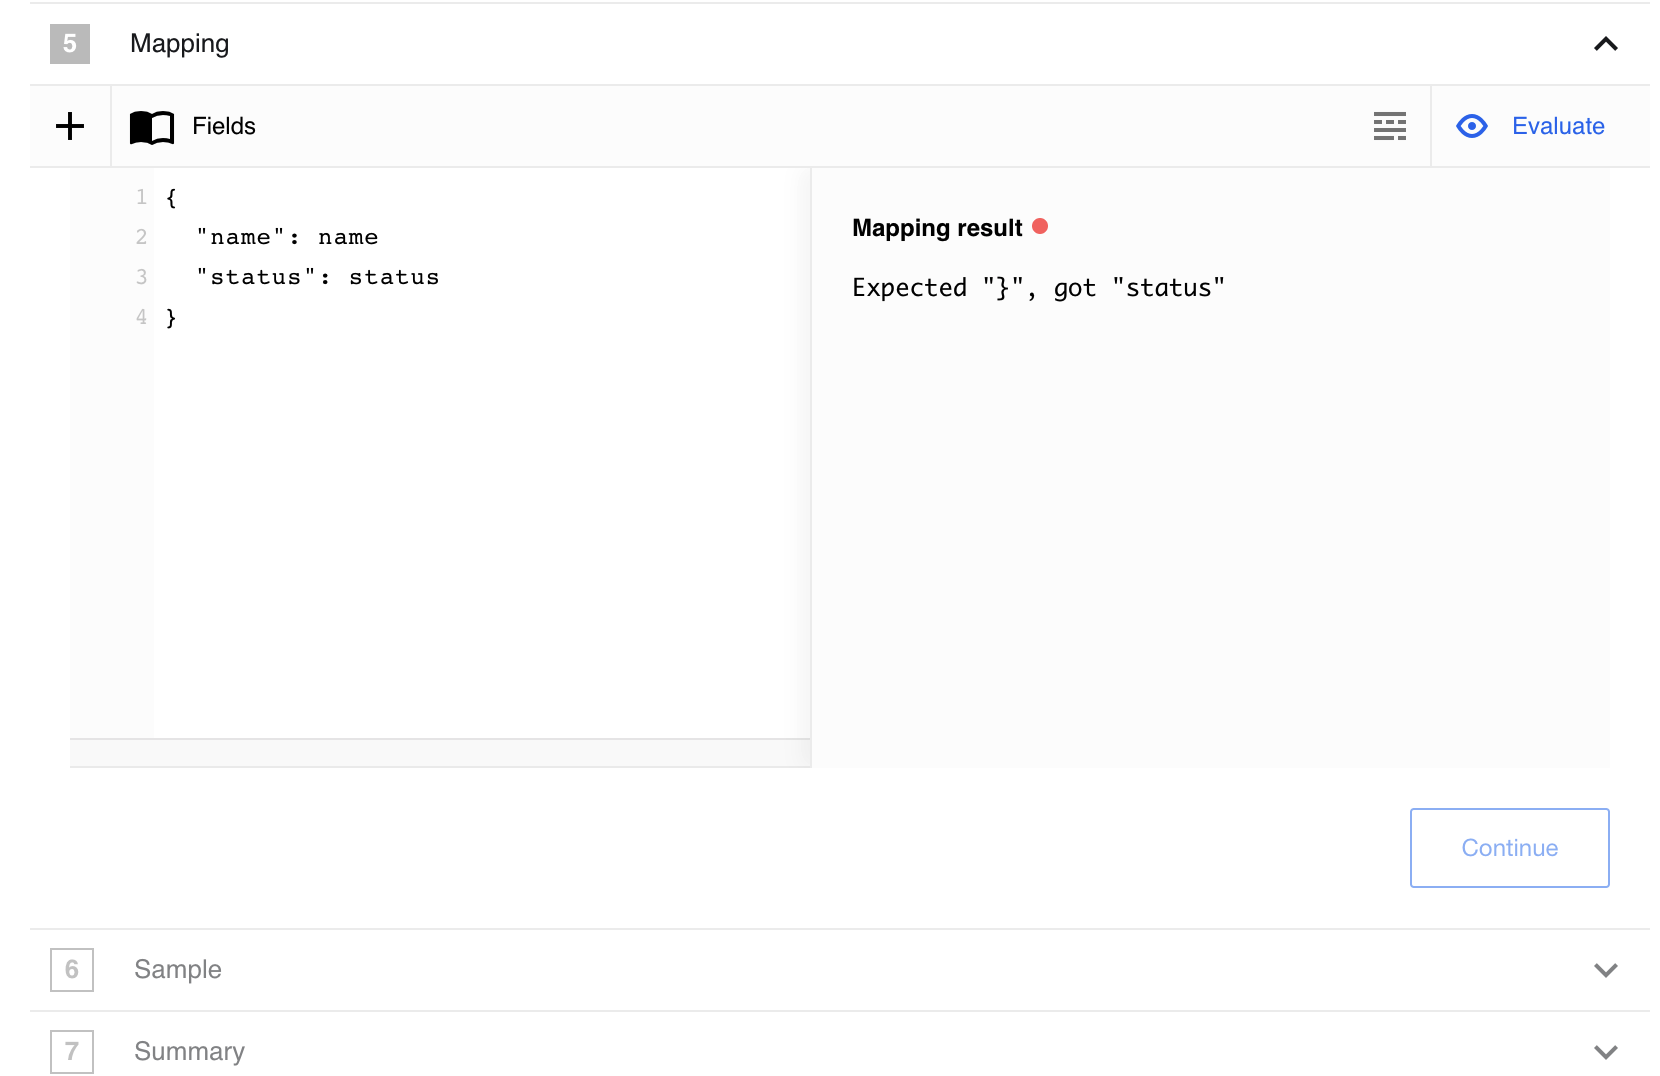
When you enter an incorrect JSON and press Evaluate the platform UI will check it and you will get an error in the Mapping result section:
Note You can switch between Developer and Integrator modes during the design of integration flow but not after you publish it. To change the mapping mode, create a new draft version of a flow.
Array-to-array Mapping
You can map the incoming array values with an outgoing array fields, we call this an array-to-array mapping.
You can use both Integrator or Developer modes to map array structure. However, when you have complex array-to-array case we recommend using the developer mode since the Integrator mode has certain limitations.
- You can map data from objects inside the arrays.
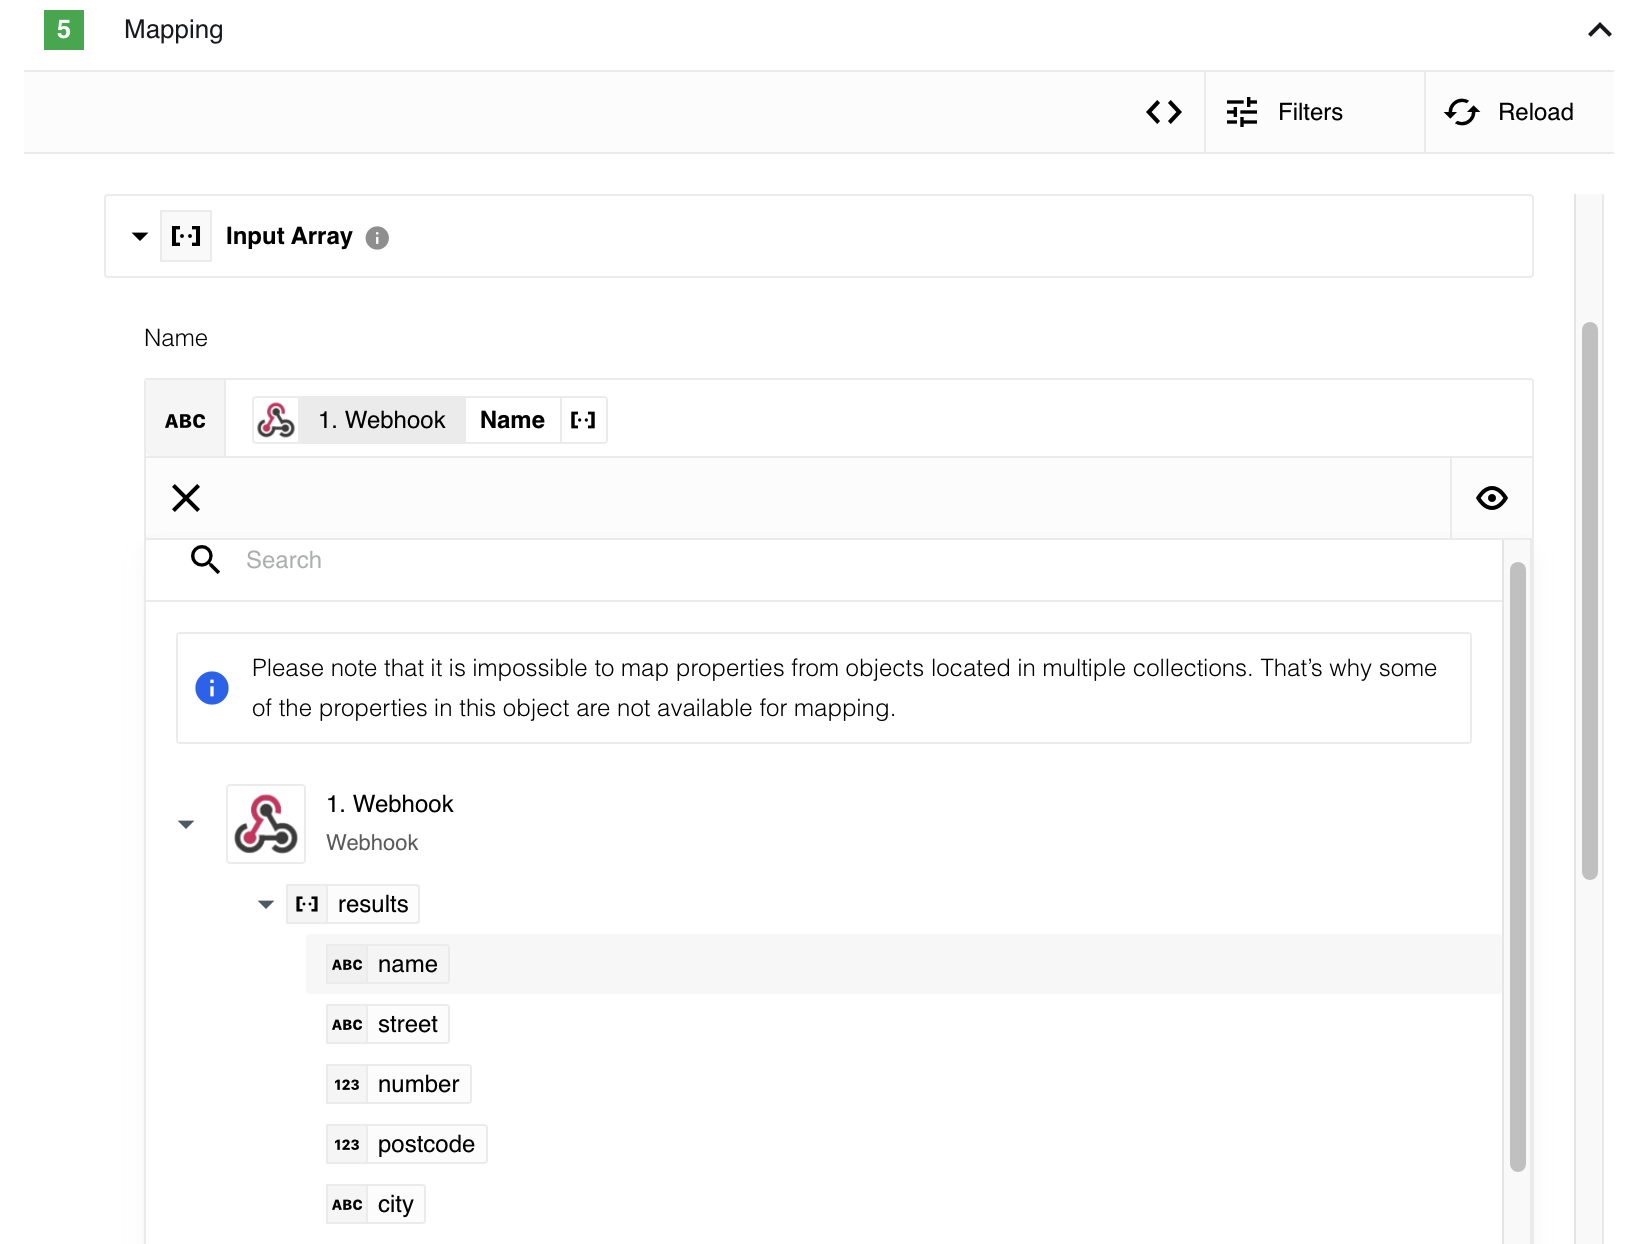
- You can’t map properties from objects located in multiple arrays.
- Due to complexity and limitations, when you map array-to-array Integrator mode, the mapping will not be saved if you switch to Developer mode and, vice-versa.
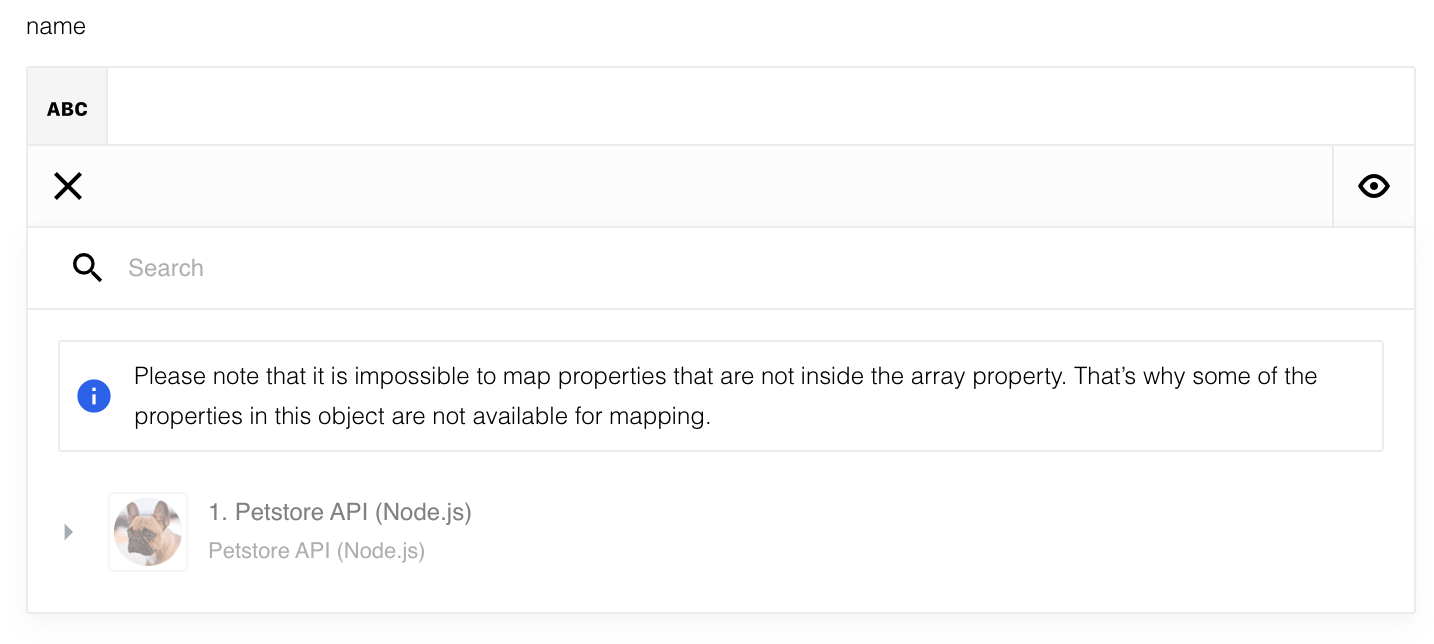
When in Integrator mode, the system checks if the incoming array has properties to map. If not then the previous step is disabled.
Alternatively, when there are array parameters to map you can access the incoming data fields.
For complex cases of array-to-array mapping we recommend switching to Developer mode where you can write extensive JSONata expressions and use data from different arrays simultaneously.
Support arrays of Objects
When working with arrays in the context of mapping data, you may have encountered limitations in representing values that are not objects. Our platform utilizes JSON as the data interchange format, which imposes certain constraints, including the lack of support for arrays containing values. Therefore, in our platform, we only support arrays that consist of objects. This section aims to explain where this limitation arises and provide solutions for working with arrays effectively.
Example
Let’s consider a scenario where you receive the following payload through a Webhook trigger:
{
  "body": {
    "registered": true,
    "header": [
      "customer_id"
    ],
    "rows": [
      [
        "ozzy.osbourne@example.com"
      ],
      [
        "michael.jackson@example.com"
      ],
      [
        "janis.joplin@example.com"
      ],
      [
        "whitney.houston@example.com"
      ]
    ]
  }
}
Suppose you want to extract user emails from the rows array and use them in the URL field of your REST API. To achieve this, you need to split the rows array, treating each value as a separate URL.
Attempting an Incorrect Approach
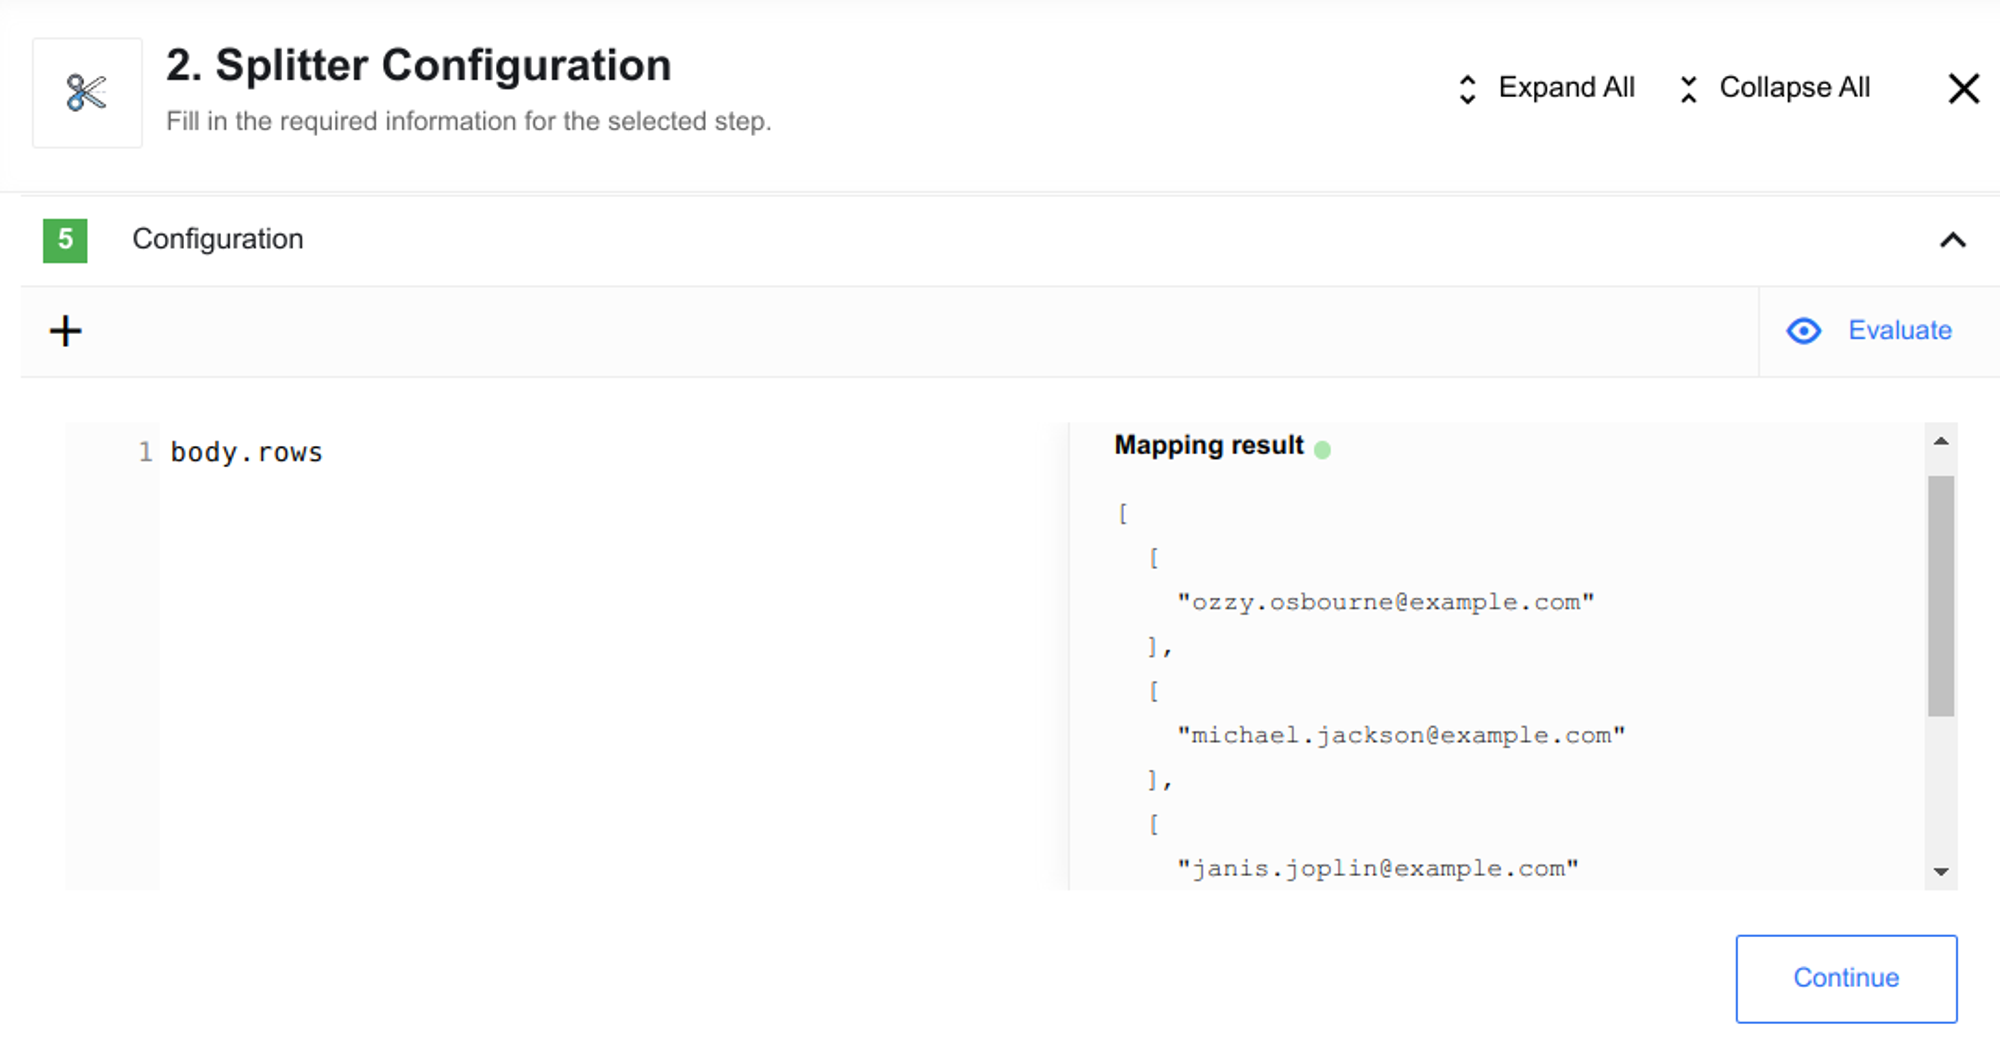
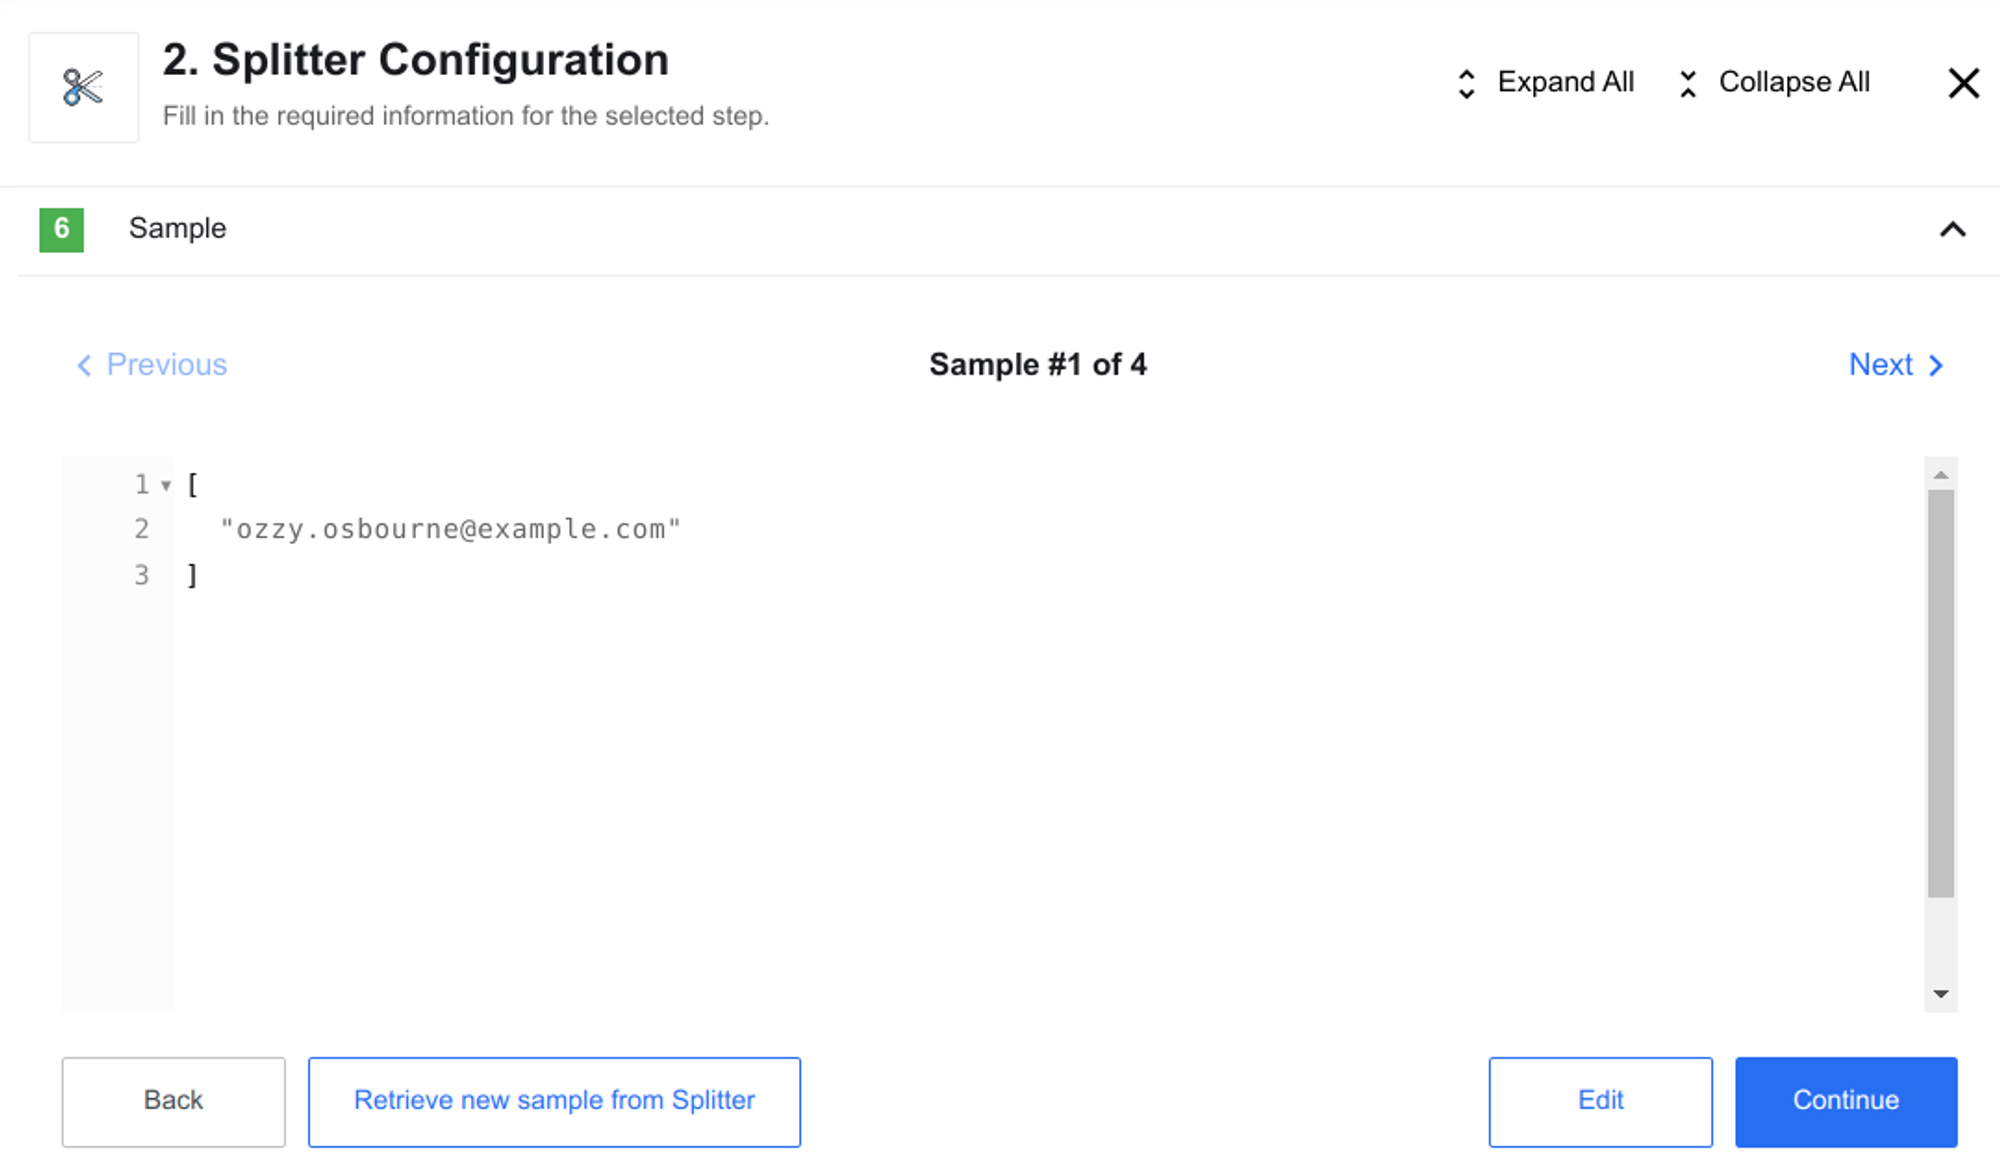
Initially, you may attempt to split the sample provided by the Webhook component to extract array values.
However, this sample does not contain a name and is not an object but a simple array value.
In JSON, you cannot directly interact with an array of values in this manner.
[
  [
    "ozzy.osbourne@example.com"
  ],
  [
    "michael.jackson@example.com"
  ],
  [
    "janis.joplin@example.com"
  ],
  [
    "whitney.houston@example.com"
  ]
]
Consequently, you won’t be able to utilize the Splitter component to work with this array of values as expected.
Adopting the Correct Approach
To overcome this limitation, each element within the array should be represented as an object.
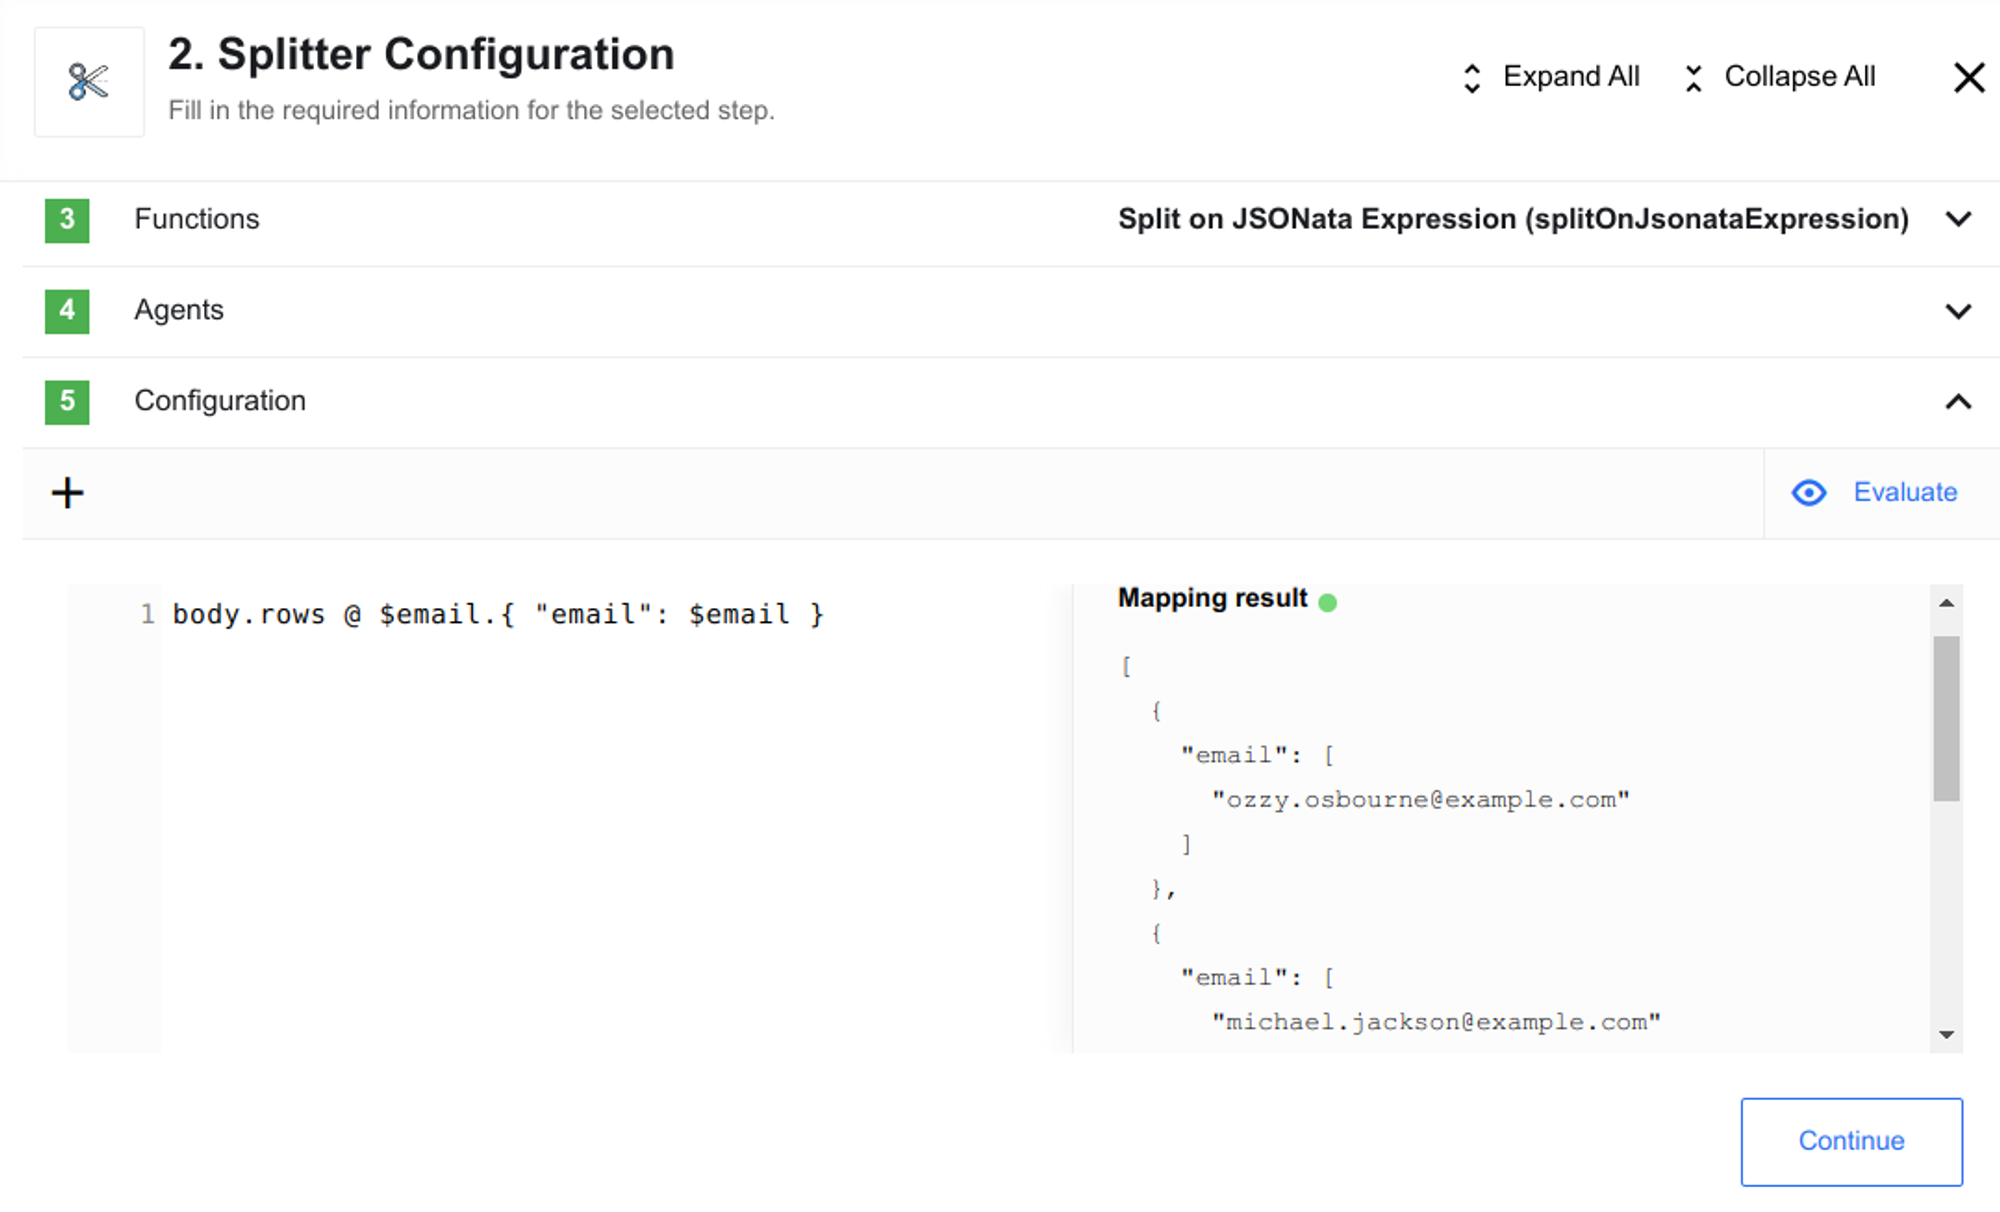
In JSON, to create an object, we need to provide a name. By using the dot notation before the { }, we can assign a name to each value within the rows array.
body.rows @ $email.{ "email": $email }
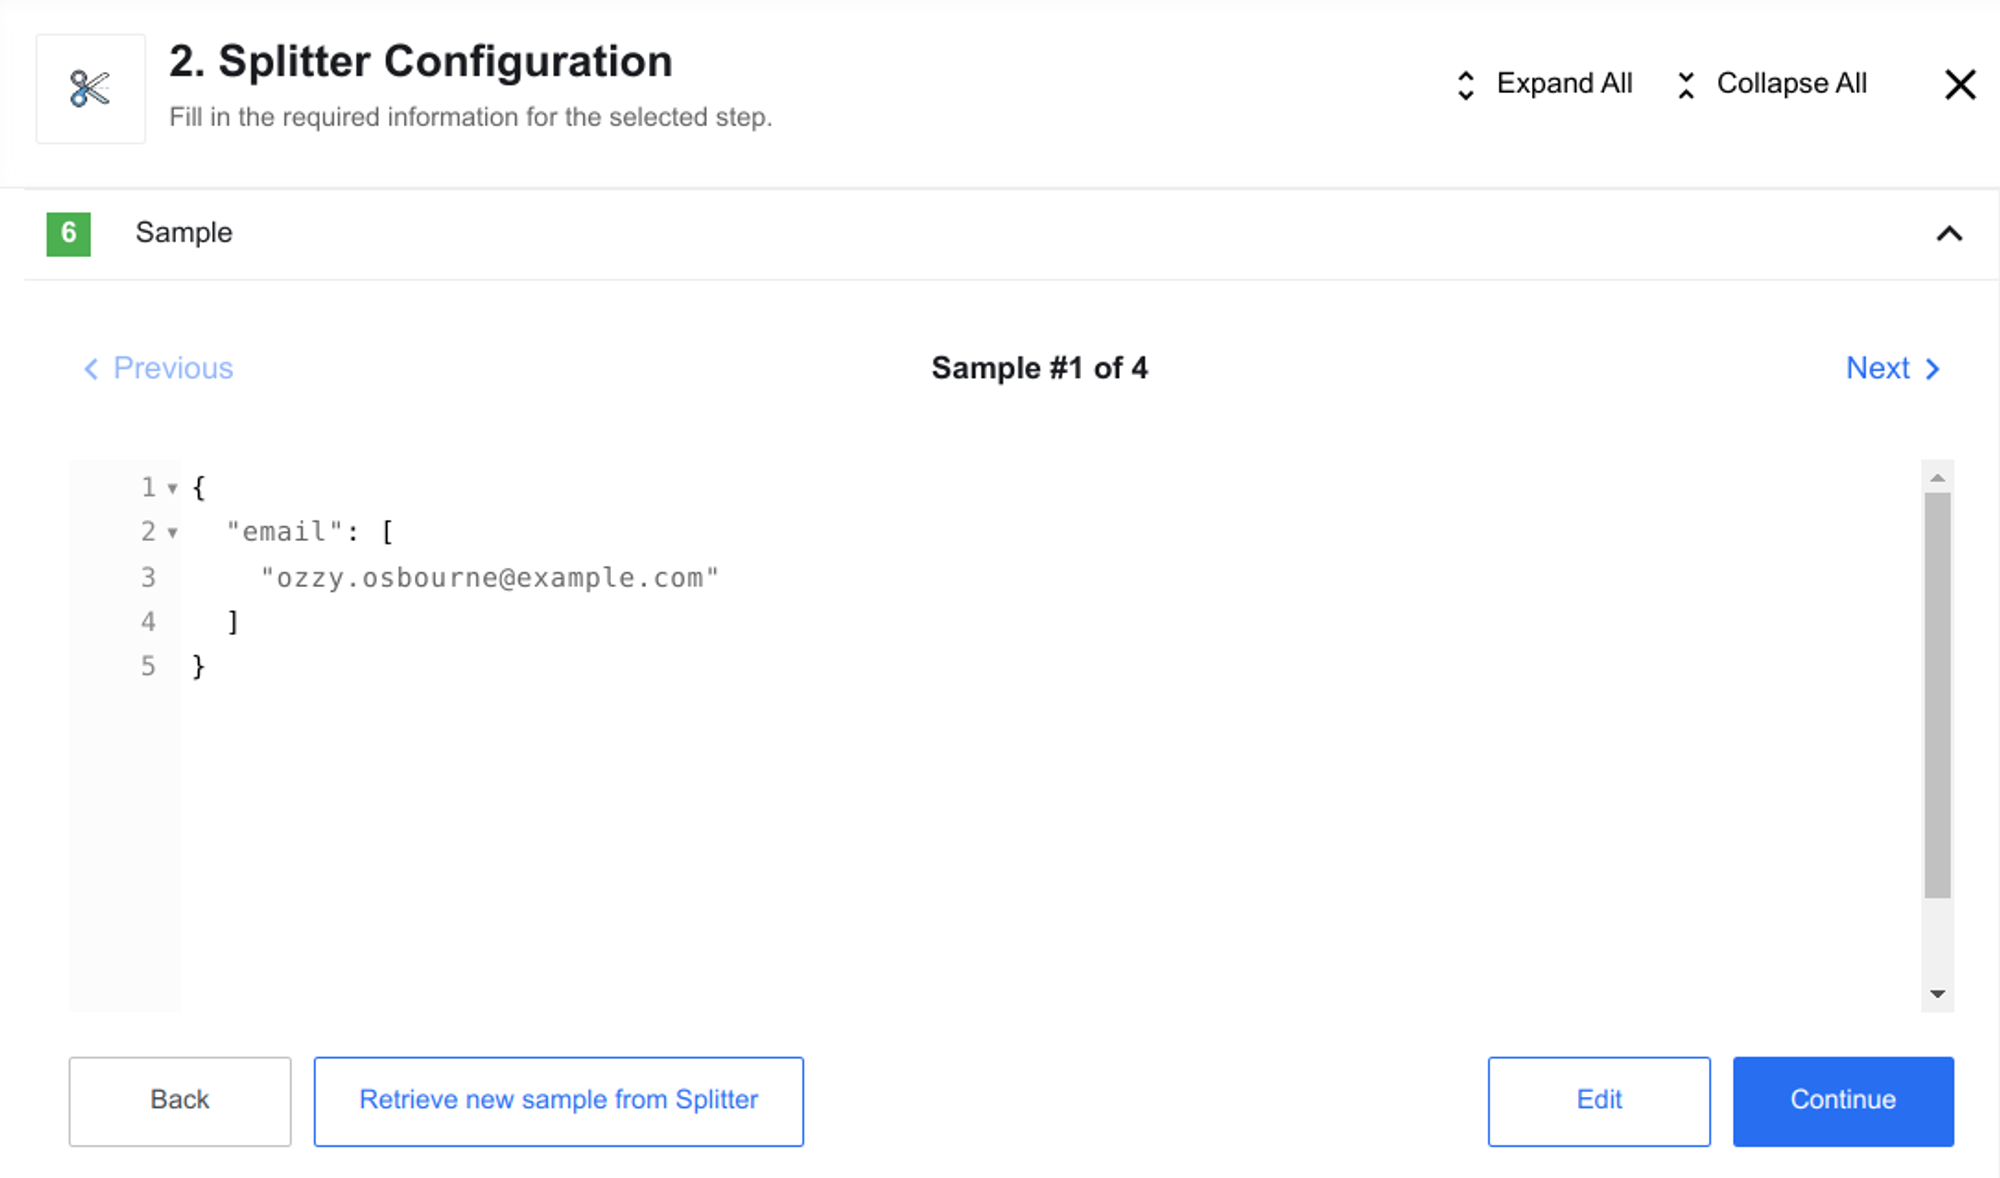
Consequently, each sample becomes an object.
This results in an array of objects.
[
  {
    "email": [
      "ozzy.osbourne@example.com"
    ]
  },
  {
    "email": [
      "michael.jackson@example.com"
    ]
  },
  {
    "email": [
      "janis.joplin@example.com"
    ]
  },
  {
    "email": [
      "whitney.houston@example.com"
    ]
  }
]
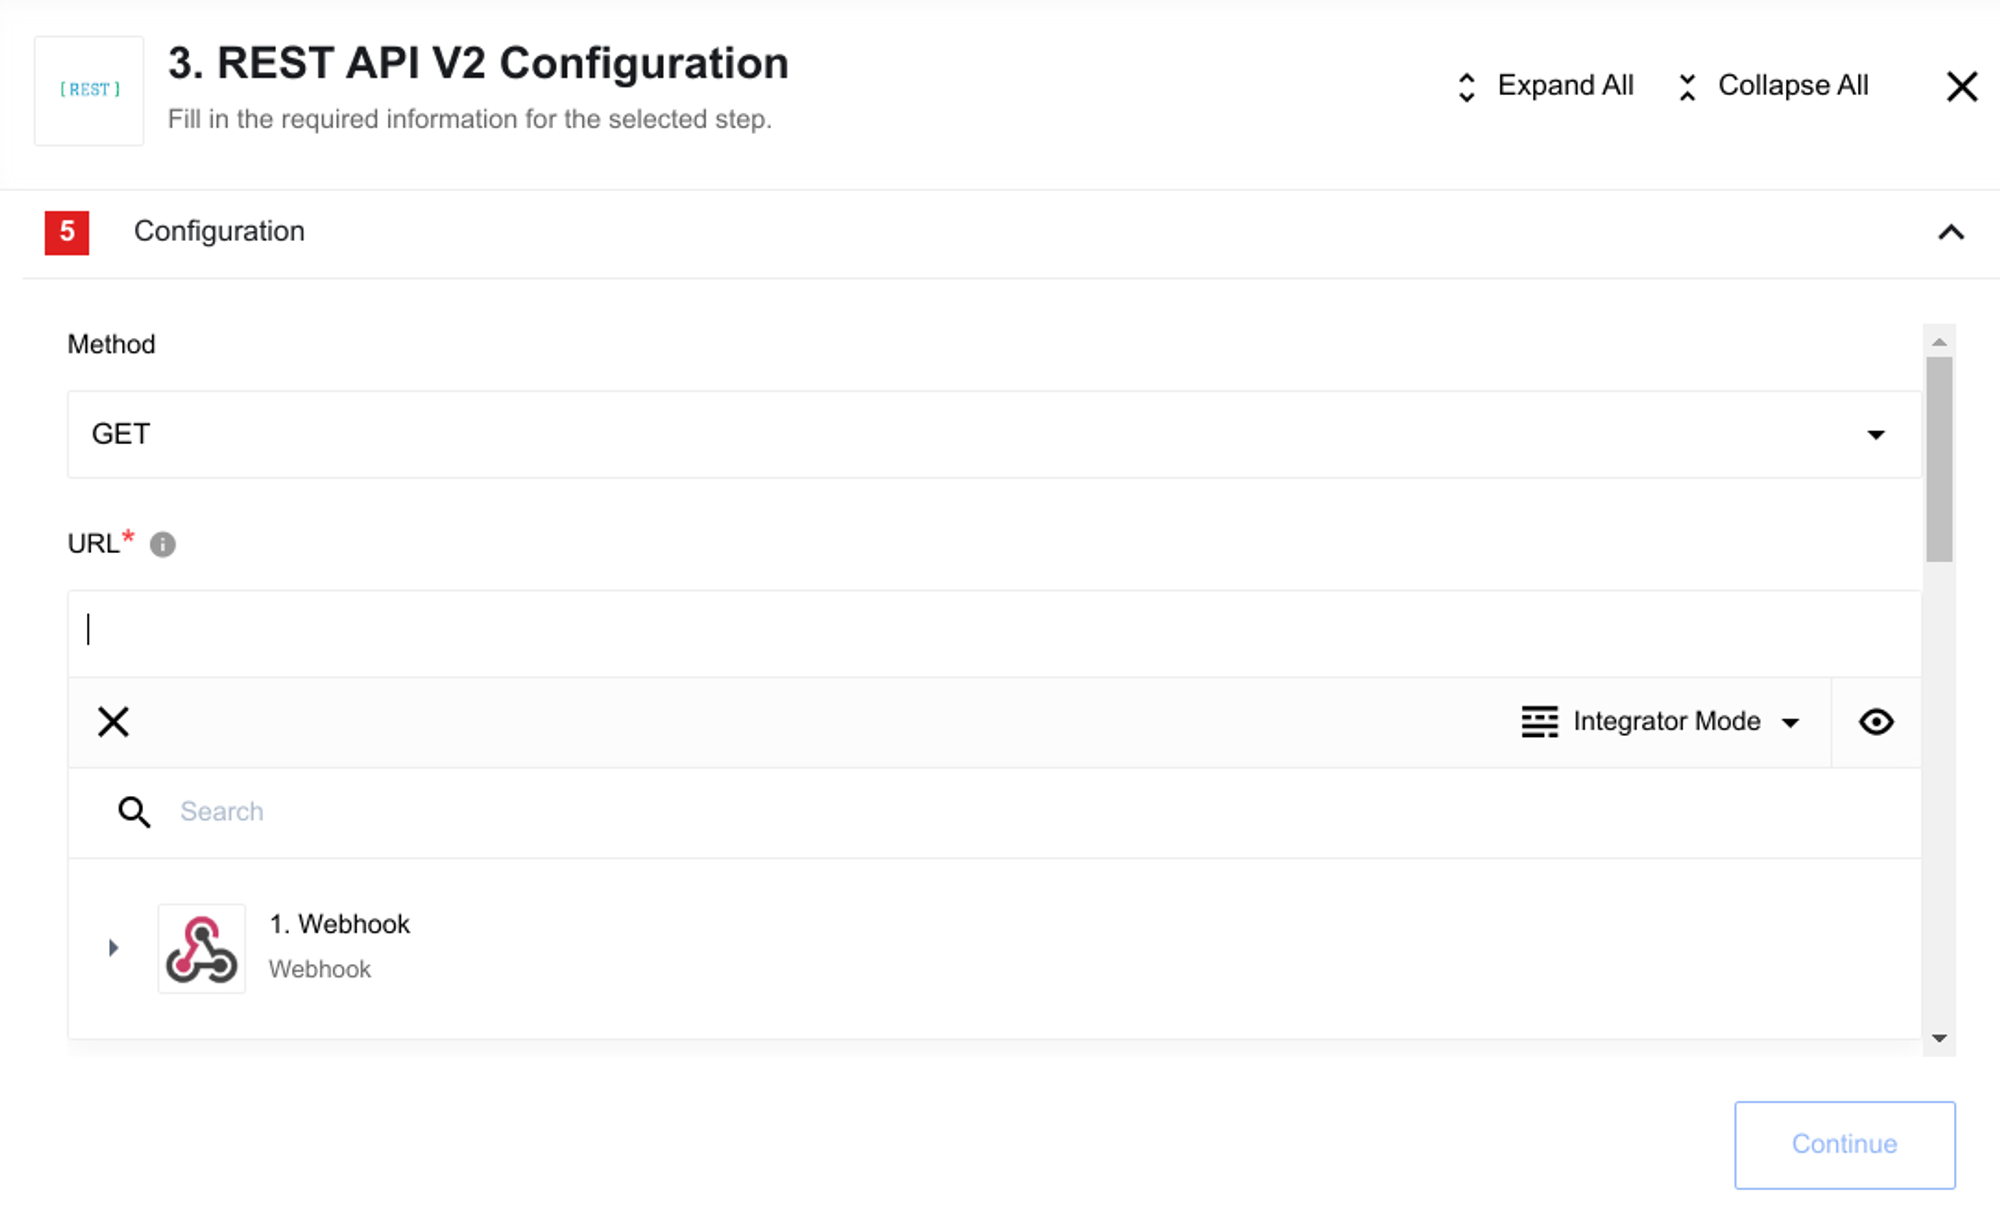
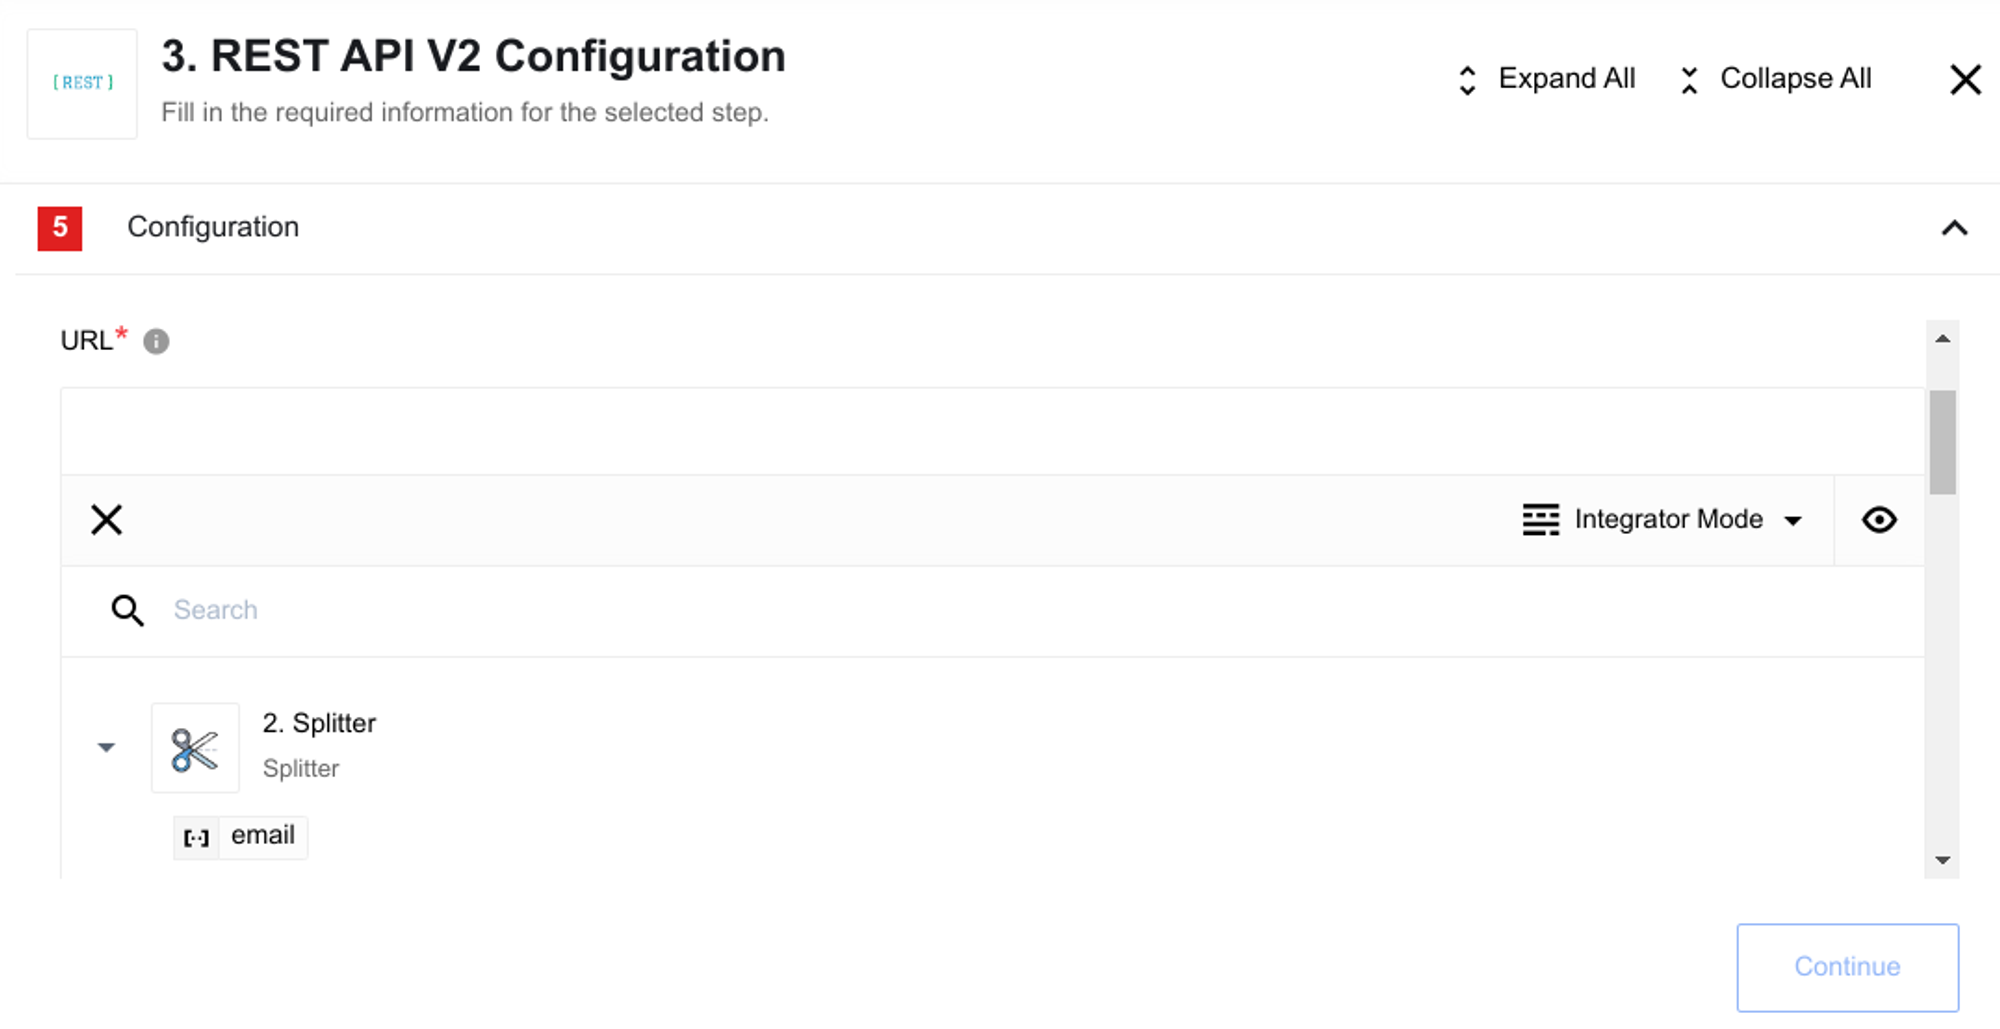
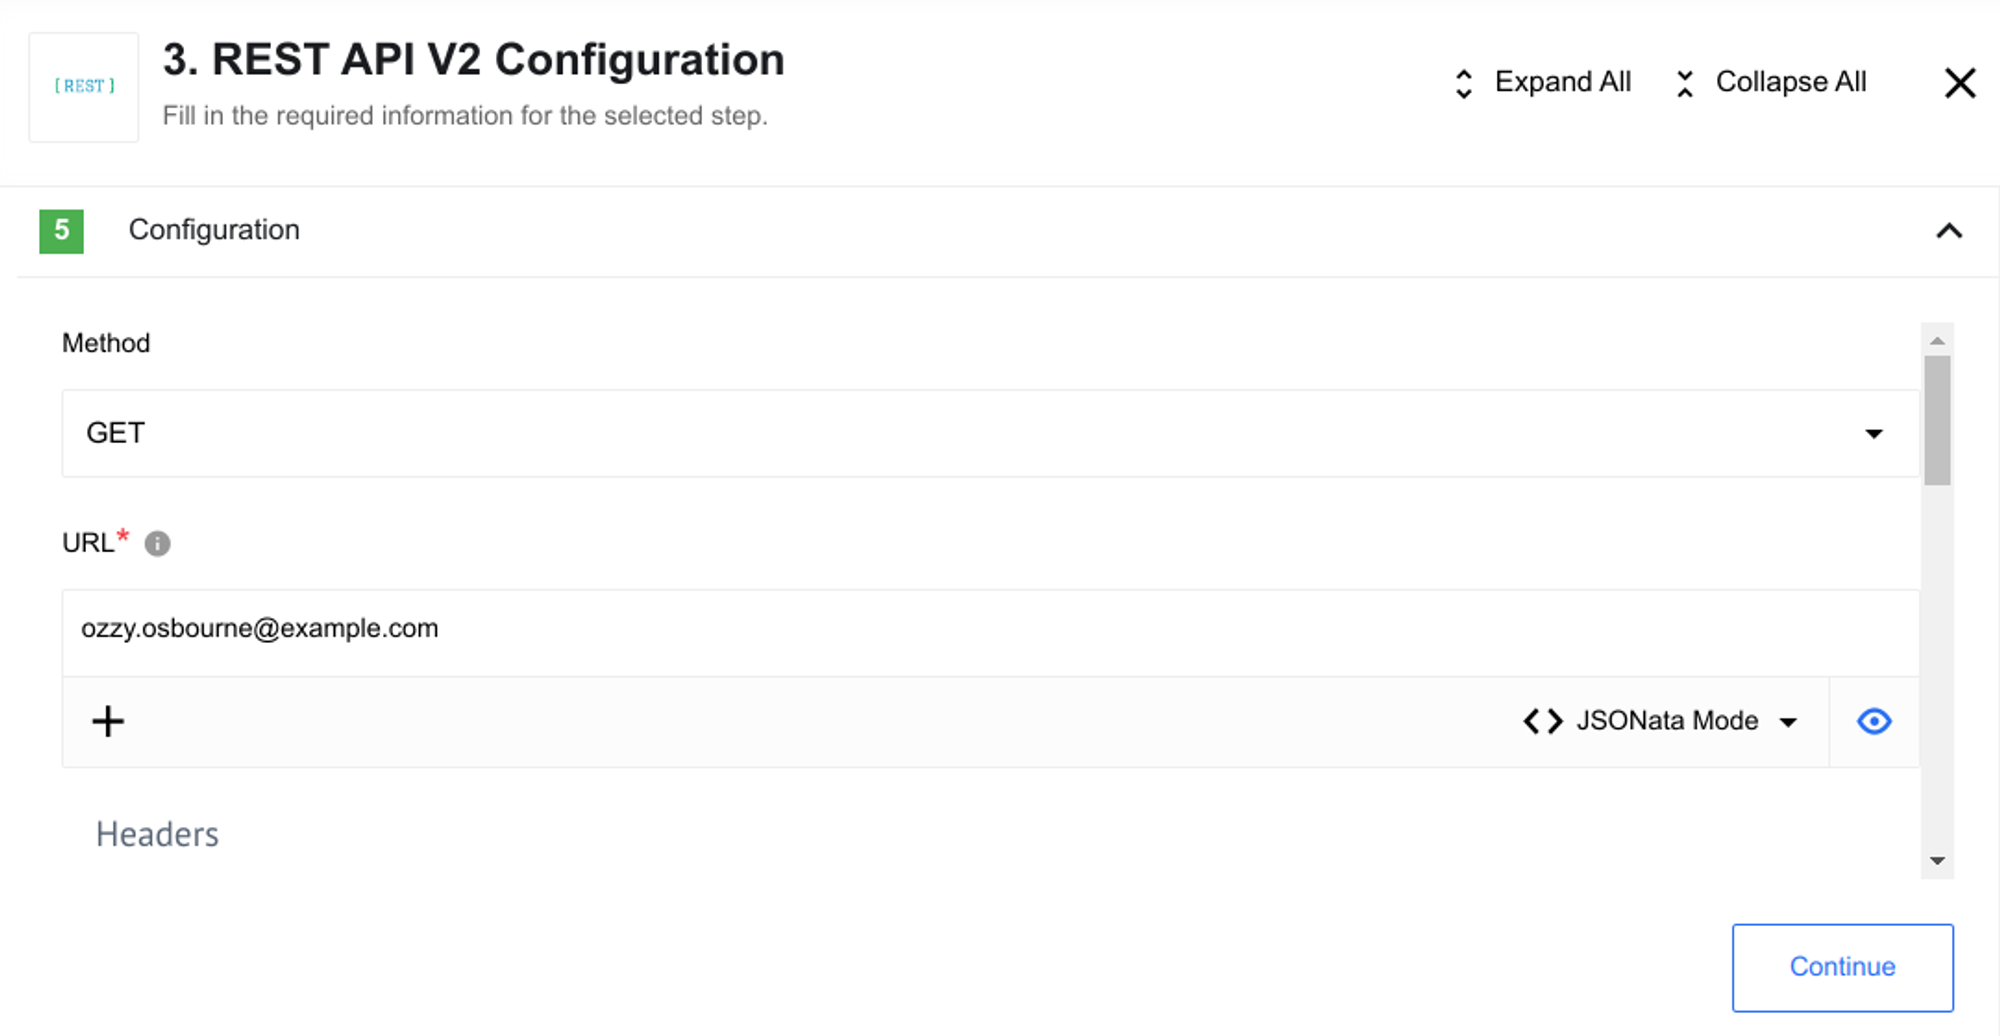
The Splitter component sample can now be used in the URL field.
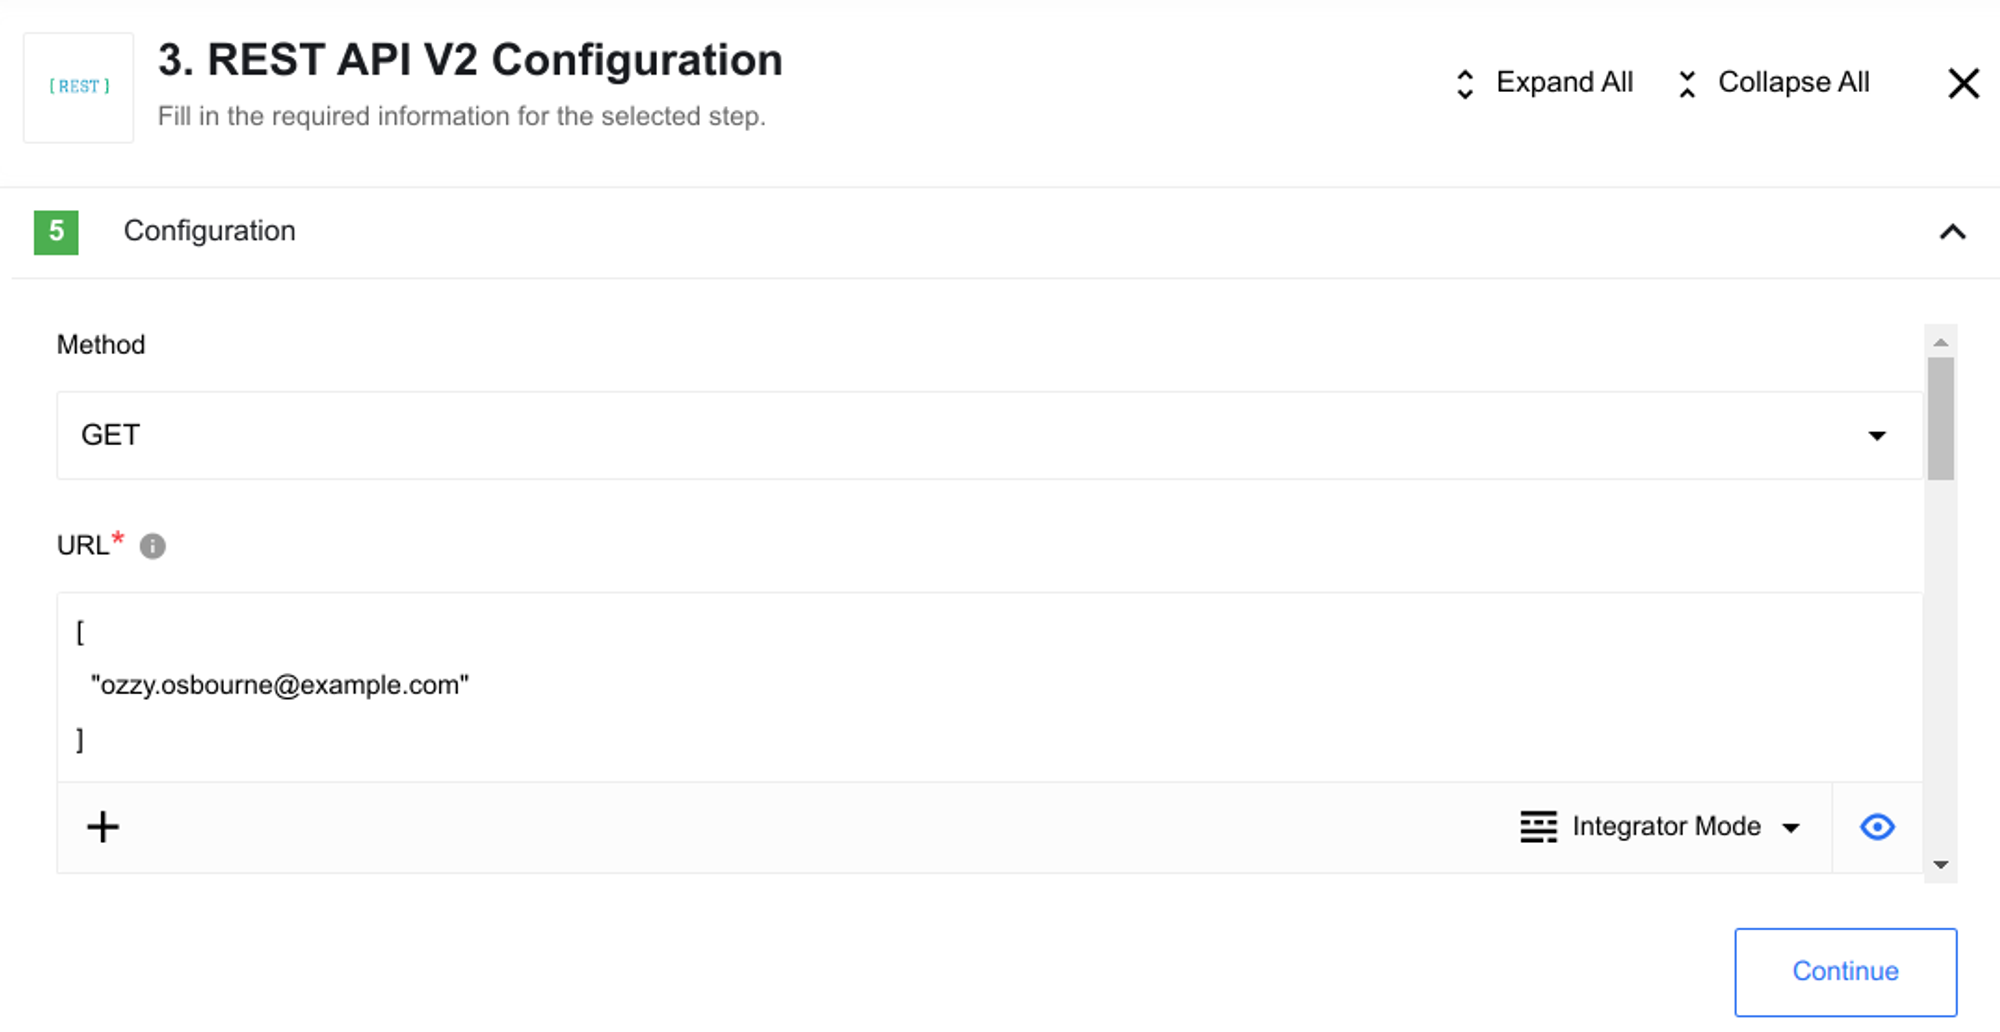
As shown, the value is placed inside the object, which is an array.
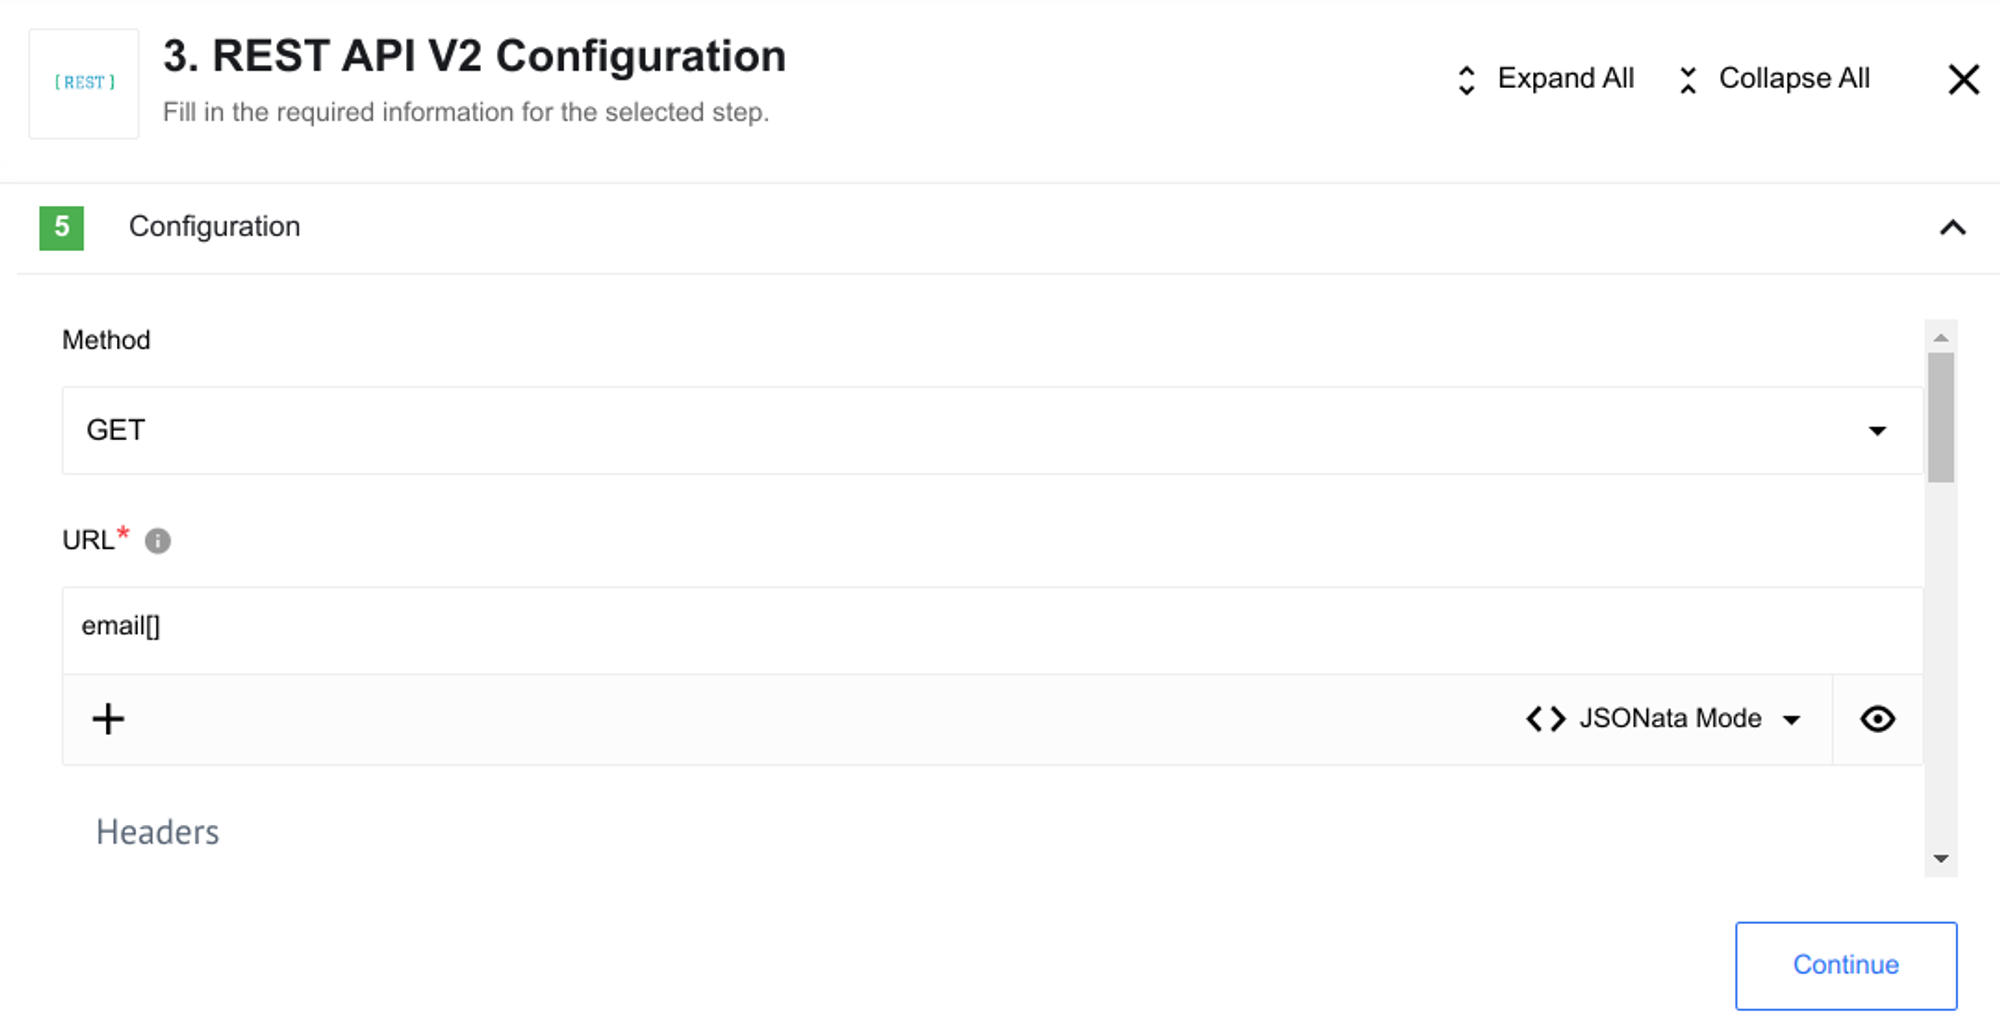
To extract this value, switch to JSONata mode instead of the Integrator mode.
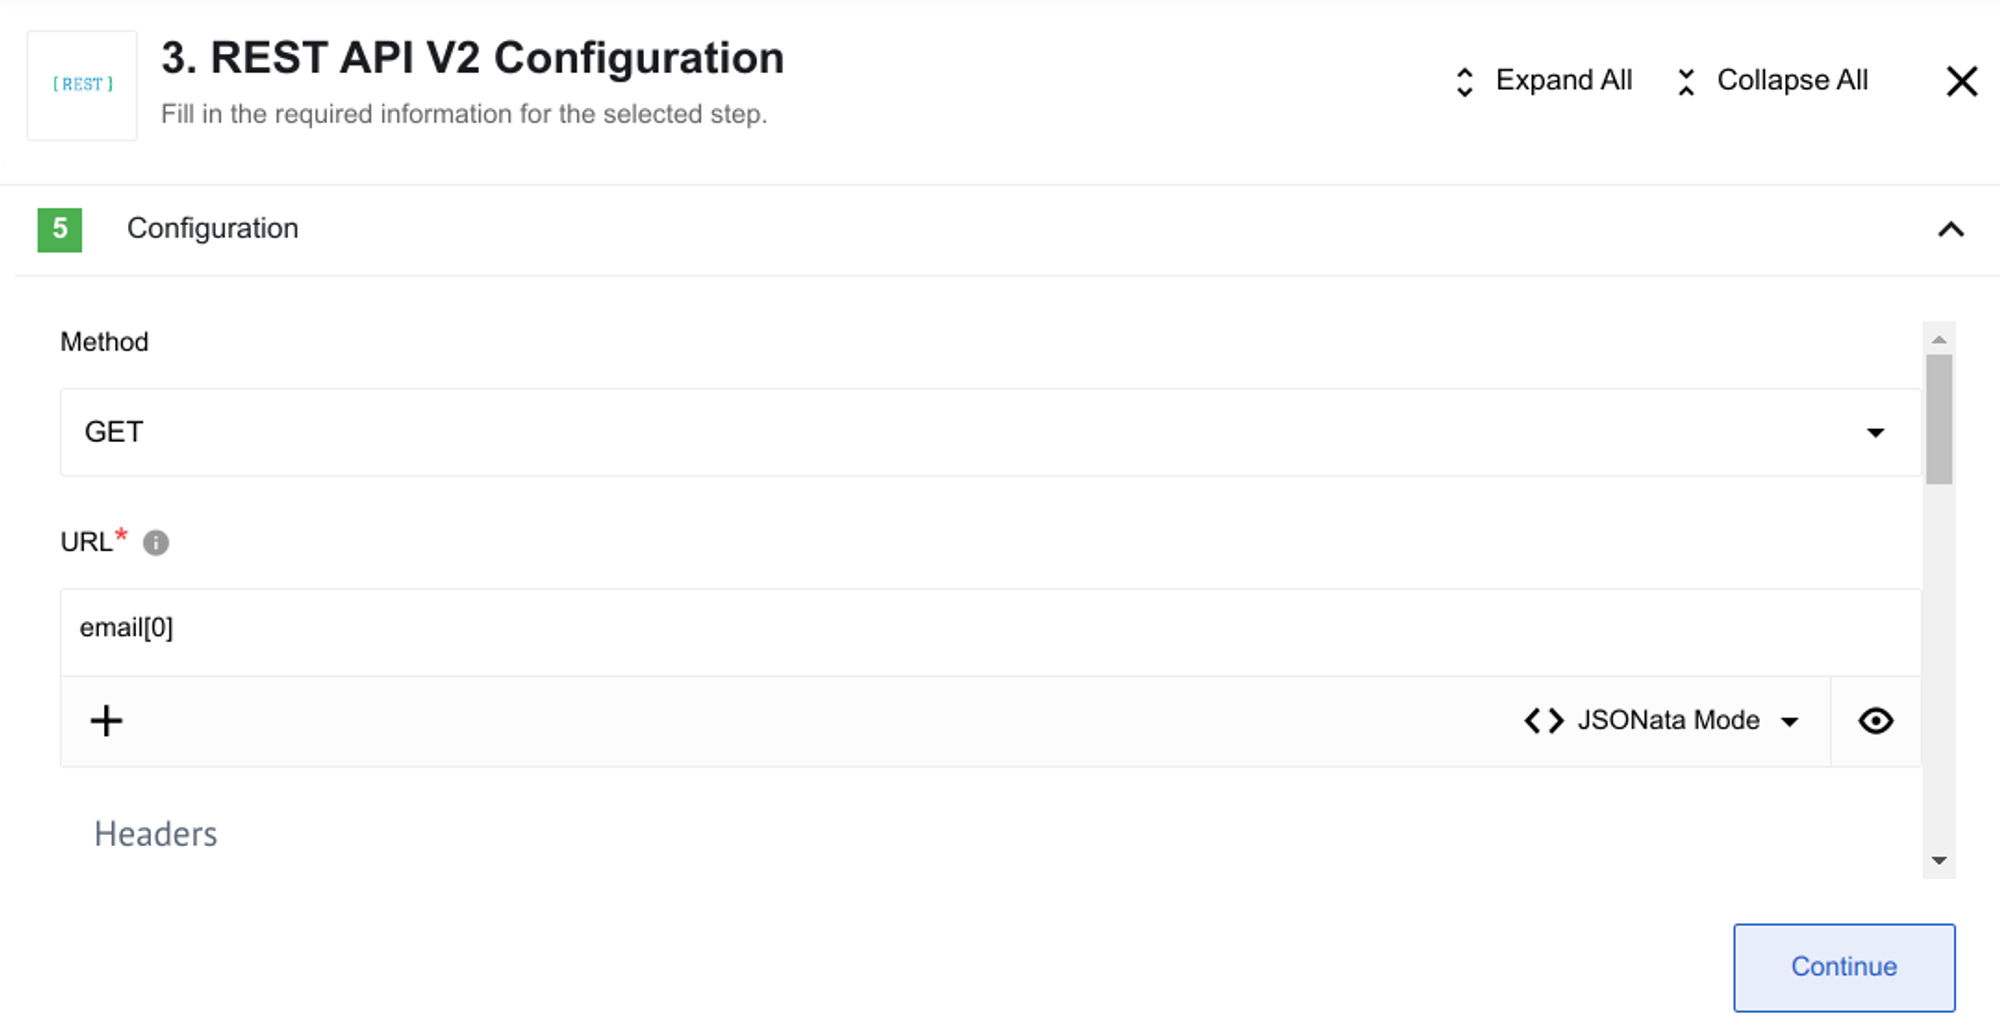
Then, specify zero within [ ] as the first element of the array.
Finally, you will obtain the email value, and each subsequent iteration will provide the next email from the array of objects.
In conclusion, JSON offers a high level of interoperability for data exchange across platforms. However, it does have limitations concerning support for object arrays. It is crucial to be aware of these limitations to set up your flow logic correctly.
